Off the heels of completing Call of Juarez: Bound in Blood I decided it would be time to finally beat one of the longest serving members of my backlog… Call of Juarez: Gunslinger.
Now this game actually was a nice breath of fresh air at the time and I remember it. The release of Call of Juarez: The Cartel, which was well known to be one of the worst games ever made and a recipient of really bad reviews and mockery alike, was a low point for the series and Gunslinger was supposed to take it back to its routes. Unlike Bound in Blood however, I don’t have any history with this game and that’s mainly as I always said I should complete Bound in Blood first.
I have 37 minutes on Steam from the time that I first ever tried to get through my backlog and judging by my achievements I clearly didn’t get very far with the game at the time. I purchased this game on 21 December 2013 and therefore of everything I’ve played so far in this backlog, this is the thing I went the longest without completing (nearly 7 years!)
The theme song for Call of Juarez: Gunslinger
Playthrough:
Session 1: Recollections 1 to 6
Time: 1hr 24m
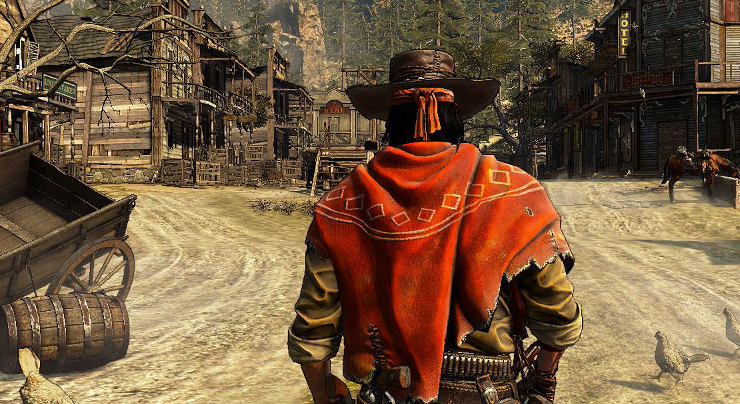
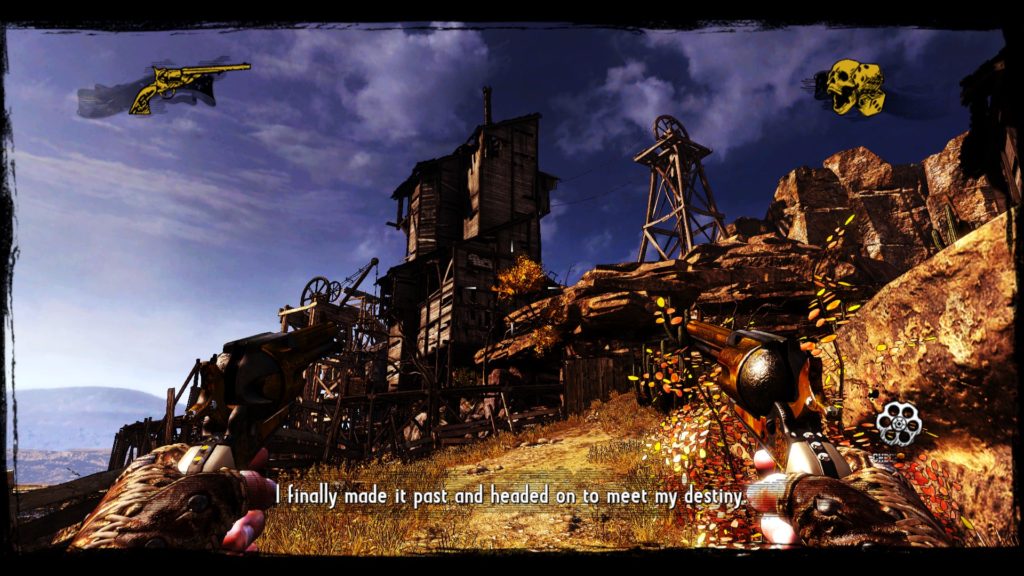
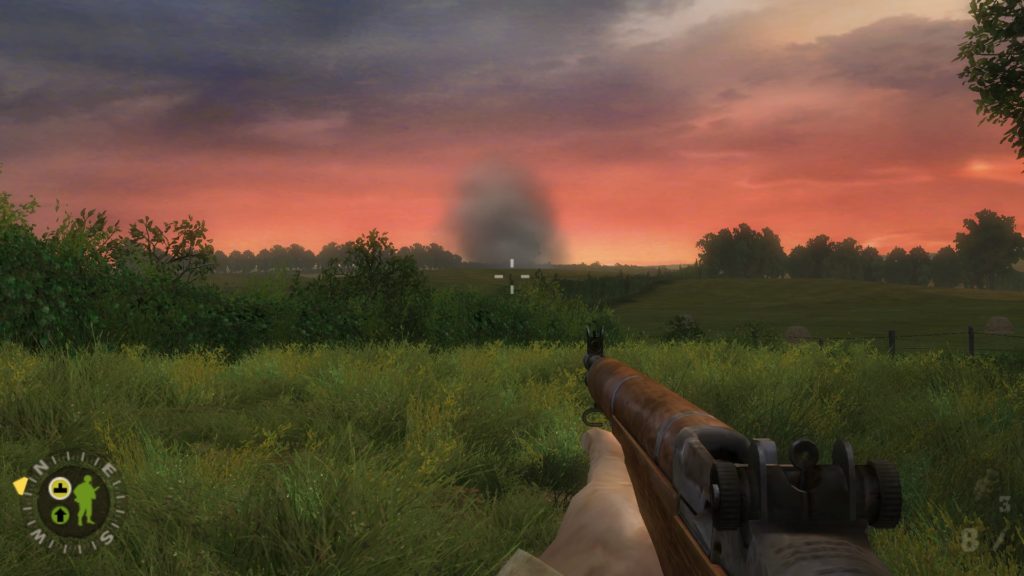
Hot off the tail of the Bound in Blood playthrough I’m here! Honestly this game just has a really epic feel to it right from the start, totally different artstyle, pace of gameplay and just different approach entirely to the previous game. As much as I loved Bound in Blood I honestly think this style really does suit the series a lot better. The story mode itself takes place through a series of recollections, where the main character is telling the story of his encounters with bandits and outlaws of the time.
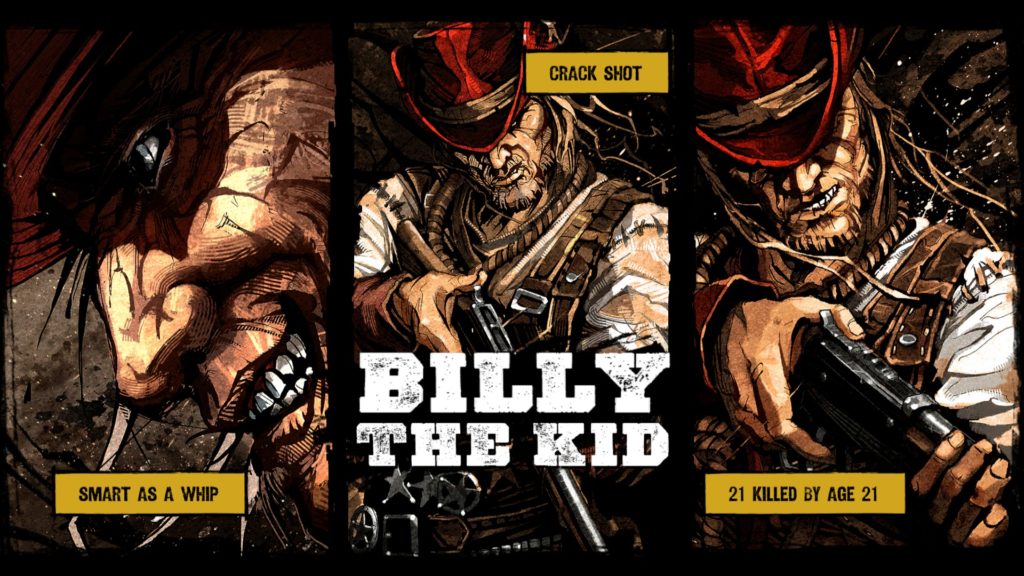
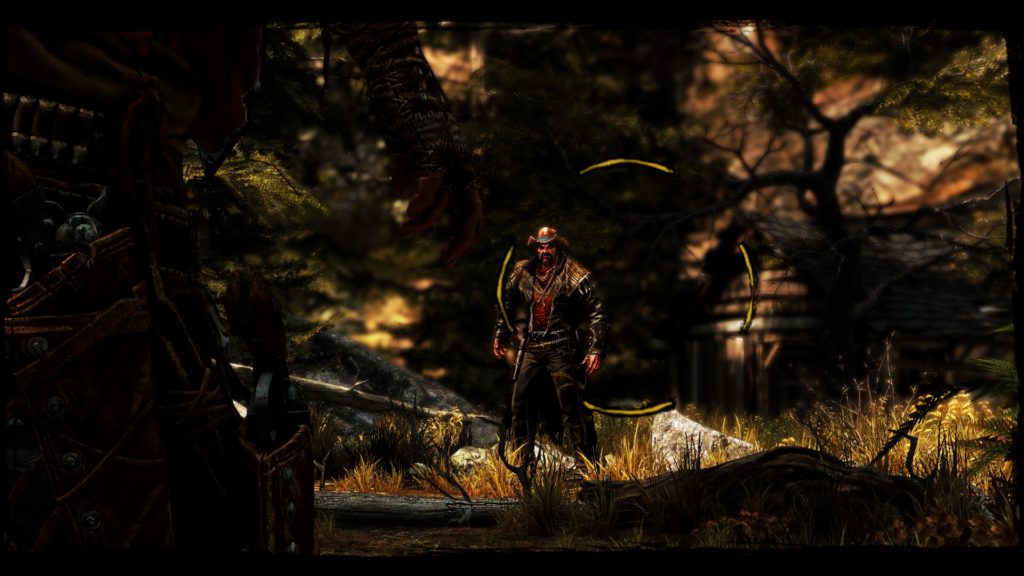
The first recollection focuses on Billy the Kid
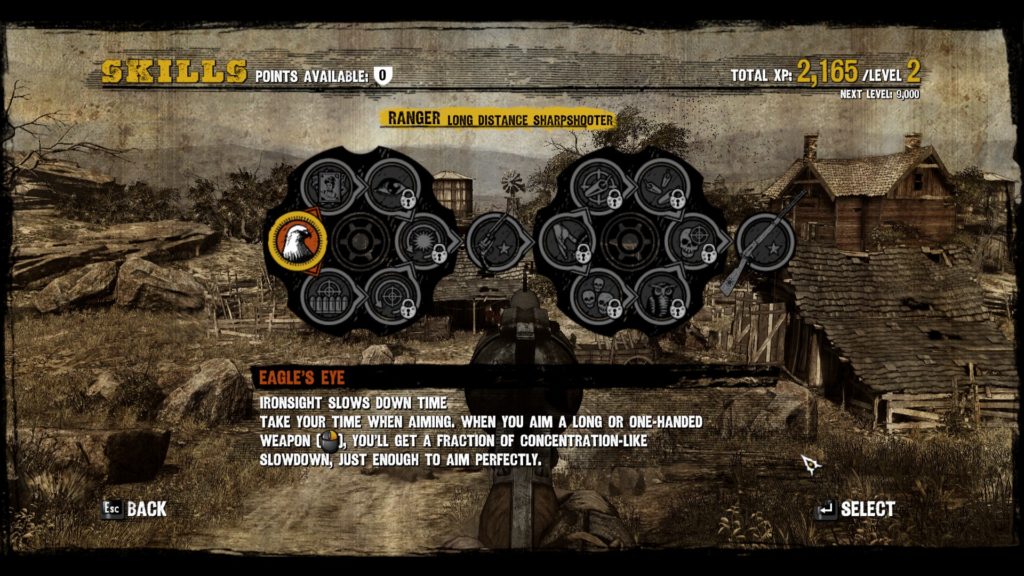
The game has a lot of cool features that add to the character development a lot more than previous games including a perk tree. As you will have maybe seen in the Bound in Blood playthrough, I was much more drawn to the long range character of Thomas, so it’s probably no surprise that I’m going down a similar route here.
The skill tree is a much welcomed addition
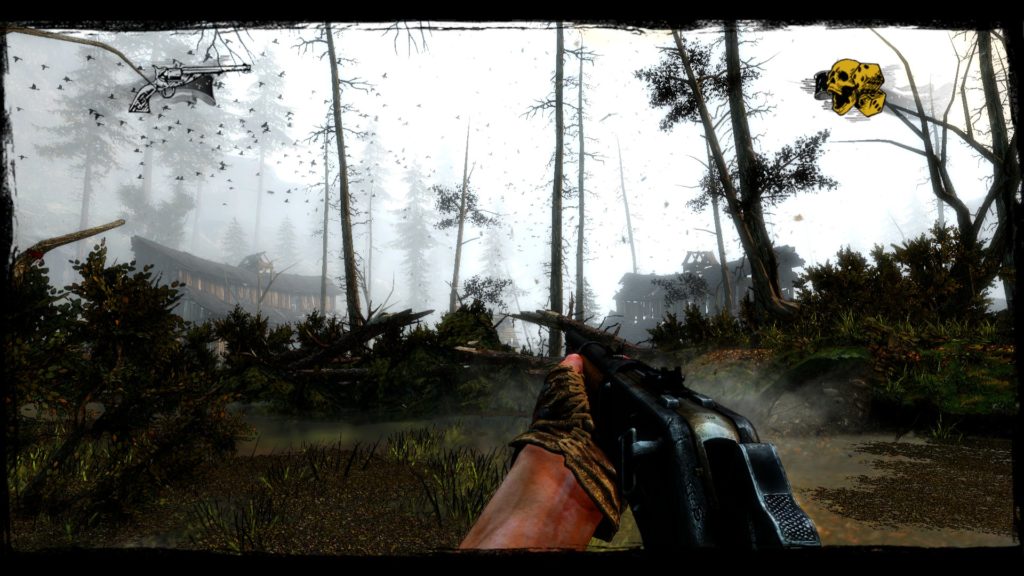
There’s also a mechanic for dodging bullets when you’re low on health, which comes in very handy when you’re getting slightly overwhelmed by the enemy. Overall it just feels way slicker than previous games and I guess that just comes with the new engine and experience of creating the previous entries in the series. The environments are also super varied and that’s noticeable straight away. It makes the missions a lot more enjoyable when it’s not always the same environment in a slightly different configuration each time. Missions in the rain, at night and in woodland as well as mineshafts are all present within the first half of the story mode.
Another element that has continued from previous entries, but also seen significant change, is the dueling system. This time instead of moving left to right you have to ensure you keep focused on the enemy with the mouse and keep your hand close to your gun with the A and D keys. It’s a much slicker way of doing things than in Bound in Blood and makes for some very cool moments.
There’s also a separate dueling mode if you enjoy this!
Session 2: Recollections 7 to 14
Time: 2hr 21m (3hr 45m)
After an incredibly long break, mainly due to work and other commitments I am back! It has been so long since I played this that I kind of had to re-read the previous blog entry to understand where I was at.
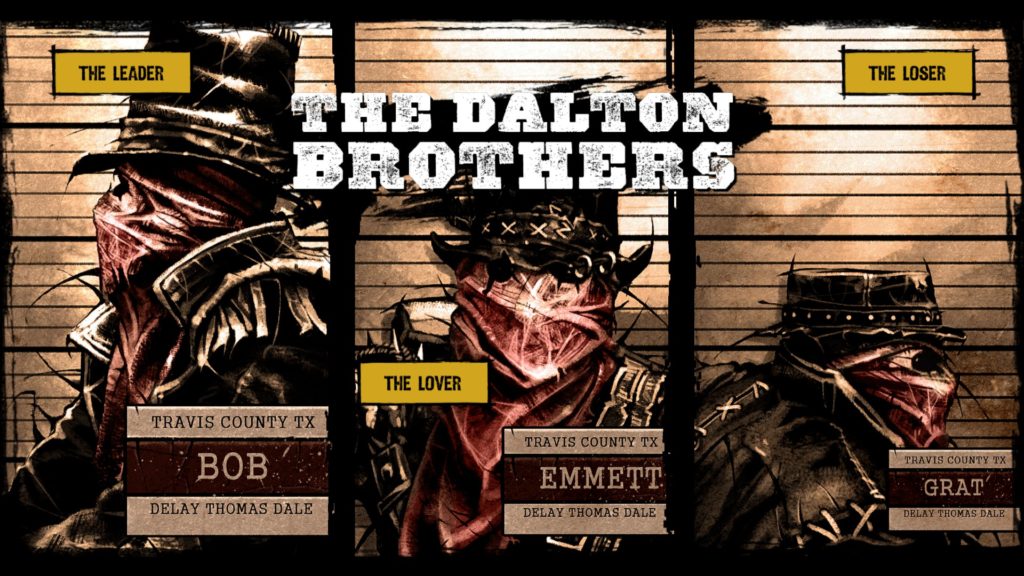
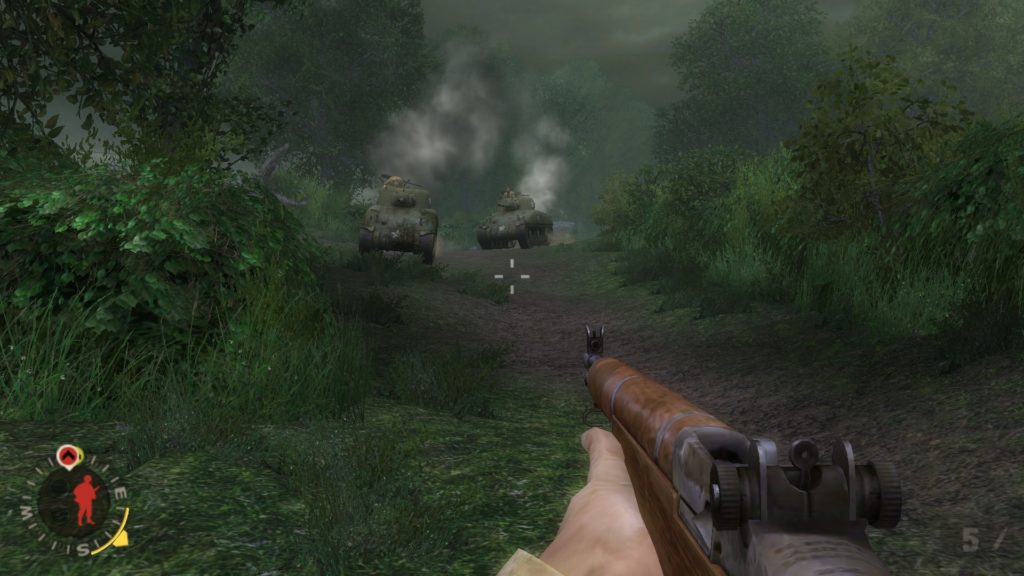
The game didn’t disappoint, chocked full of really quite fast paced and awesome missions including the killing of the Dalton brothers. Again the game has managed to mix up the environments sufficiently that it actually feels very fun to play through and varied whilst allowing the gun play to basically stay the same.
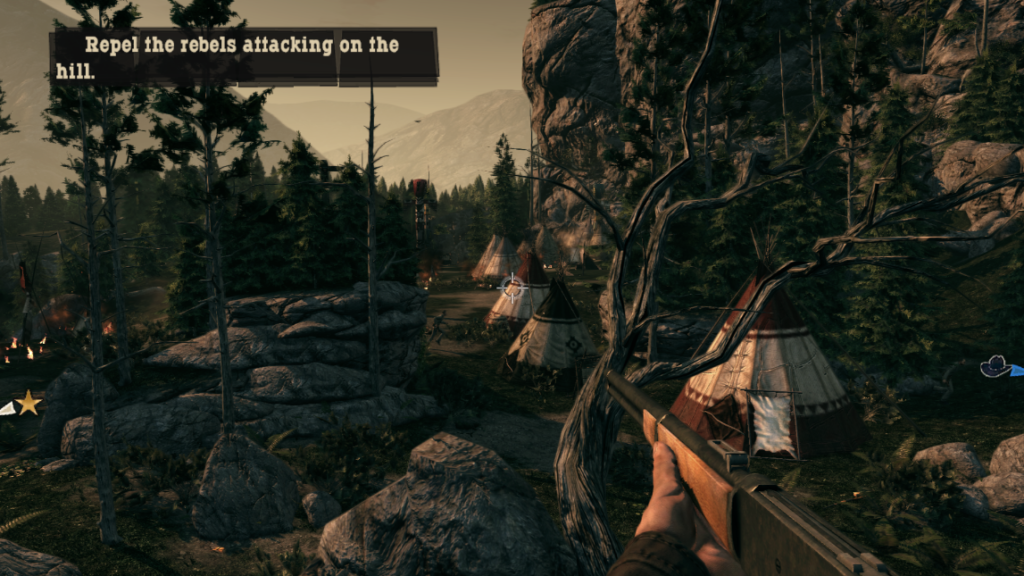
Maps become varied in the game’s second half, including a swamp map
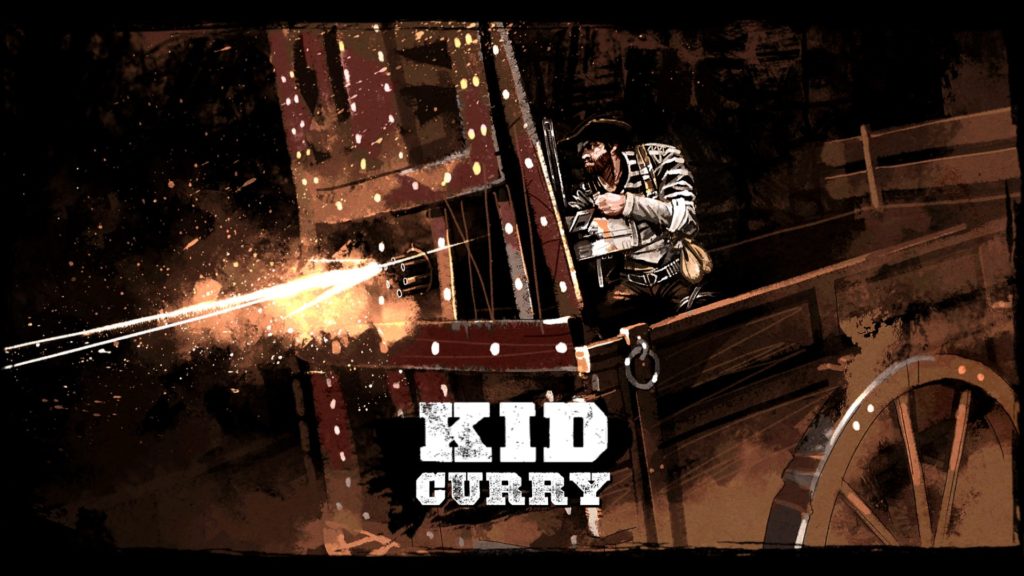
The mixture between boss battles and duels allowed for things to remain interesting, although in all honesty there is kind of a similar vein. The boss battles near the end basically involve finding some cover and chucking dynamite until the enemy gives up. This happened for Kid Curry and his gatling gun, but also later against a sniper.
The Kid Curry boss battle is one of many near the game’s conclusion
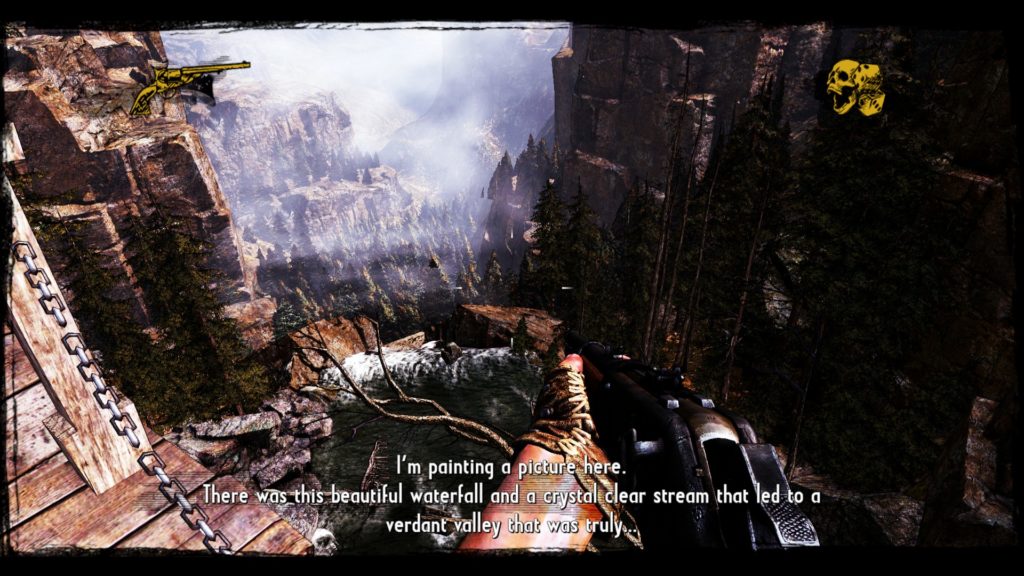
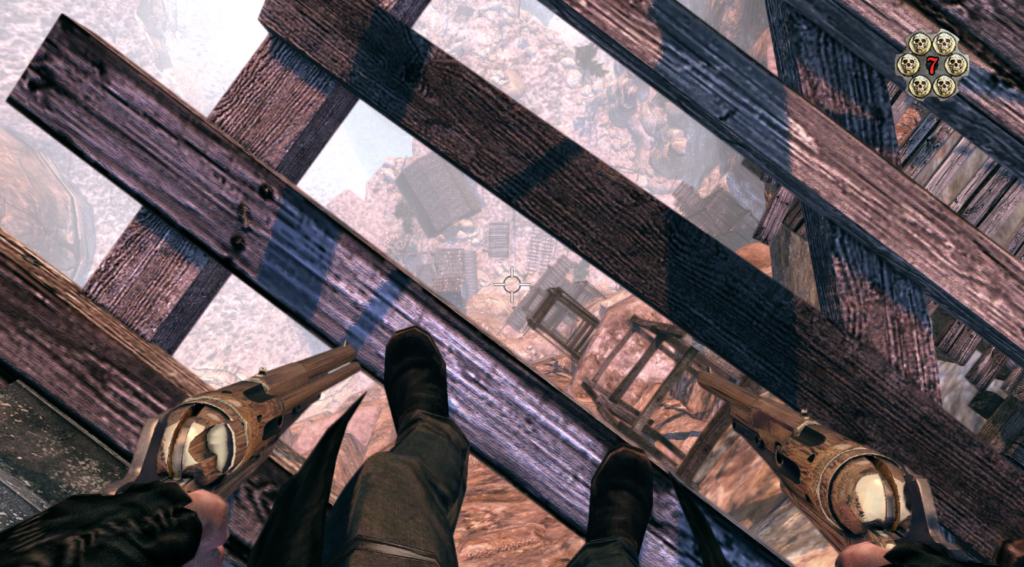
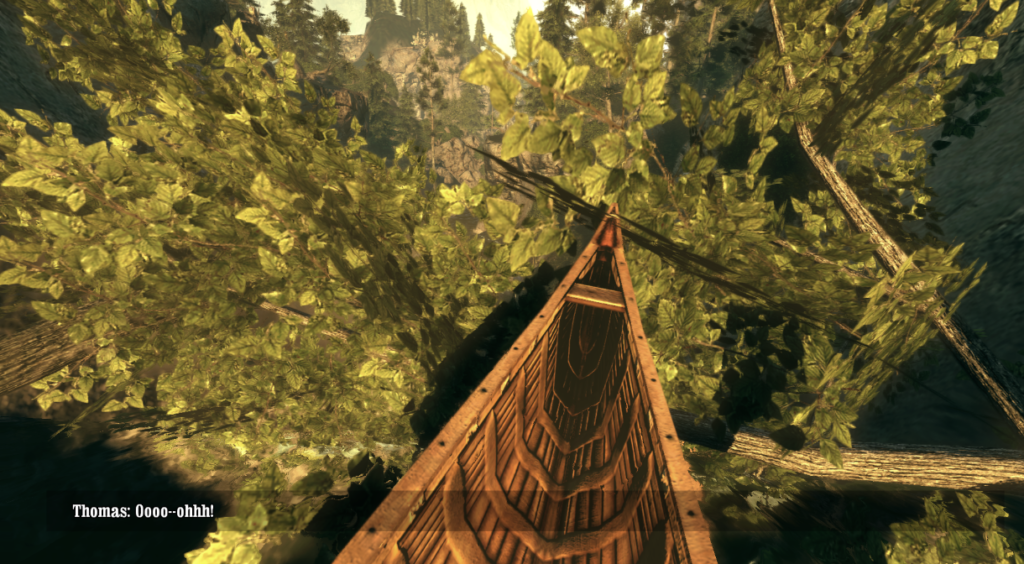
There’s a secondary undercurrent to the story too. A Native American chief is providing the main character with a sort of foreshadowing tale that he will eventually return to the place where one of the game’s largest battles took place. Low and behold you do return and it is exactly as foretold. One of the quirky things the game does is change the environment based on the way that the main character is telling the story. For instance in a mission where you are trying to prevent a bridge from exploding, the character will say things like “and then a ladder that had escaped my vision appeared” and then in the game word a ladder will come from the sky and forge its way into the map. Kind of a cool feature from a story telling perspective, but also something that helps with pacing.
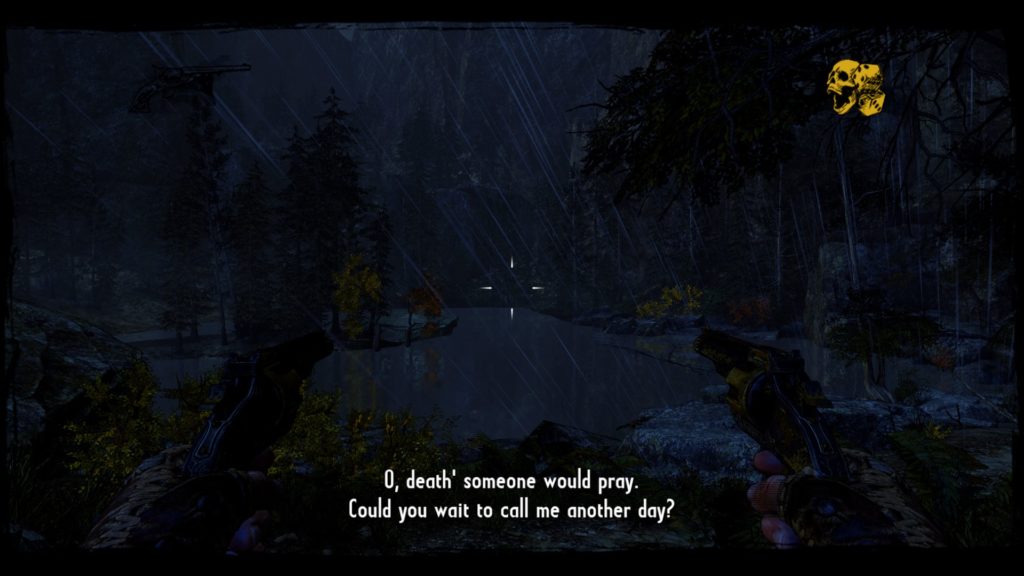
A beautiful song sung at a beautiful rainy lake. A strange turn for the game’s fast paced story.
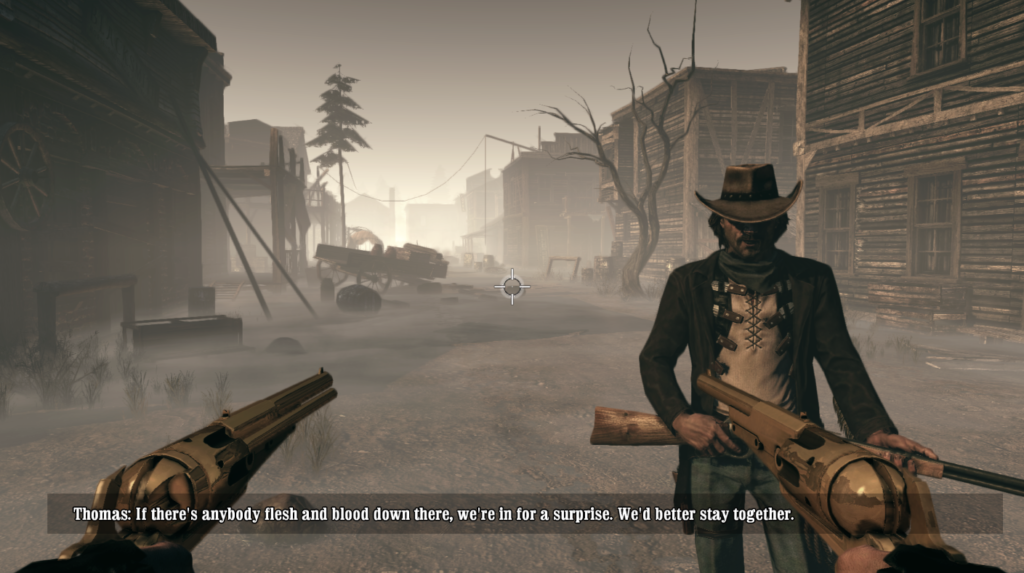
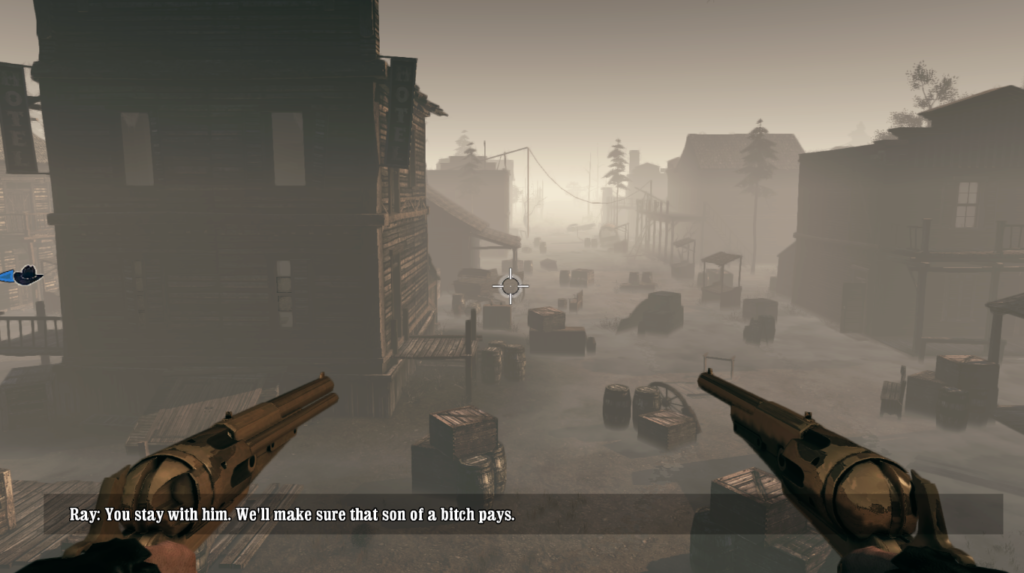
The game’s conclusion is… strange. I mean it seems to draw from the similarly cool way in which Bound in Blood brought its storyline to a conclusion… A ghost town! In this instance though, the ghost town isn’t just a nice graphical overtone but you are actually fighting ghosts. Yeah, actual ghosts.
The game goes about this by recalling all of the people you’ve fought throughout the game and you fight multiple ghostly embodiments of each main character. Honestly on hard mode this was actually quite a challenge, mainly as it was quite hard to tell where enemies were going to come from. The aesthetic and the actual combat was incredibly cool though and a much more enjoyable way to being the game to its conclusion than in previous entries to the series.
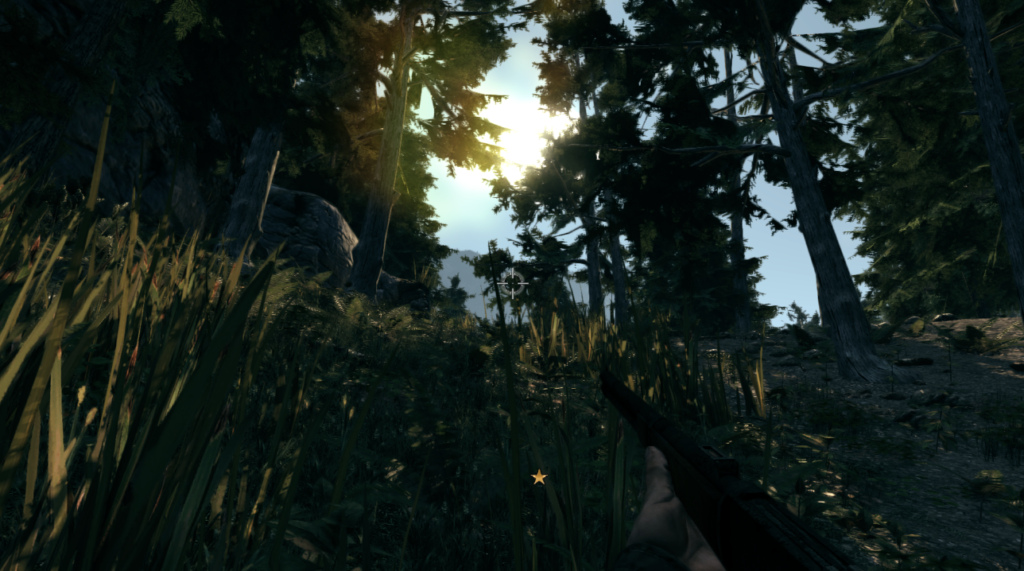
The spooky woods in the lead up to the spooky ghost town
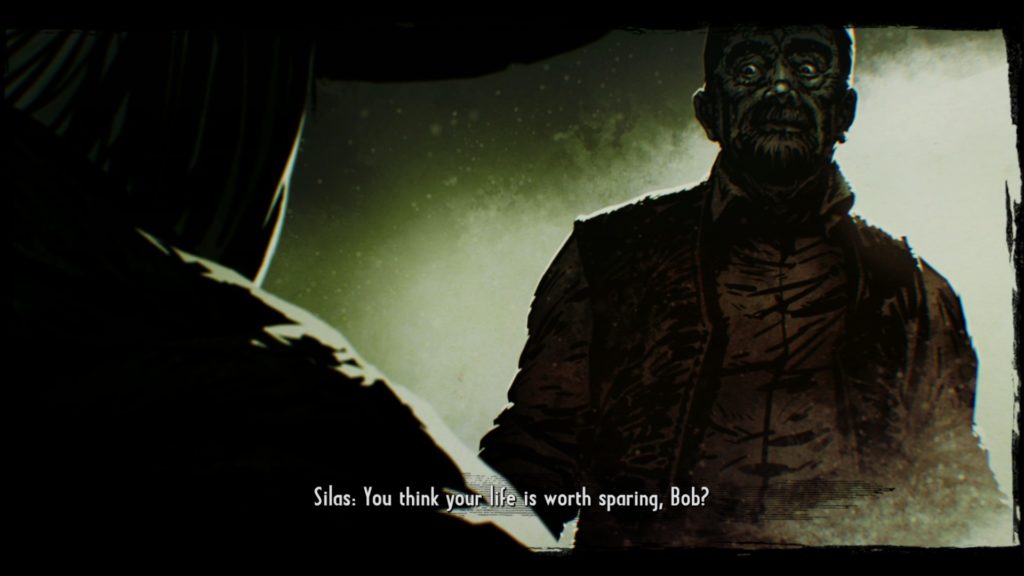
The game finishes with a choice. You confront the bartender “Ben” who is actually “Bob” who you have been hunting this whole time and over all these years. You can either seek redemption or revenge for him trying to kill you. Of course I went for redemption seeing as we had been sitting drinking with this gentleman recalling tales for the best part of three hours of my life and he clearly appears to have led a better path. The game ends through the cartoony
But yes, that’s all folks. It was a very short campaign and honestly I had expected that after the last session where we got almost half way through the story within just clear of an hour. But honestly this has been a great experience and something that was so much more refined than Bound in Blood. The game knew what it was trying to be and did that well.
Game completed in 3hrs and 45m. Please find my entry on HowLongToBeat HERE
Review:
Score 9/10
Call of Juarez Gunslinger takes the series on a different route from the previous entries. It’s much more fast paced and the art style is much more like an old western dime novel. The gunplay is incredibly fun and the pace of the game is very enjoyable with you gaining more XP for netting headshots, running shots, long shots and combos.
The story is told by Silus, the main character, and everything kind of unfolds around you making it seem much less linear. As part of this you unlock new skills through a skill tree and choose whether you want to focus on being a dual wielder, long range rifleman or a super close range shotgunner.
The main story however is super short, with it honestly taking most people between 2 and 4 hours. There are however other modes, an arcade mode and a dueling mode. So there should be lots of things to keep you occupied. This game is usually cheap, so well worth picking up in my eyes.
So my relationship with Men of War actually spans a long way back. When I was younger I used to try and run the original Men of War game off of an old Acer computer we had in our house and it used to struggle. I then made some really rubbish levels in GEM editor and tried (and failed) to get the skirmish campaign mods working. I even made a mod for Assault Squad called “Liberté” which was actually reasonably well received, but I have since taken it down as I didn’t have time to fix people’s concerns.
I decided not to start with the original Men of War though but to give Red Tide a go as I purchased this and then have literally never touched it again. This particular game is about Soviet sailors and the role that they played and I have seen through the GEM editor that this actually contains some pretty cool units. There is also only one currently recorded completion for this game (at time of writing) and that was about 60-something hours, so I’m interested to see if I can beat that.
I purchased this game on 28 August 2014 (which was my birthday!) and so I have managed to not even start this game for almost six years of ownership. It’s going to be a good feeling to tick this one off.
The intro sequence from Men of War: Red Tide
Playthrough:
Session 1: Odessa Must Be Ours – Baptism of Fire
Time: 2hr 7m
This was an incredibly long session, not helped by the fact I actually failed the mission after trying to advance for 40 minutes. I think one thing that I was not anticipating with Red Tide was that it uses the old camera system and you don’t get reinforcements in the same way as you do in the newer Assault Squad games.
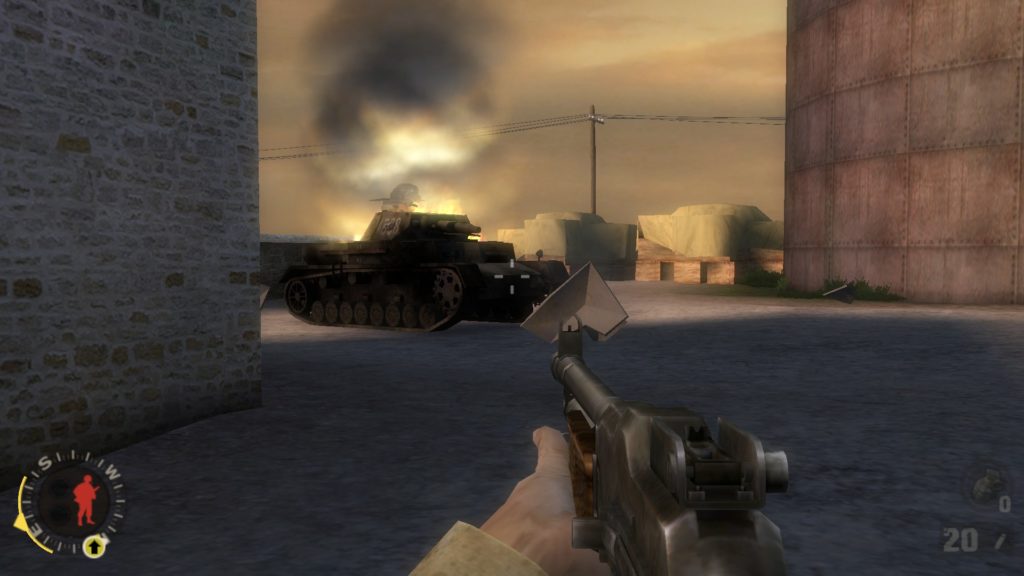
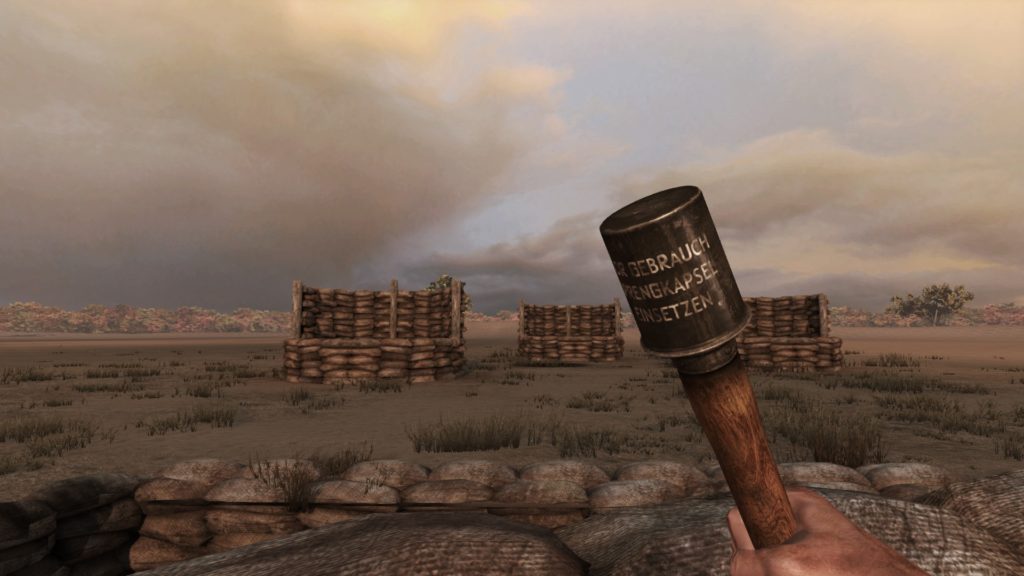
Interesting to see Romanian units in the first missions, as this was not something I’ve encountered in any other WW2 game and have only seen in Men of War through mods before. The Romanian soldiers are so much better equipped that the players units as the Soviet soldiers seem to spawn with little to no ammo and basically no AT grenades… so scavenging dead soldiers inventories became a must (and was a reason I took so long to beat this).
Session 2: Odessa Must Be Ours – Thunderstrike
Time: 1hr 22m (3hr 29m)
So one thing that is already alarmingly clear is that the difficulties that I’m having with navigating the camera controls are going to really require me to change things up. I need to re-bind things at some stage so that I feel more comfortable with the controls. Potentially even WASD or something.
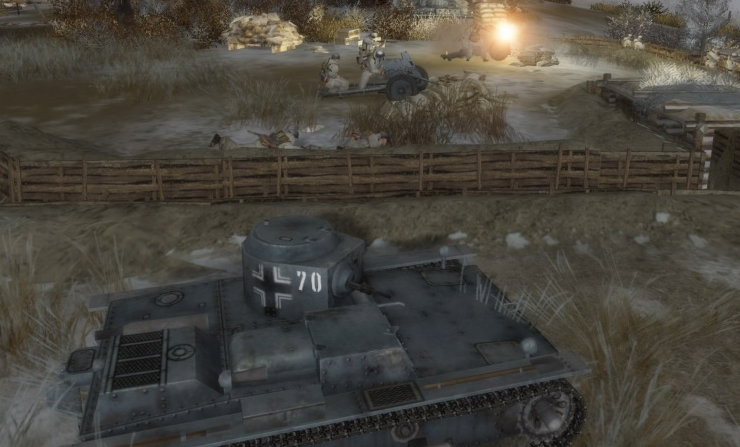
Anyway this mission was tough as nails, so I’ve decided to change to the ‘Easy’ difficulty as I do also want to have fun playing this game and not just constantly fail time and time again. Managed to get through this mission thanks to an incredibly brave BA-10 which fought diligently killing basically all of the enemy infantry that we faced.
Seized from the Romanian soldiers and by far the hardest fighting unit in this mission.
Coming from an Assault Squad background means I’m having to realise something about early MoW games… you have to use Direct Control way more to ensure that things don’t just get killed. This applies to infantry units too, the AI just cannot be trusted not to screw it up.
Session 3: Odessa Must Be Ours – Never Again!
Time: 1hr 22m (4hr 52m)
Now the change in difficulty is definitely allowing me to have way more fun with this game. Like I can feel that it’s probably too easy at this stage, but I’m enjoying it and to me that means a lot more. I must say there were a couple of things that helped in this session that weren’t just the change in difficulty.
Firstly, the map itself was actually way more interesting. A mixture of urban, woodland and shoreline combat. There were more interesting vehicles on this map and honestly it was just much less “kill all the things” than the previous mission. Secondly, I started listening to a playlist on Deezer in the background whilst playing, which was recommended to me by a friend and honestly that helped a lot. Takes a lot of the mind numbing sounds of the guns being fired away and helps time pass.
Having to load troops up and engage in river crossings was fun!
The charge at the end of this mission was also epic! A great way to round off the “Odessa Must Be Ours” campaign! Now I guess it’s onto what comes next, which I guess won’t be against such soft Romanian AIs.
Session 4: The Crimean Offensive – A Handful of Bullets and Theodosia (The Opening)
Time: 1hr 18m (6hr 11m)
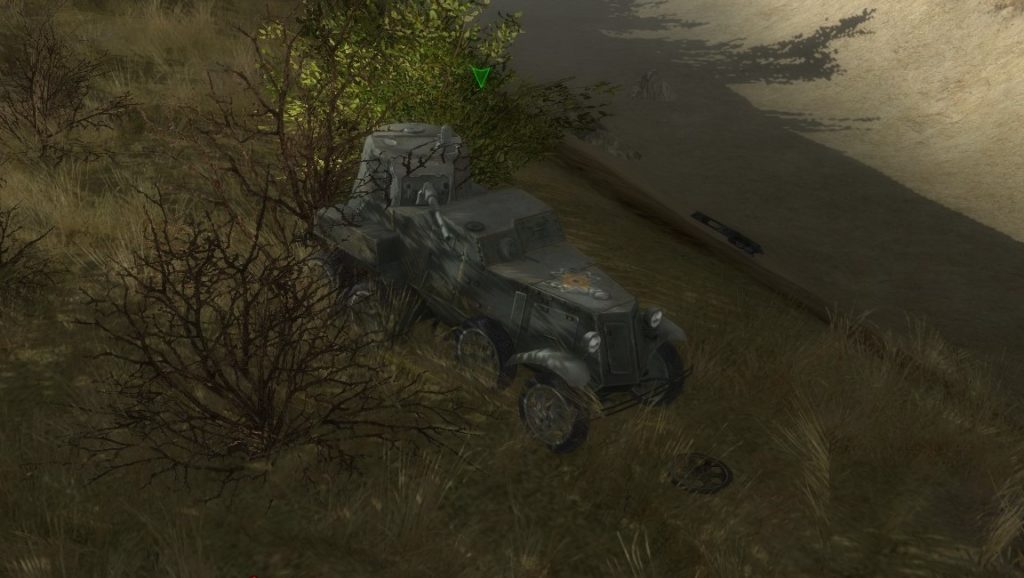
So I actually managed to complete two missions this time! Mainly helped by the fact that mission one was a very short defence mission (although still very fun). I actually failed it the first time as the medical truck was destroyed by a shot fired about 1 second before my BA-7 destroyed the Stug causing the issues. Alas, I filled my flanks with more men, used a bit more direct control and it went much better.
Real “The enemy is advancing!!” vibes from the Battlefield series.
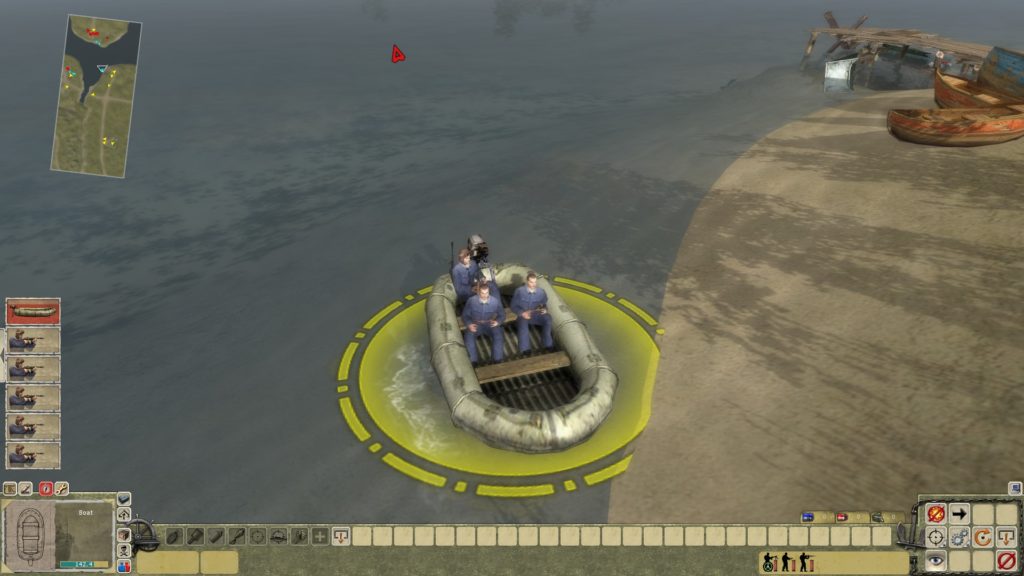
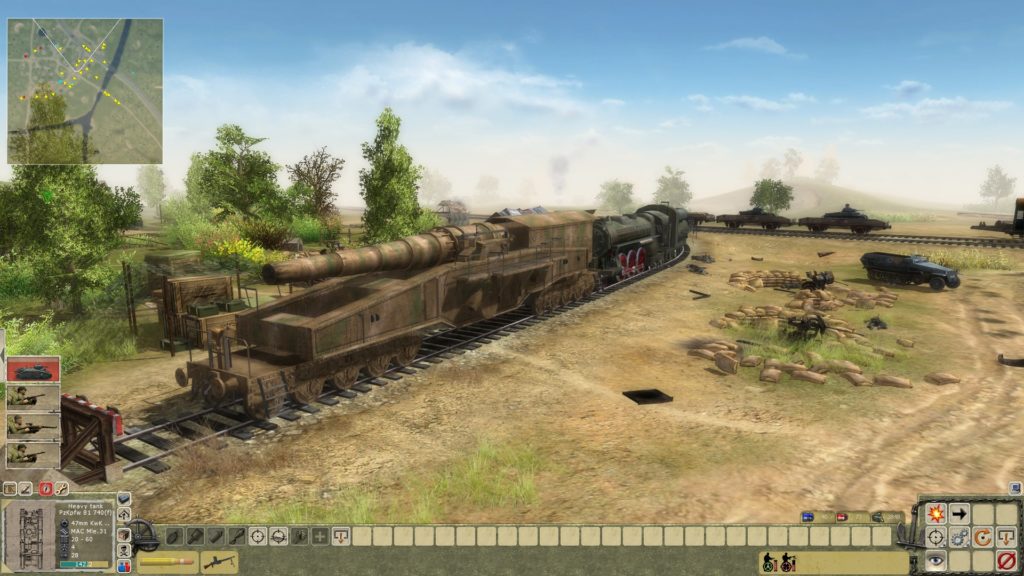
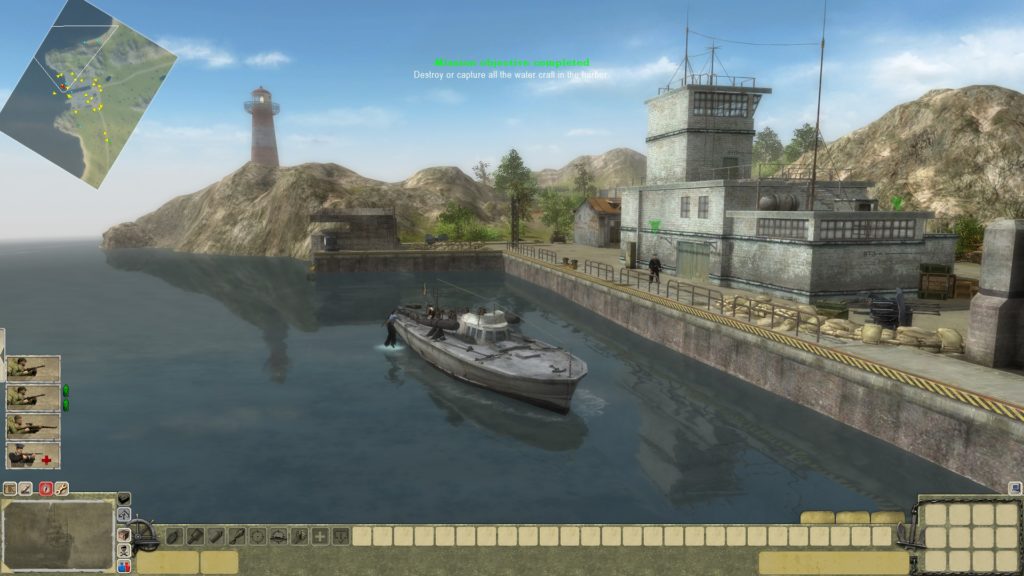
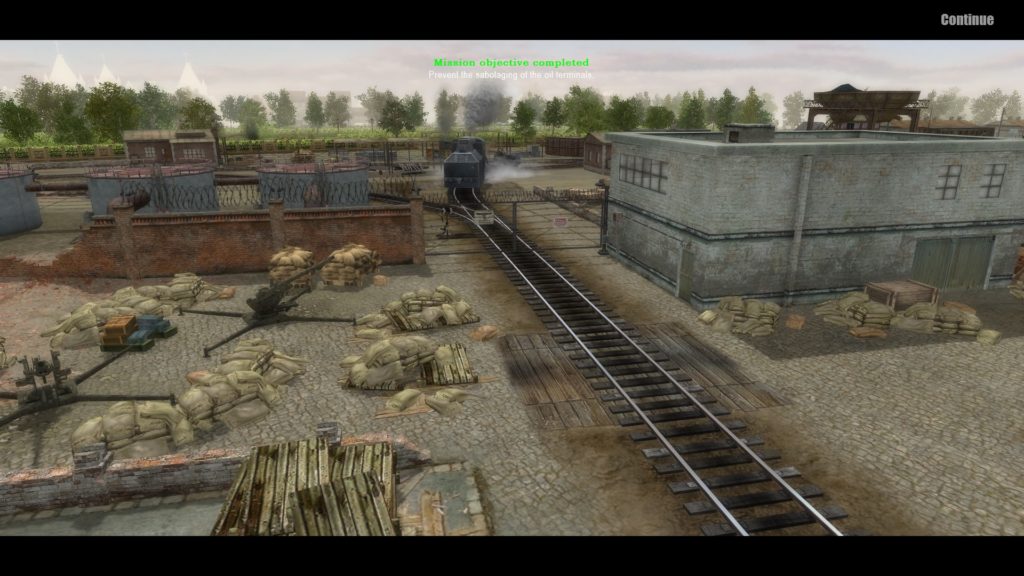
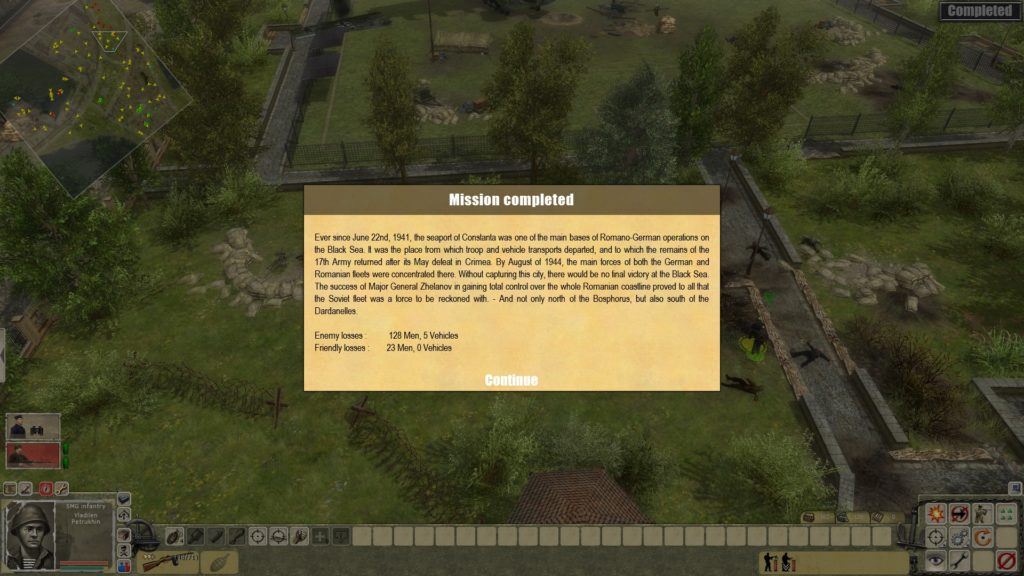
The second mission was actually amazing. It was a port invasion where you had to clear the piers of enemies, using a range of troops including snipers. Then clear the rest of the port from enemies whilst the Soviet ships were raining hell on the enemy. Just a really cool use to friendly AI and building up from 1v1 combat to a much wider scale defence and a final offensive. Probably my favourite mission so far. I thought I’d leave my stats below this time as I was happy with managing to lose only 10% of the enemy losses. None of the vehicle losses were mine and about 8 men were mine. Really fun mission all around.
Stats for the first mission in Theodosia.
Session 5: The Crimean Offensive – Theodosia (Endgame)
Time: 1hr 33m (7hr 45m)
Welp, this session didn’t have the best of starts… it crashed about 25 minutes in, which I predict was something to do with me calling in artillery as it happened almost immediately after an explosion.
I also ended up taking forever on this mission mainly due to my men getting stuck at sea and having to micromanage them. A brilliant albeit slow advance along the flanks to allow my two army groups to link up was foiled by the enemy artillery position, which proved very challenging to take in the end and is certainly something to try and kill off early if you can. Fun mission though, although I wish this campaign would be over soon! I only say that because these port missions are super fun but they’re beginning to make me want to attack / defend somewhere else. The enemy AI flocks to buildings, which usually means flattening them with artillery here.
Session 6: The Crimean Offensive – The Key to Kerch
Time: 1hr 31m (9hr 17m)
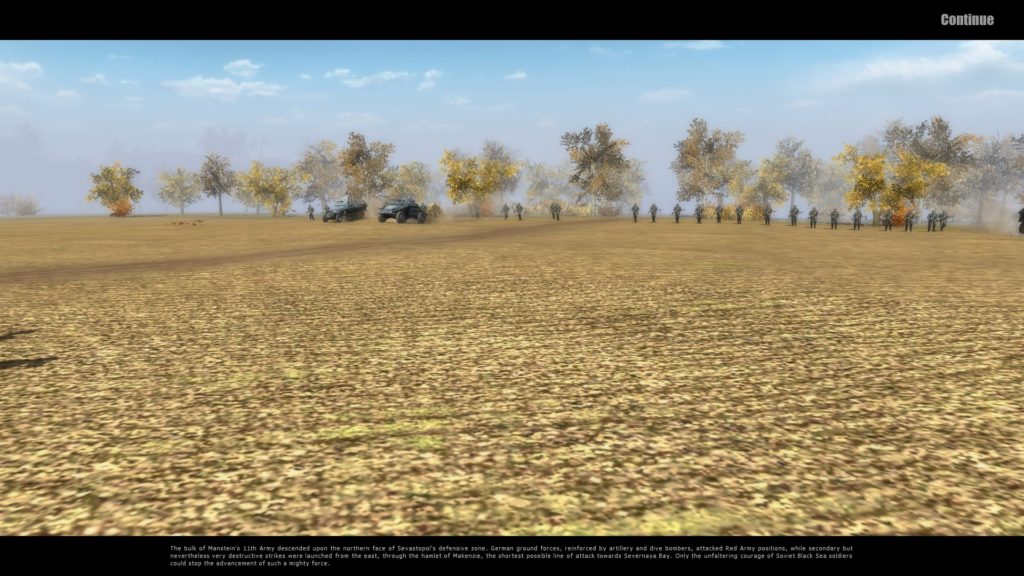
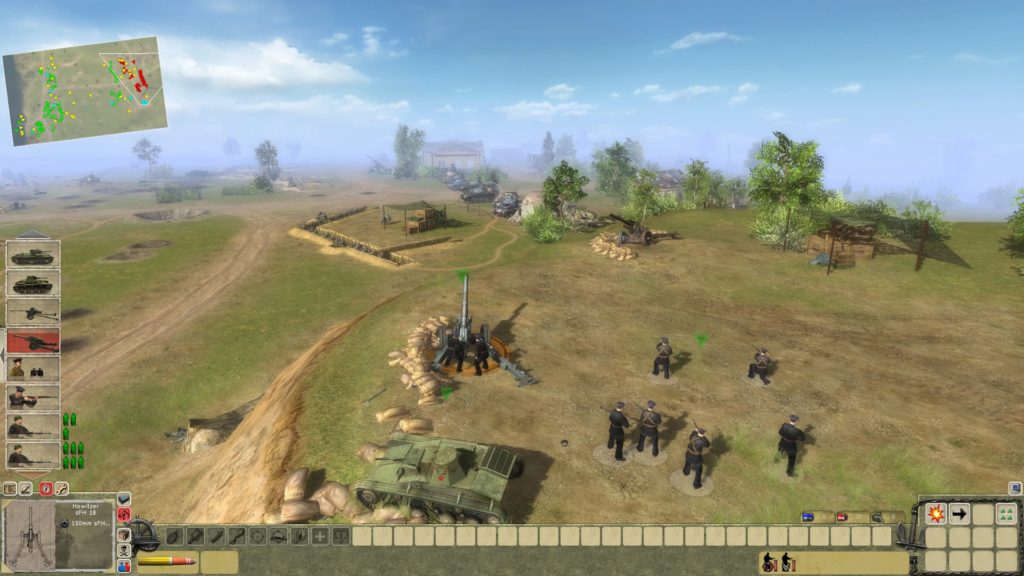
My hopes and dreams that this was the last mission in The Crimean Offensive campaign were short lived as at the end of this session I have seen that there is indeed another mission. This one however was a total change of pace, focusing on open fields and a small village, although it was quite frustrating that the classic Men of War tactics were used by the developers by just giving the enemy lots of artillery.
One story that was absolutely epic from this session was my single AT trooper who managed to disable 2 MG towers, two infantry guns and indeed a howitzer all single-handedly whilst most teammates around simply died to a tank that was unable to move due to failed attempts at throwing AT grenades. This is one of the things I really love about this game though, that you can just have this mini stories within the missions that you create yourself. Each inch of territory gained comes at some kind of cost and it makes it gut wrenching when you lose an infantryman or a vehicle that has helped to seize a flank or strategic position.
Session 7: The Crimean Offensive – Special Unit Paratroopers
Time: 42m (9hr 59m)
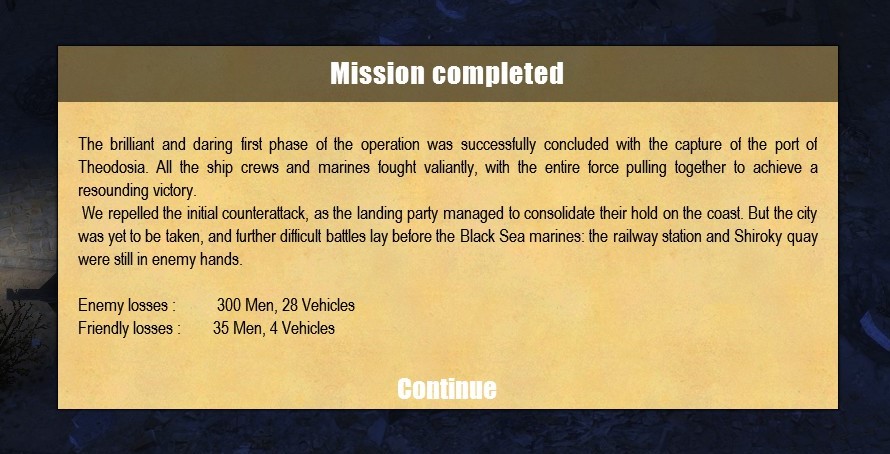
Thought that I’d get another quick mission done and this was almost that. I must admit this mission couldn’t start off any worse if it tried. You basically get told that the plane has crashed and that you need to get to shore. One bullet against the boat will cause it to explode so that you have to swim to shore.
Spending 5 minutes watching my men swim was not how I intended this to go.
I got some resistance fighters here though and used them in order to Direct Control and attack both of the flanks, which was actually incredibly fun. Seizing a German AA gun in order to destroy a number of tanks and gun installations is always a Men of War classic feeling. I did have a fail half way through this one as it did the stupid thing where one particular person is not allowed to die and he did. So I sent him to hide in a corner of the village where there were no friendly or enemy AI for the entire mission.
This campaign still isn’t over, but I cheated and looked in Localisation.pak which shows me that campaigns 2 and 3 have 6 missions and so the next mission is actually the last one in the campaign. So we’re 8 missions down, 14 to go!
Session 8: The Crimean Offensive – The Fall of the 42nd Corps and Manstein’s Big Guns – Behind Enemy Lines
Time: 2hr 9m (12hr 8m)
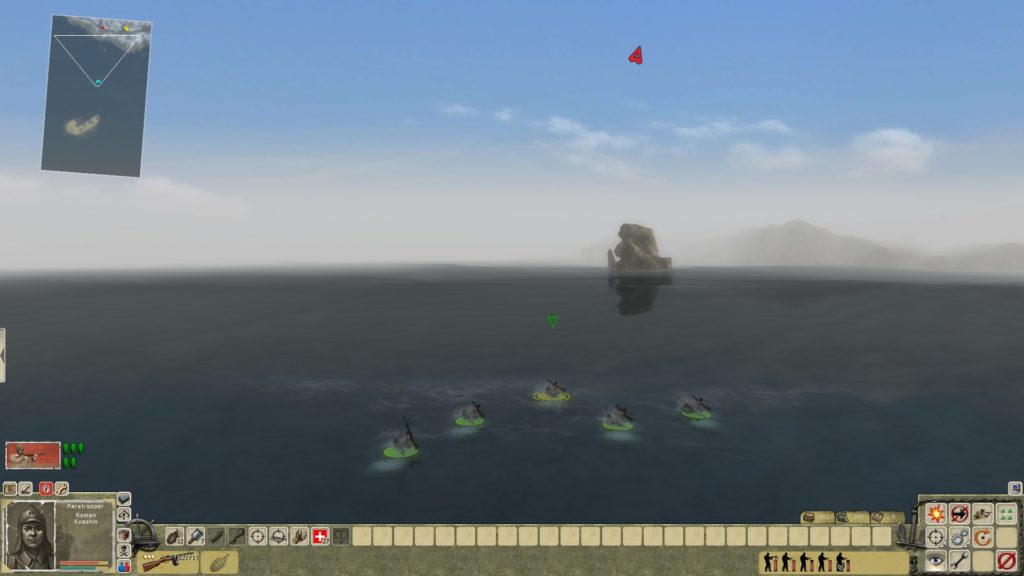
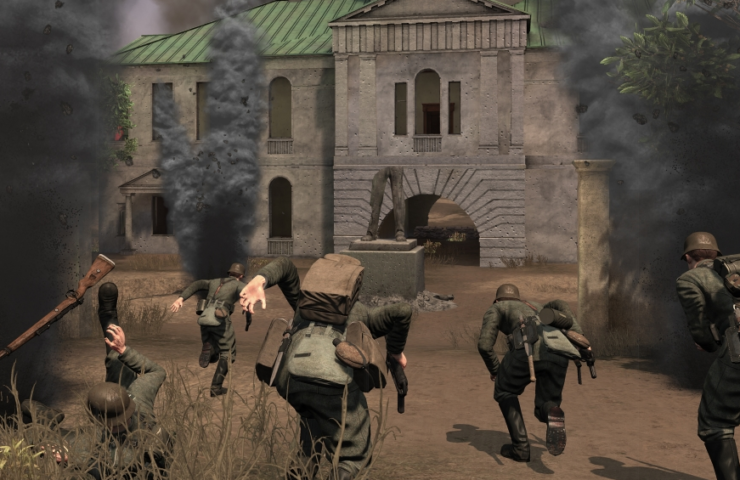
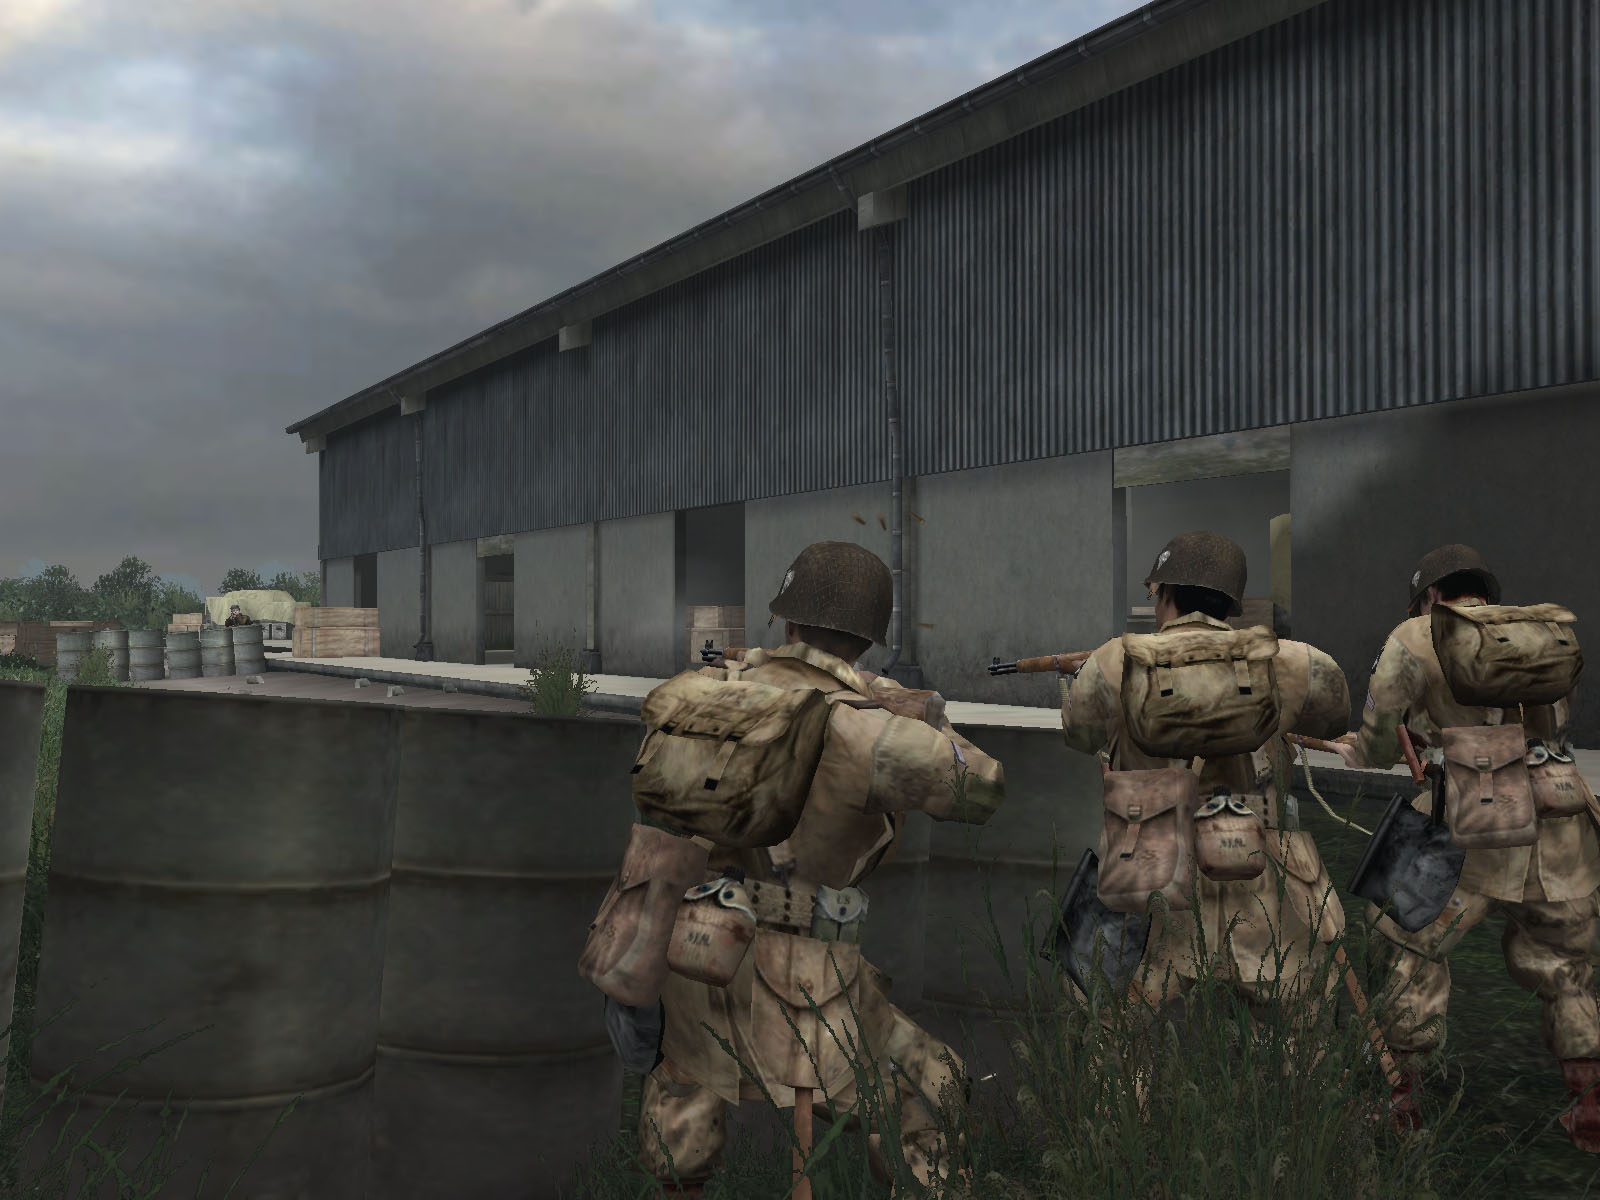
This was a long session and really much longer than I had even intended to play today. However, these two missions could not have been more different. In the Fall of the 42nd Corps, we see a daytime raid where basically everything is a race against the clock in order to secure enemy documents and stop them from fleeing. I had an excellent time off picking off enemies on the outside of their main lines before the chaos commenced once the enemy had been alerted to my position. I’ve added a picture below of one of my soldiers attacking an enemy church.
They’ll never see this coming!
The next mission is what managed to take up the vast majority of my time in this session. I’ve posted in the last two parts that I cannot wait for The Crimean Offensive campaign to be over but so far I am enjoying Manstein’s Big Guns even less. The first mission involves attacking an airfield, however the enemy has a massive range of tanks, very fast armoured cars, AA guns, MG positions and halftracks. The base goes crazy each time you kill someone. If I was allowed to use all my troops properly I think this would have been more fun. However THREE of the eight people you are given are not allowed to die under any circumstances or it’s an instant mission failure. Pretty rough stuff.
Sometimes you need to… borrow… an enemy halftrack.
Session 9: Manstein’s Big Guns – Paid in Blood
Time: 1hr 0m (13hr 9m)
This was a really odd mission, involving a very low number of soldiers, but because of that, I managed to get a pretty good story about one soldier in particular, Viktor Novitskiy. He was a sniper under my command who ended up being the only person that could do most of what needed doing. He eliminated countless enemy troops with his rifle, but also destroyed two tanks undetected in order to help us clear the village and for friendly troops to escape.
The most devastating moment of this for me was an unfortunate miscalculation about how much cover the terrain would provide resulting in the loss of a Resistance Fighter who was about to clear the way for the Soviet troops to escape! I am really getting way more invested in this game once you start giving the soldiers their own little backstories. It’s kind of nice in a way. Next mission will be mad, I can already tell as it involves train convoys and lots of tanks.
Session 10: Manstein’s Big Guns – Chasing Bruno
Time: 45m (13hr 55m)
So this was an absolutely crazy mission and again I lost both resistance fighters in utterly unfortunate circumstances, but I was proud of them for seizing a German anti-tank gun and destroying at least 3 armoured cars that would have otherwise pulverised my infantry.
My scout was however the star of the show. Destroyed the German train artillery, then seized the train AA gun and used it to destroy a number of vehicles, disabled two German Anti-tank guns. Then moved in and killed the enemies in the warehouse area, lays down mines on the train tracks, then manages to steal an Opel Blitz, move an anti-tank gun into the path of an enemy convoy, destroy 4 enemy tanks with AT grenades all before dying to an unfortunate MG shot to the head from an advancing tank.
I was gutted I didn’t manage to get a screenshot from this session as this was genuinely a super fun mission. I think this campaign has been a mixed bag so far, but the next mission promises to be good as it includes one of the unique units in this game!
Session 11: Manstein’s Big Guns – Judgement Day for the 688th and The Attack on Captain Mimbelli
Time: 1hr 30m (15hr 25m)
Woah, the 11th session in this playthough! It has actually gone really fast and looking back I was so critical on this game at the start but the more I get into it the more hyped I get to see what’s coming next. I decided to celebrate this momentous occasion that I would play two missions instead of one! Partly also because I know that the lockdown in the UK over COVID-19 is coming to an end soon, so my time to actually finish this game is limited.
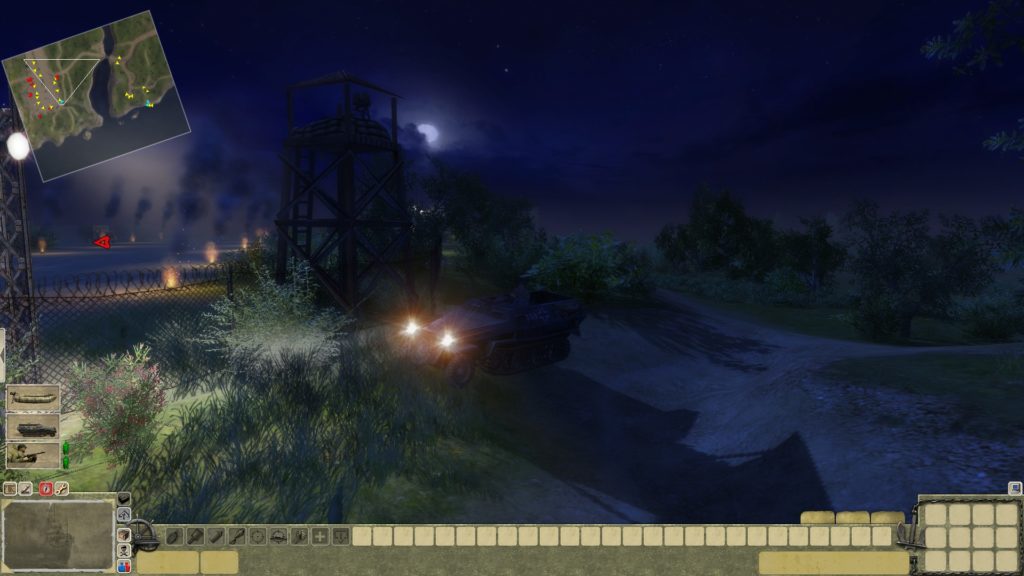
The first mission involved the Rail Gun “Bruno” which is a famous German artillery piece from the second world war. The mission itself was oddly easy, and I honestly think that this was because the AI was set to advance rather than to hold positions. Let me explain. If I killed one soldier, the entire enemy front would advance to the source of the shot, therefore in some cases allowing an entire squadron to be gunned down by my tanks.
Here is “Bruno” mere minutes before its eventual destruction
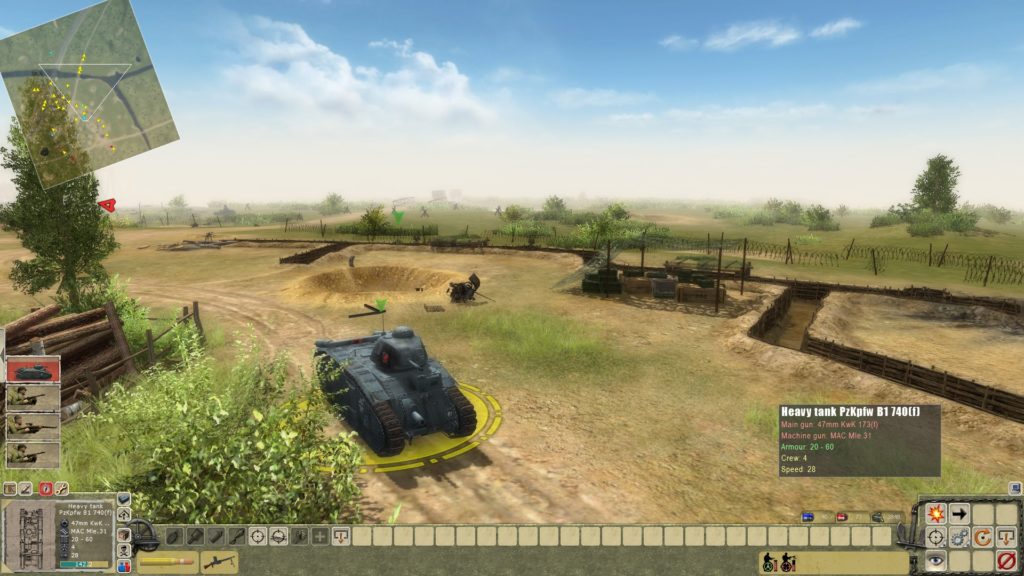
The heroes of this mission were Vasily Kuashenkin, who is a radio operator that managed to destroy the Anti-Aircraft weapons, steal the maps of the enemy positions and even to destroy “Bruno”. The two resistance fighters were however the most important people in this. They started the mission off by stealing a tank and used that to destroy a lot of enemy infantry, then stole a halftrack to disable a few enemy positions and then destroyed the turret of a B1-Bis tank, allowing it to be repaired and captured so that remaining enemy forces could be eliminated. An awesome mission overall.
This B1-Bis still shows signs of the AT grenade that knocked out the turret before repair!
The Attack of Captain Mimbelli was interesting. A night assault on Italian and German joint forces, meaning we’ve now faced Romanians, Germans and Italians in this game. Capturing the coastal guns was fun and honestly I just used the squad’s sniper to eliminate all of the machine gunners in this map and that basically enabled me to not have to worry much about the rest of the squad dying. This mission only took me about half the time of the one before it too! Only one more mission to go in this campaign and it’s all done!
Session 12: Manstein’s Big Guns – Lt. Federov’s Response to Breaching the Blue Line – Neptune’s Broken Trident
Time: 2hr 2m (17hr 28m)
This is the most progress I’ve made in a single session of this game, completing four missions in the end and now we’re closing in on the later stages of the game. So firstly and foremost, the end of Manstein’s Big Guns was at a naval base fighting Italian units and was a fun mission. Although at one stage I had to force my squad to retreat through the base so that I could get a Romanian tank to come into range of my AA gun. The inclusion of naval units just makes me realise that they were really never intended for this engine and have sort of been bolted on in order to fit the storyline of the game.
Naval units control really strangely in this game.
Tanks in Action was the first mission of Breaching the Blue Line and was a totally different pace of mission, scale of combat and really just overall much more wide than the previous campaign had been. In this mission I relied a lot of stealing enemy guns and at one stage managed to force my infantry through a minefield on just pure trial and error.
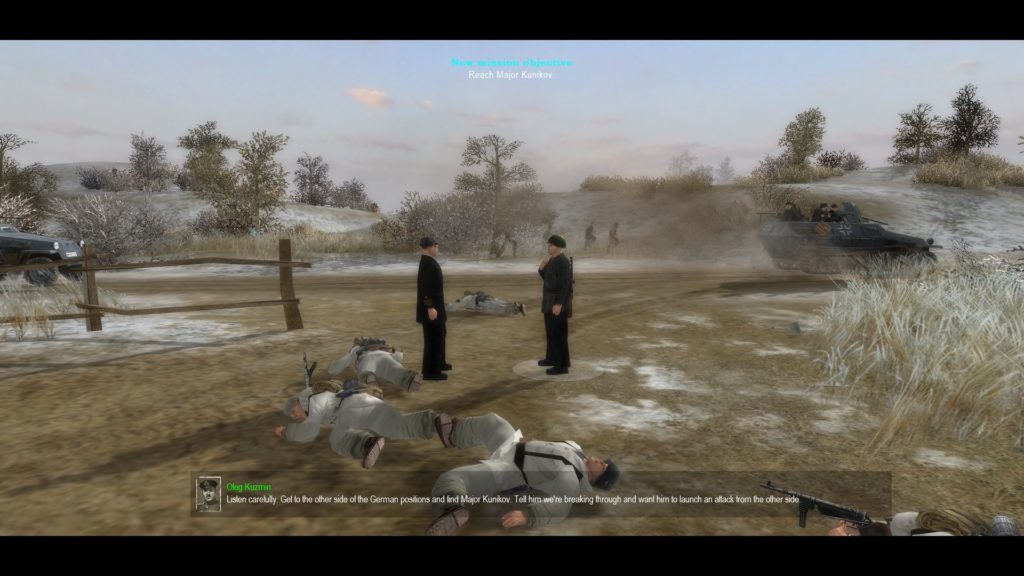
The Dash to Kunikov was also a good mission that required a lot of awareness about where your forces were as the enemy came from behind you at one stage in the mission. My favourite part of this mission however (well in terms of actual gameplay) was trying to use one single solider to break through the enemy lines in order to make contact with Major Kunikov. The actual best part of that Major Kunikov himself has quite possibly the worst voice actor that I have so far encountered in this game, which is saying something as 1C titles always set the bar incredibly low for this.
The brave solider who had to sneak past enemy lines alone.
The final mission I played almost took up half the session and genuinely included a couple of fails. First thing to note is that you get to play as Leonid Brezhnev, who would eventually become the Soviet Premier in real life from 1964 to 1982. This mission was mainly challenging as Brezhnev kept randomly dying, so I decided that I was going to hide him at the back of the map. This mission then after an incredibly long defence becomes about attacking the enemy who have an absurd number of tanks, but some strategic howitzer theft allowed me to destroy them all relatively easily.
Grand theft howitzer after my T60 managed to clear the hill
To give an indication of how long there is to go, based on the Localisation.pak file there is one more mission in this campaign, two in the following campaign and one in the final campaign. However, I have no idea how long these missions will be, but I anticipate at this stage that this will be completed in under 25 hours.
Session 13: Breaching the Blue Line – Gun, Grenade and Bayonet
Time: 1hr 23m (18hr 51m)
This mission was intense. The first part of the mission took so long mainly out of frustration more than anything else. The boats and landing craft do not work well and their implementation in this game has in previous missions meant that many of my units just get stuck in the water and unable to get to any sort of land, rendering them useless throughout.
Both parts of this mission take place in a giant port. With the first half of the mission focusing on the original landings and securing a beach head and the second focusing on ever so slowly pushing back against heavily fortified enemy positions.
The second part of the mission was better, but this was basically about taking out enemy artillery positions (as most Men of War large scale missions tend to be) and therefore the actual infantry combat was somewhat limited and the tank combat tended to be from extreme range against artillery pieces. I did enjoy however attacking the enemy headquarters and factory. Some other objectives were just more cumbersome than anything else.
It’s good to see this campaign over in all honesty…
Session 14: Company of Heroes – Backstabbing Hollidt and The Fall of Stronghold Nikolaev
Time: 2hr 1m (20hr 52m)
So after a long period of about a month where I was preparing for my return to work and dealing with exams I am finally back playing this game! I actually got a new keyboard and mouse since then and this is actually really helpful for this playthrough as I now have macro buttons I can use for some of the game’s key functions.
The first mission on this was actually quite cool. The mission firstly involves you taking a port with infantry and clearing the seafront. Then you are tasked with preparing 10 minutes preparing your defences with some mines left behind by the previous occupiers. I must admit the enemy does come through in a varied and surprising way which actually makes for a good fight. The game starts introducing some heavier tanks including Panthers just to keep you on your toes. After I lost a number of artillery pieces, I simply commandeered an enemy Panther in order to use this to bulk up my defences.
The next mission is a mixed bag and honestly felt a little bit more tedious than the first to me. Just something about the whole only having two infantry soldiers to fight Flak 88’s and an Elefant tank which was incredibly challenging to destroy. Once the battle opened up a bit more in the second half it did get more enjoyable, but you have to work for it. The AI’s advance is also quite slow as any infantry or fixed gun will slow them to a halt for some time.
You’re only given a very small squad for this mission.
At least that’s another campaign over. Now from memory there is only one mission left in the entire game and so hopefully I can beat my target time of beating this within a total of 24 hours. We will definitely be the fastest playthrough as the other one on HowLongToBeat is currently 59hrs.
A nice way to end the campaign
Session 15: Reclaiming the Black Sea – Into the Lair of the Kreigsmarine
Time: 1hr 6m (21hr 58m)
Well. I cannot believe that this game is finally coming to an end. I started this playthrough more than a month ago and tried my best to prioritise this over the other series that I had ongoing at the same time but it has taken a fair while. So how on Earth will this adventure end?
The answer to that is disappointing. This mission has so many bugs with it and most are to do with the Romanian troops. In some instances they not only cannot be killed by German infantry but also cannot kill other enemy infantry. They seem to switch sides without it actually make any sense and the mission itself feels like they were just trying to do something slightly quirky to end the game. The whole “you’ve got to kill all enemies at X before they destroy Y” thing was boring after a while because it was mostly luck based or got scuppered by things like the soldiers not being able to kill things bug I mentioned a moment ago.
However, it would be unfair to let a very poor final mission put a stain on an otherwise good game. This is a Men of War game that tried to incorporate things that others had not at this stage in the series past. In fact, I found it to be one of the better Men of War games in terms of its variety between large and small battles as well as types of combat. But alas, it’s over. We’re done here.
Game beat in 21 hours and 58 minutes. Check out my entry on HowLongToBeat HERE.
Review:
Score 7/10
Men of War: Red Tide takes a slightly different approach to the original Men of War as it remains focused on one particular WW2 front and tries to create variation through its varied combat, weapons and vehicles. I think that it does a fairly good job of this, with there being a tonne more nations and vehicles to play around with. The campaign also does a good job of varying the missions in terms of scale and also play style to keep things interesting. However that doesn’t mean that the game is free of all issues.
I got nearly 22 hours out of this game of actual playing time (the rest of the time on Steam was accidentally idling in the menu) and honestly that’s pretty good considering how cheap this game usually is on Steam. For that reason I’d recommend picking it up. If you like the hardcore element, honestly Normal difficulty should be enough to keep you happy as the game can be unforgiving, however if you want a fun challenge, ‘Easy’ is still a fun and challenging way to play the game.
The controls need to really be configured and I’d recommend doing this as soon as you start the game as the default control scheme is quite clunky and jarring. I think my main criticism is the camera, which is a long standing issue in the GEM engine that this is based on. This is because the game encourages ‘Direct Control’ mode, which is great and lets you control any individual soldier, vehicle or artillery piece, however the camera doesn’t move with the solider and needs constant adjustment, making it a challenge to use this on some maps.
Yes, the obvious critique is that the graphics are a little outdated and the voice acting is poor however I think that the variety and intricacy of the game itself totally outweighs that. It’s a fun game and a really good way to learn about a WW2 battle that often isn’t spoken about much in the west. I can’t speak for the multiplayer as I haven’t played it, but there’s more than enough single player content in this game to keep most people occupied for some time!
So this is a game that I do have experience with before! I used to play this game back on the Xbox 360 and played a little bit of the single player back then, but I mainly LOVED this game for the multiplayer. It had loads of different classes, really fast gameplay and a super cool announcer who made everything seem so much more themed.
However, in all of that I never actually beat this game’s story, nor really got all that far into it. So now I’m back to beat it once and for all. I currently have 50 minutes on this game recorded on Steam, which has been exclusively time that I’ve been trying to get this game to work on multiplayer again with friends (spolier alert: it doesn’t work, even on GameRanger).
I activated a key for this game on Steam on 10 November 2015… so I’m going to be completing it nearly five years after purchasing!
The theme song for Call of Juarez: Bound in Blood
Playthrough:
Session 1: Chapters 1 & 2
Time: 1hr 12m
So this game is super fun and honestly, coming from my previous playthoughs of the Brothers in Arms games, this has been a welcome change (and modernisation) in controls. However, I would highly recommend rebinding the default for the weapon wheel so that it’s not the middle mouse button. Maybe I just need a gaming mouse… maybe if I save some money I’ll buy one!
So I’ve decided that this playthrough will be completed on the ‘Hard’ difficulty setting and boy is it tough at times. I think a lot of my early deaths (in the Civil War parts of Chapter 1) were mainly due to me not being used to the cover system and the level of movement. I managed to get a lot better and die a lot less in Chapter 2. I’m going to keep the difficulty on hard and see where it takes us.
From this session all I will say is that it’s pretty unnerving playing as the confederates considering what they stood for, but in the story sense of the game it makes sense. Also, we have many games where you play as Nazi Germany and so perhaps sometimes you need to have that different perspective on things. Personal highlight of these chapters for me was sinking the ship in Chapter 2. Just was so fun to sink a paddle steamer and then defend against the advancing enemies. Steam’s overlay was not working for some reason, so I couldn’t get any screenshots in this session, which kinda sucks… sorry for the text heavy first post.
Session 2: Chapters 3 & 4
Time: 1hr 11m (2hr 23m)
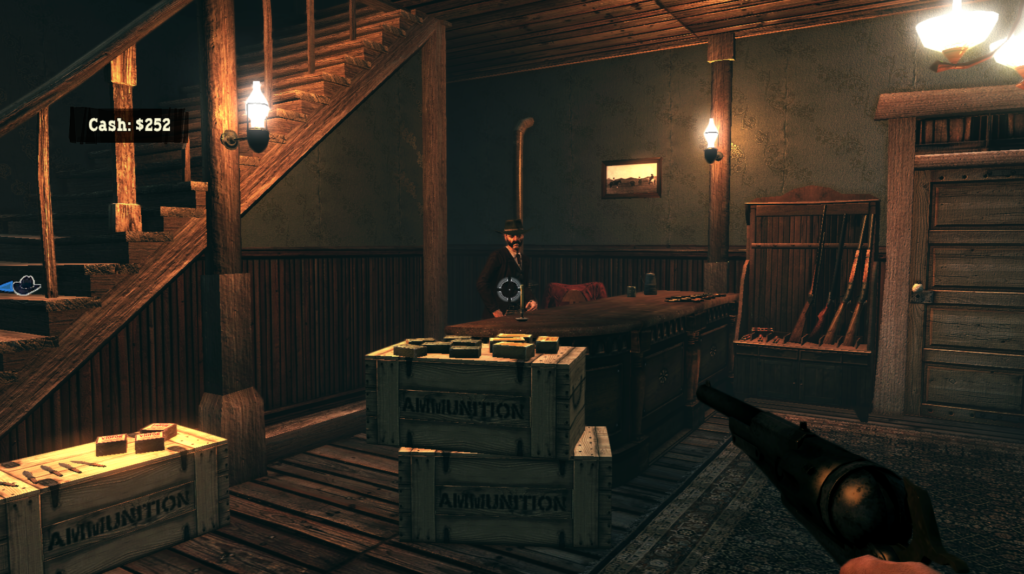
So another two chapters down in this session! I don’t actually know how many chapters there are in the game, but I feel like completing two at a time is about the right pace for me. I also found gun stores, which I couldn’t remember from playing it years ago. Kinda strange that when the whole town is trying to murder you in both chapters that the owner of the store is not at all bothered and happy to sell you guns.
The gun store owner is not concerned about chaos
I struggled a lot with the stagecoach section of Chapter 3, mainly because Thomas’ weapons don’t really allow him to put out the firepower needed to actually mow down the horseman. I restarted the chapter 23m in and managed to complete the entire thing as Ray in 8m. On hard difficulty, dual revolvers is definitely required in order to complete this. I also got lost on Chapter 4 where you’re supposed to flank the snipers and the game got very cross with me… luckily the snipers can’t aim for their lives and didn’t kill Ray in the 5 or so minutes it took me to find out how to get up there.
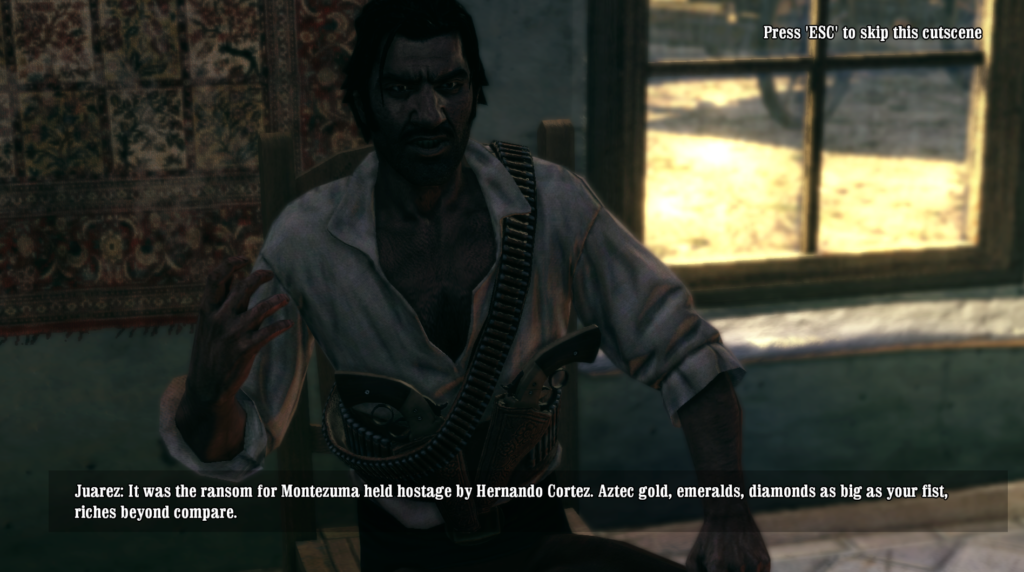
Juarez talking about cool Aztec treasures makes me hyped for the rest of the game
Chapter 4 featured one of Call of Juarez’s classic duels, this time with “The Rattler”, which I must say is one of the worst names for a supposedly threatening guy. It just made me giggle when I heard it!
Session 3: Chapters 5 & 6
Time: 59m (3hr 22m)
Managed to sneak this in as a nice short session although it was elongated by my struggles completing Chapter 5…
The actual staging for Chapter 5 in a mine shaft was really cool and the devs did a great job on the multi-height combat. It was fun to play through but I’m still struggling a bit with the difficulty (and falling off of things). Managed to beat the dual on the second attempt this time though, which means I must be getting slightly better at these! I tried my best to get a picture of William pulling a real sadboi face, but unfortunately I still cannot get Steam to work properly and it didn’t let me print screen it. I am trying to make a conscious effort to take more in the future though, gotta show off how cool this game looks.
Chapter 6 actually lets you free roam a bit. I basically just used this chapter to do one quick mission and get Ray some nice shiny new revolvers as I’m definitely going to play as him in Chapters 7 and maybe even 8 too!
Session 4: Chapters 7 & 8
Time: 45m (4hr 08m)
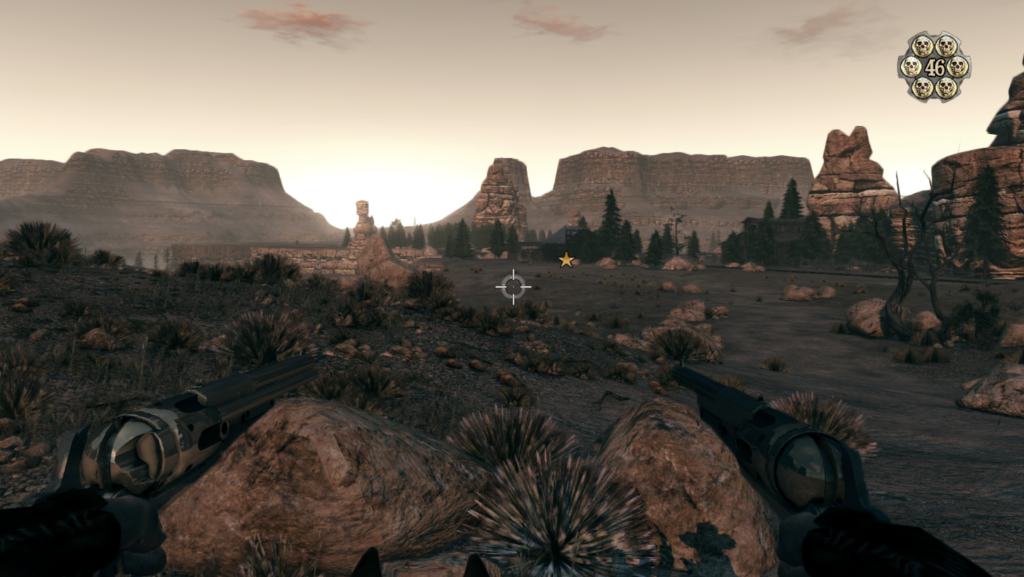
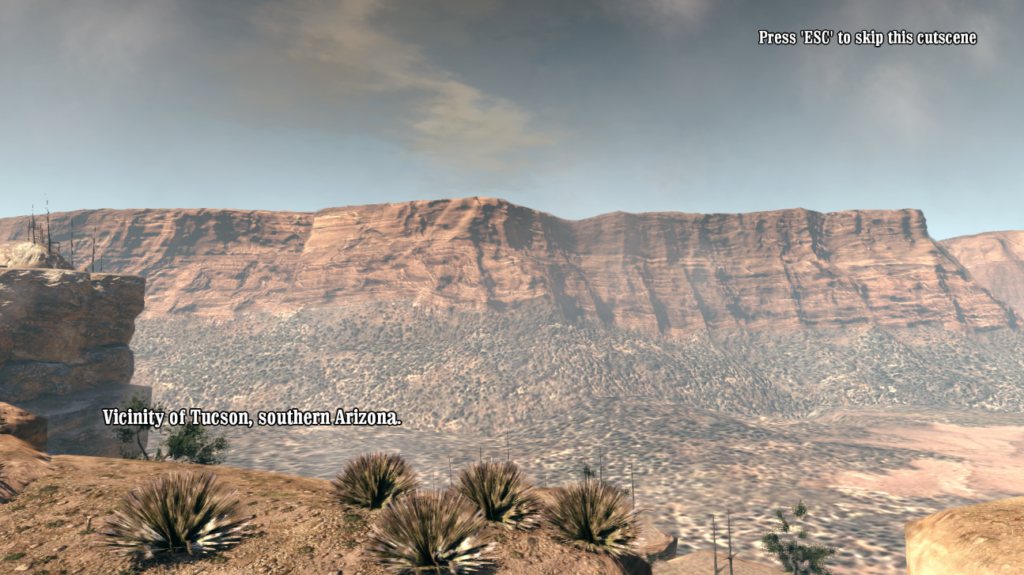
A super short session this time, but I’m liking the idea of completing two chapters at a time, especially when things get challenging. I took more time to appreciate how honestly beautiful the more open landscapes are in this game, but it’s a shame that these chapters are basically skippable. There are small events that happen in places around the little “free roam” sections and some really picturesque places to look at.
In fact on a graphical comparison, the cutscenes actually look much worse than the game itself. I can only put that down to perhaps Techland using footage from the console version in the cutscene or better graphics options being released further down the line. I’ve included a little comparison of the graphical fidelity in these chapters below.
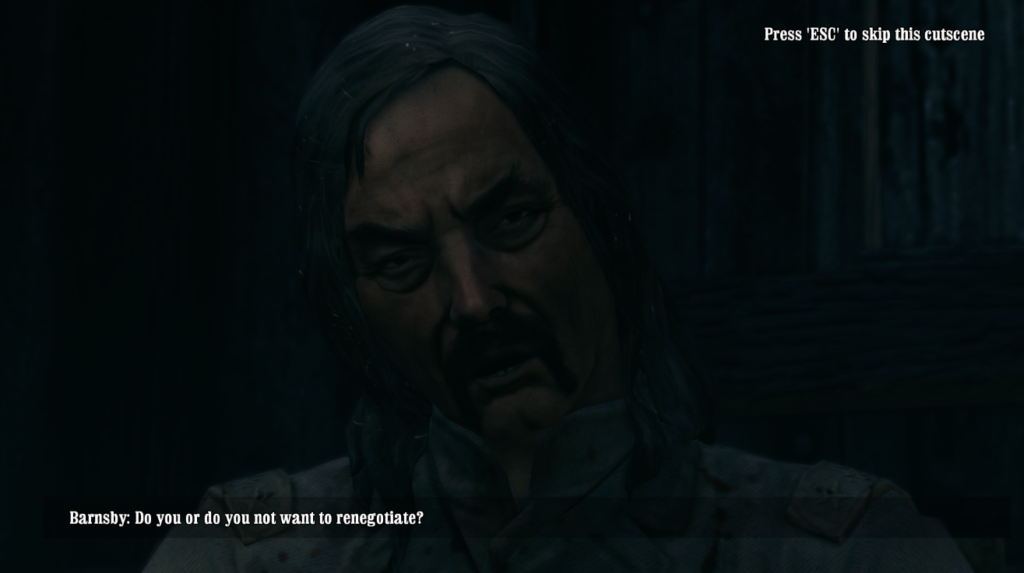
These were a very fun two chapters though and I think one of the reasons I’m keeping these sessions so short is because I’m genuinely really enjoying the game and I don’t want it to end! Also in a total shock to absolutely no-one, Barnsby is revealed to be the person in bandages you help throughout Chapter 7 and then kidnaps you. *pretends to be shocked*
You thought I was dead? Well you clearly don’t understand generic villain revenge story lines.
Session 5: Chapters 9 & 10
Time: 53m (5hr 2m)
See I went into this session with the genuine goal of beating more than two chapters, but for some reason this game just exhausts me, so I ended it again after two. One of the things that struck me were the massive differences between the environments and mission types between Chapter 9 and Chapter 10. In Chapter 9 there’s a lot of vertical combat, lots of sandy desert-type environments and this is quickly replaced in Chapter 10 by luscious forests.
I hope you don’t suffer from vertigo!
I think that this variety is actually to the game’s strength. It means that missions aren’t just the same thing slightly changed and the fact that Ray and Thomas will have slightly different experiences does add some element of replay-ability. For instance in Chapter 10 I was playing as Thomas (the first time in about 5 chapters) and I was tasked with saving Marissa. There was a whole sequence dedicated to that whilst Ray saved William. I’m low-key regretful that I didn’t choose Ray as I much prefer William and I reckon that would have been a better sequence.
Not the screenshot I intended to take of the forest landscape, but the one we got.
The story has moved in a weird way now, with our lives being spared by William’s ability to use his Godly powers of being a nice young man to forge somewhat peace with the Apache tribe. I am genuinely interested to see where the game goes, but I just had no more oomph left in me to continue this session. So I guess the journey will go on some other time.
Session 6: Chapters 11 to 15
Time: 2hr 21m (7hr 23m)
So here we are… the final instalment of this blog. I decided that I would finish this game today (23 May 2020) because as much as I was enjoying my two chapters at a time, I could sense that the pace of the end of the game was going to be difficult to disconnect from and come back to. A lot happened and I’ve got a lot to say, so hold on tight folks.
Chapters 11 and 12 see us doing more with Seeing Farther and the Apache tribe. We learn that Ray is massively afraid of water and genuinely the gameplay holds a good pace at this stage. I also tried to capture one of the better action scenes in the game and managed to screenshot at the worst possible time, so please enjoy this terrible screenshot.
The canoe glides gracefully through the… bush?
This chapter is however where I started to radically change my opinion of Ray and Thomas. They had before been questionable people fighting other questionable people, but seeing the Apache village burning down not only made me frustrated with Barnsby who was doing it, but also to Ray and Thomas for bringing that level of destruction on the village in the first place.
The Apache village begins to burn, destroyed by Confederate canons.
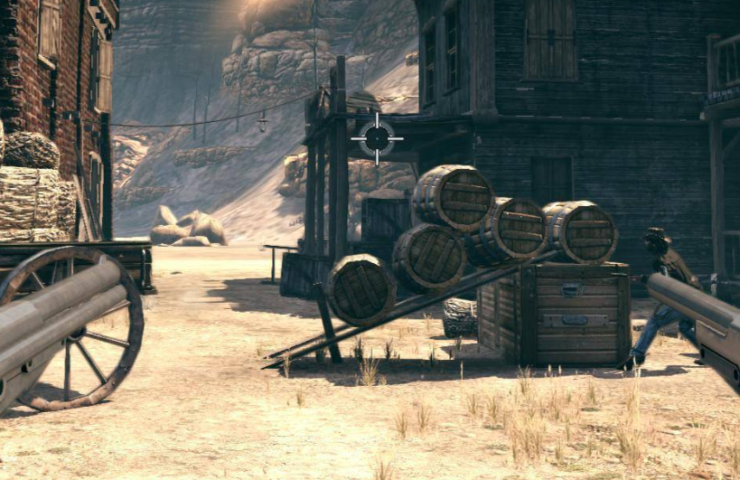
Chapter 13 gets a special mention here, because the ghost town that it took part in was epic and honestly this was probably my most enjoyable mission in some time in this game. It had lots of enemies, lots of vertical combat but also it wasn’t just doing things for the sake of it. There was a cool travelling gun merchant on the edge of the ghost town, which I found quite funny as why on Earth would he be there?
The death of Seeing Farther in this sequence however is where I confirmed my earlier concerns about Thomas and Ray. Running River lost everything and yet Ray and Thomas continue to chase the gold, even though at this stage they’re under the impression that they have lost William and Marissa too. It’s odd not liking the playable characters, especially as there was so much to like about their chemistry and their personalities near the start of the game. It’s almost as if they see their own goals as being much more important than anyone else’s lives, which is difficult to get on board with.
Chapters 14 and 15 however are pretty awful. There’s “added difficulty” applied by just simply spawning a load of enemies again and again, whereas the actual gameplay and objectives are incredibly dull. This is mainly a criticism of the Thomas section of Chapter 14 and the final section of Chapter 15. Ray’s section of Chapter 14, where you lead William through a cellar and eventually duel Juarez, is much better and was generally more enjoyable to play.
Chapter 15 and the way the story advanced is where I take some concern though. William’s death seemed unnecessary (although the scene itself was well executed) and for me it was the final nail in the coffin that I didn’t like either of the main characters. Neither of them would have ever got to this stage if it weren’t for William and so killing him off in order to give Ray’s character a reason to get better just seemed forced and a quick way to finish the game.
That’s all folks!
Game completed in 7 hours and 23 minutes, find my entry on HowLongToBeat HERE!
Review:
Score 8/10
Well before I say anything else it’s important to remember that the online for this game really doesn’t work anymore so please don’t buy it for that. Yeah some people have had luck with GameRanger and other things but it’ll never be the same as it was.
Looking at this game’s single player, I can recommend it as a buy. The game lets you choose between the two brothers in almost every mission, so there’s something in there for those that like to get all up close and personal with Ray or who like to take a slower and more long range approach with Thomas. Generally the graphics have held up reasonably well too and the game has a surprisingly diverse range of environments that you will find yourself in across its 15 chapters. It also has a very unique art style in how the game draws the various cutscenes… there’s a roughness to the whole graphical presentation really so I highly recommend this for fans of the western style.
The characters can seem pretty one dimensional at times, with some fairly cheesy story elements, but honestly I think it’s a good campaign and a game that you’re going to want to continue playing. The shooting mechanics are quite slick and the concentration mode can save you from some really dastardly moments. This game took me about 7.5 hours to complete on ‘Hard’ difficulty and I died a fair few times on some chapters, so take that as a yardstick for how long this game is.
The duels are also something that is quite nice and mastering them requires a different skill to mastering the very fast paced gunplay of the main game. Additionally there are some chapters which provide a bit more of a free roam experience, allowing you to complete extra missions for money which you can use to buy upgraded guns. This game is usually cheap, so why not go out and buy it? However, buy it for the single player because you’re not getting a multiplayer experience from this one anymore. I would say it was worth buying for the single player alone as I really did enjoy it.
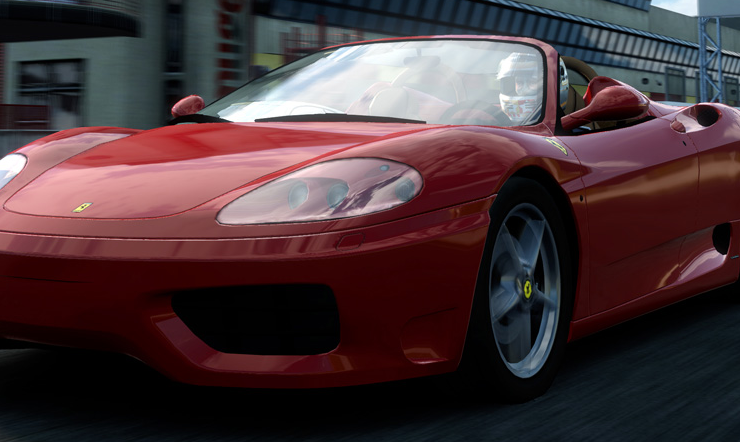
One genre that I haven’t yet explored as part of my very WW2 heavy start to this backlog is racing games. I actually grew up almost exclusively playing Gran Turismo games as a kid, with GT1 and GT2 being my main games for most of primary school and GT4 dominating most of my late primary school and secondary school years (sorry GT3).
Test Drive: Ferrari Racing Legends is of course a game about the supercar manufacturer Ferrari. I’ve also heard that it’s not particularly great either, but I purchased this and so I think that it’s time I got around to playing (and hopefully beating) the game.
Heads up though, please visit the following PC Gaming Wiki page in order to get this game to work on modern systems. The Games for Windows Live (GFWL) saving function does not work out of the box and so you will need to do some manual tinkering if you are on Windows 10 like me.
The theme song for Test Drive: Ferrari Racing Legends
Playthrough:
Session 1: Golden Era – A Good Foundation to The Rookies
Time: 1hr 45m
So before I even got to start playing this game I had to spend a good hour or so actually getting it to work. The GFWL functionality was not working at all and you cannot actually save the game if you cannot sign in (or create a local profile which also wasn’t working). I referred to a guide in the introduction above, but also if you’ve ever logged into GFWL on your PC before, I recommend going into the profiles screen and removing your profile before playing the game as that’s the only way I got it to work.
In addition to this, I had hoped to play the game on my Thrustmaster T150 wheel, but I couldn’t find any way for the game to recognise the wheel and even using the “custom wheel” setting in the controls menu didn’t bare fruit as it recognised everything except steer left and steer right (which funnily enough are important functions in a racing game). So instead I will be playing with a DualShock 4 controller using DS4Windows.
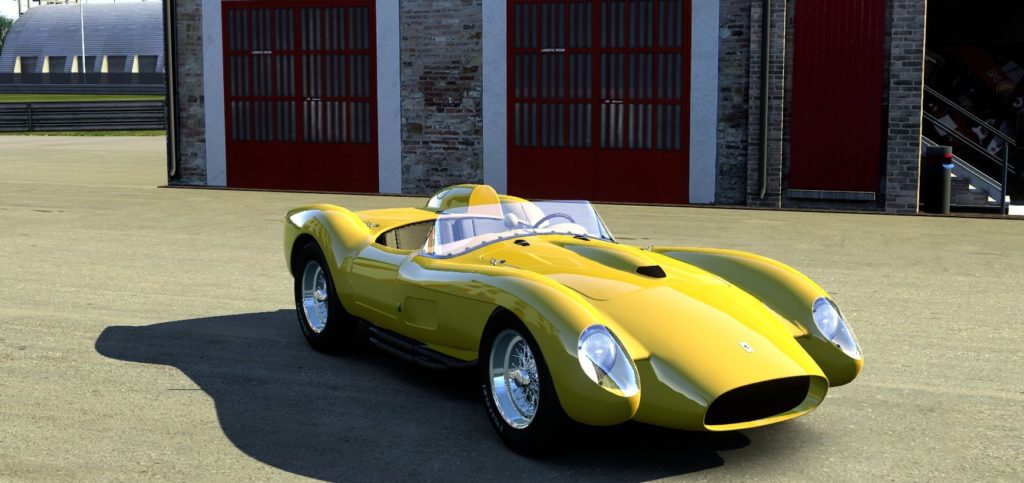
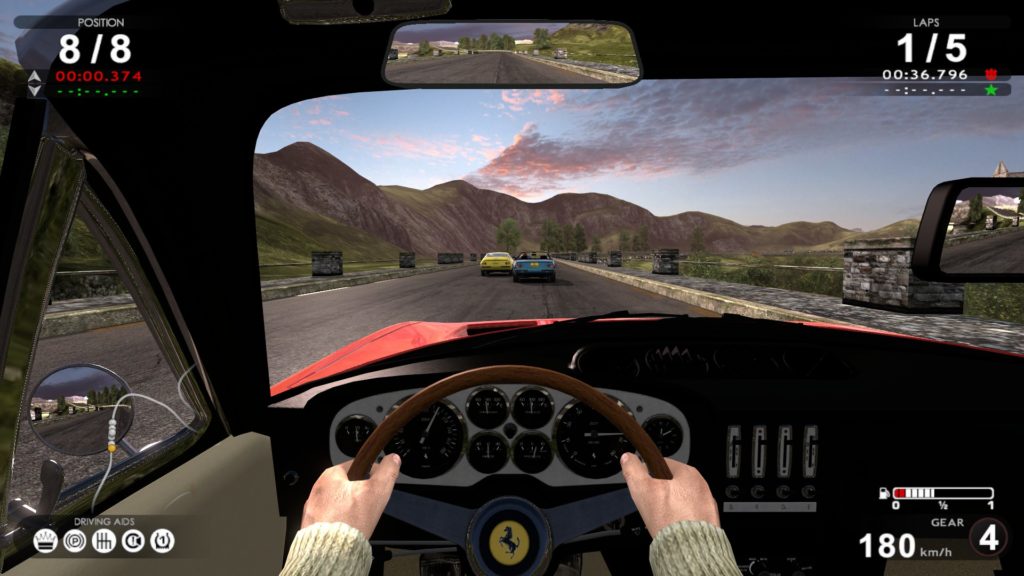
One of the rarer Ferrari’s in the game. Not one I’ve come across before in a racing game.
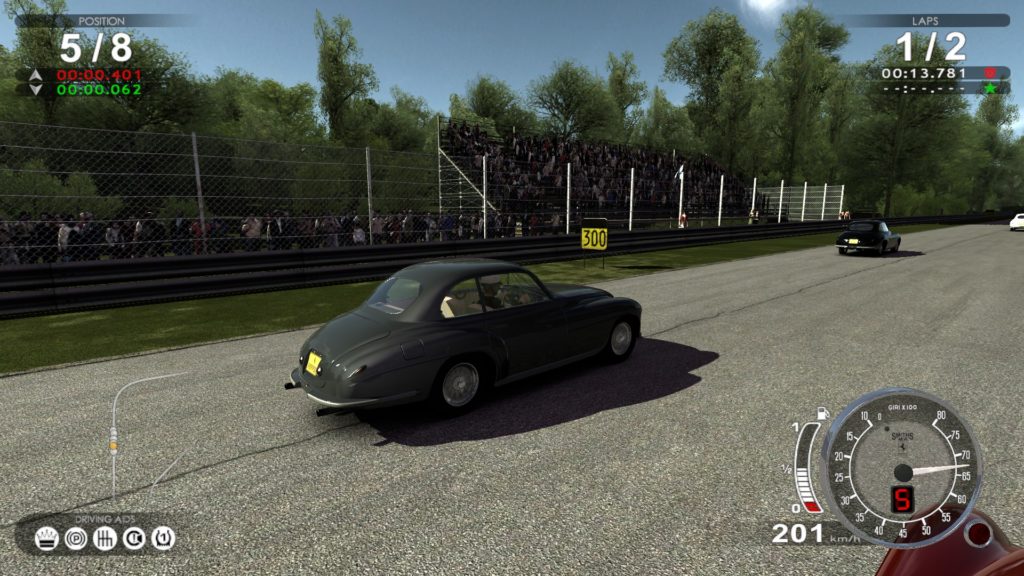
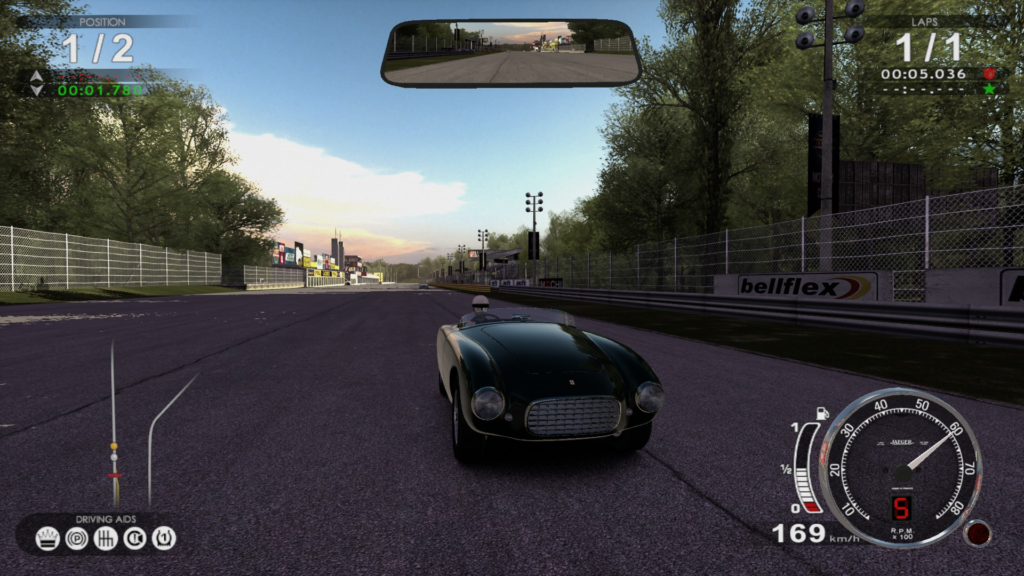
So the game itself… meh. It’s not had too much going for it so far. Not helped by the fact that in this session 11 of the 17 races I completed were either on the same layout of Monza or Silverstone. There were however some interesting cars along the way, which was a change from the norm in racing games where you start driving a hatchback. The saving grace for this session was the Misty Loch course, set in beautiful Scotland. Teh track layout itself wasn’t anything to write home about but the map is quite beautiful. I crashed getting this picture too, but I wanted to show this off.
Misty Loch is striking, much unlike Silverstone and Monza’s recreations,
So far I have completed 3 out of 35 of the missions (3 out of 10 for the Golden Age) so that’s at least a chunk of the game taken on. Plus it only crashed once! Which funnily enough was when I opened GFWL to see what an achievement was.
Session 2: Golden Era – The 250 Challenge
Time: 1hr 30m (3hr 16m)
This entire session was dedicated to one of the campaign missions and the biggest within the Golden Era campaign. Here you are basically stuck with the Ferrari 250 Testa Rossa, so I hope you like it! Whilst I didn’t really enjoy this campaign, I decided that I needed to have music on in the background as having no music in a game this arcadey is bizarre.
Here is the 250 Testa Rossa, which believe me gets dull after a while.
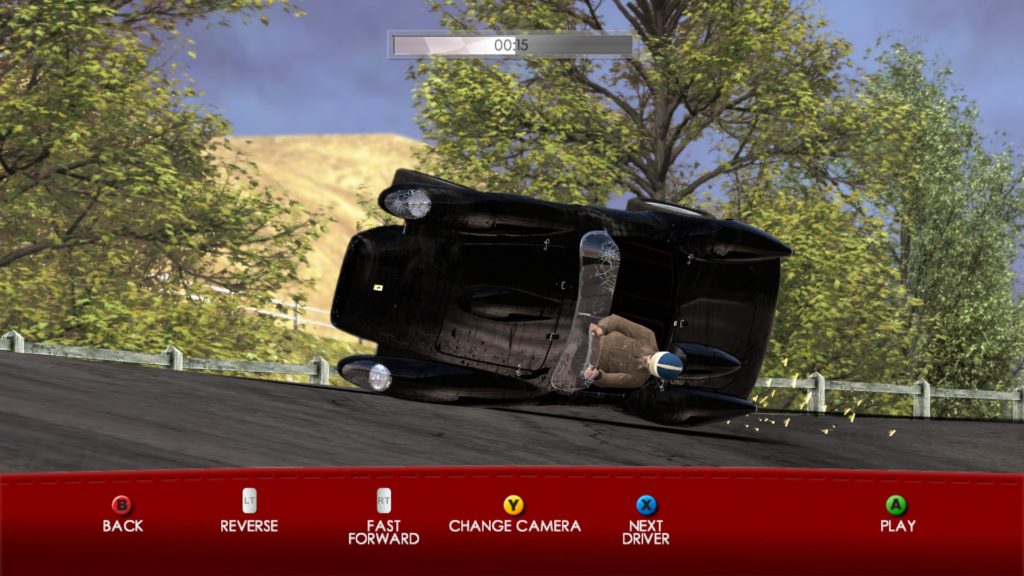
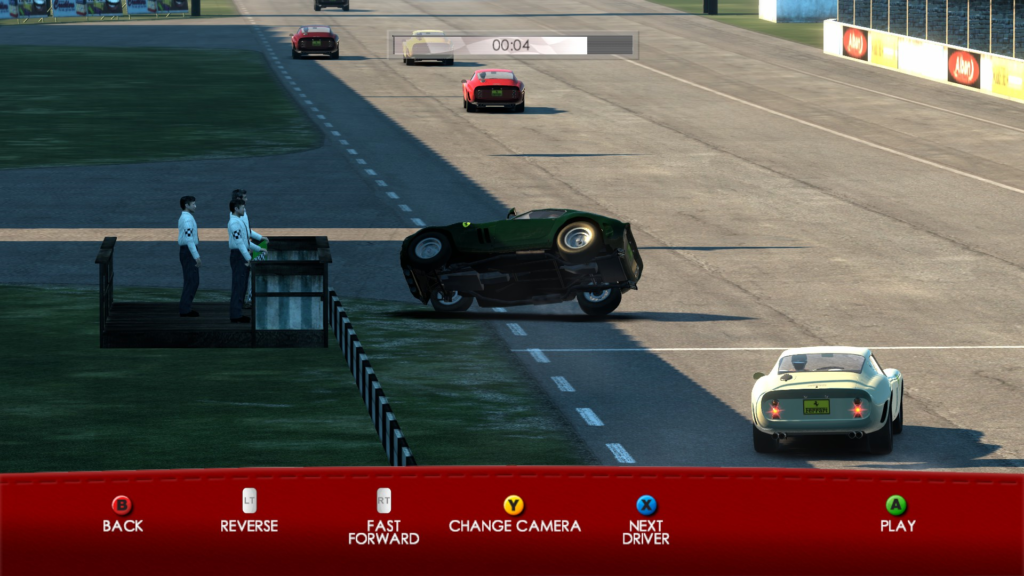
This shouldn’t have taken long, but there were two issues that I came across. In one event, which is like an endurance event on the Misty Loch map where you’ve fallen way behind and need to catch up, I got flipped near the end of the last lap by the AI and therefore needed to restart and it took forever.
That doesn’t look like a survivable incident. The real casualty was the 10 minutes of my time that I shall never get back
Then something that wasn’t really my fault, on the “Day Off” challenge, I finally got to drive another car and so I was incredibly excited. However I was hardwired into how the 250 Testa Rossa handles and acts, so the Ferrari California was never going to be easy to control and in fact I ploughed my car into the barriers on the final corner and had to start again… yup.
Session 3: Golden Era – Drivers Training 101 and Seasonal Changes
Time: 1hr 32m (4hr 48m)
Well we’re back playing this again and honestly not much changed between the previous missions and this one. Funnily enough actually there was even less variation between the challenges and less opponents as most of the missions completed in this session were just me alone on the track. Also, I’m getting real tired of Monza because they use that for basically every single one of the Golden era missions in one form or another.
Got to drive a variety of cards in Drivers Training 101, an improvement from the mission before.
There was a pretty funny moment on Silverstone however where an AI car absolutely totalled itself and this happened just as I was passing it, which was actually hilarious to watch (and yes, I managed to capture a screenshot this time). Overall though, the missions are beginning to get gimmicky as they’ve run out of ideas. The obstacles on Monza and the “your hand is cramped, you cannot change gears” missions were both dumb. I have given up at this stage with secondary challenges as I just want to rattle through the missions.
This was followed by an impressive flip, a highlight in a dull session.
Session 4: Golden Era – The Big League and Celebration Tour
Time: 2hr 0m (6hr 49m)
So this was technically two sessions, but one took place in a weird “I’m still awake at 3am and I need something that will put me to sleep mood” and then the other was driven by me not actually finishing the whole series and feeling like I needed to get to a more definite cut off point. Basically what I’m trying to say is that this game feels like a mountain to climb and I do not understand how the Golden Era is still not over.
I must say The Big League and Celebration Tour show this game at its worst and how it could have been better. The Big League has you drive a single car across lots of different qualifying events, but frustratingly we are still on the exact same rotation of circuits. One thing I found funny was how the last race of this challenge was on Misty Loch and was 10 laps of pure boredom, so much so that even the weather on the track was miserable unlike its normal picturesque self.
Get used to seeing this grid of identical cars at this stage in the campaign.
My other big issue with The Big League was the wildcard entry in challenge. You finally get to drive something different, the utterly stunning Ferrari Daytona. However, you only get to drive it in this one mission. Also, the mission “Change of Pace” itself requires you to ‘go easy on the competition’ but in reality is just frustrating as trying to force yourself to come 7th when the AI is spinning out all over the place is just not fun. This for me was the worst mission so far and feels like it was wedged in just to add to the total playtime. In fact a lot of this game feels like that. As if someone said “this has to be at least 20 hours” and so they padded it with unmemorable events.
The only chance you get to drive this magnificent car.
Inversely however, the shorter 4 event “Celebration Tour” challenge was much more fun (despite suffering the track limitations again) and felt like if they would have limited the other car challenges to four races, perhaps with more unique scenarios, that this could have been a vastly better game. The 330 P4 was also just way more fun to drive too compared to almost anything in the Golden Era. Here’s hoping this means the Silver Era and Modern Era to come will continue that trend.
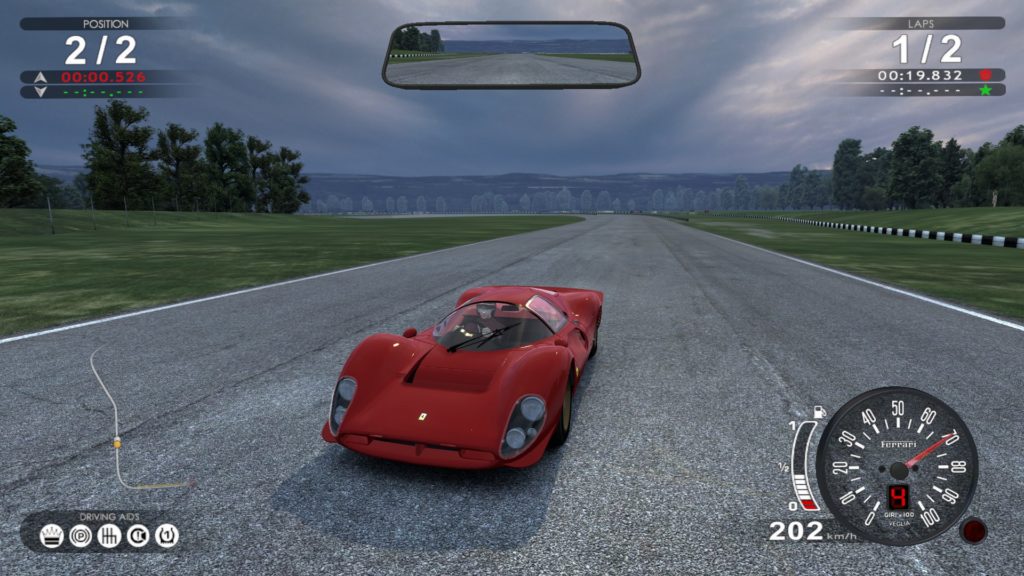
The 330 P4 series is shorter but feels better paced than the others.
So this first game on clearing this backlog I completed was Brothers in Arms: Earned in Blood and that might seem like a bizarre choice seen as this game was actually the first in the series. Well, that’s because I had tried to complete Brothers in Arms: Road to Hill 30 before and managed to get six hours into the game before giving up due to the difficulty of one of the tank missions. It’s another first person shooter with a tactical squad management element.
Now however, armed with my intense knowledge from Earned in Blood, I am back to make sure I actually complete the series properly before moving onto Hell’s Highway, which I already know I will love. I’m completing this playthrough on the ‘Difficult’ difficulty setting and hopefully will complete this in fewer sittings than the previous game. I also purchased this on 3 July 2017 on the same date as Earned in Blood, so beating this almost three years after picking it up will be worthwhile!
The main theme for Brothers in Arms: Road to Hill 30
Playthrough:
Session 1: Hill 30 to Objective XYZ
Time: 42m
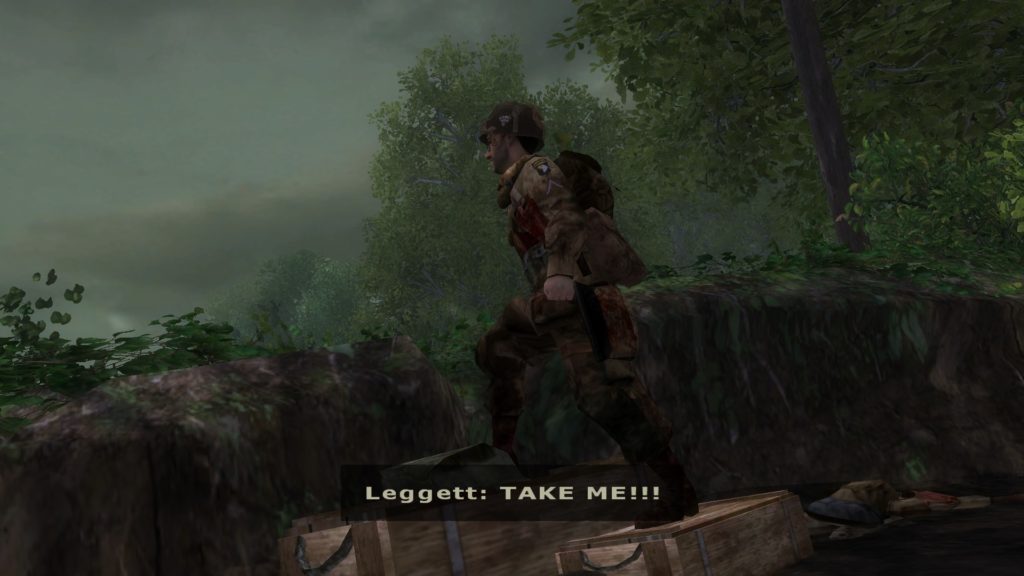
I thought I would do a super quick session just to start off this playthrough as I know that the first few missions of any shooter are usually quite basic and tutorial heavy. I found the portrayal of Pfc. Leggett to be kinda strange at the start of the game as we see his death immediately and him not really acting as his character does for the rest of the game.
The first three missions, including Objective XYZ are kind of basic and so getting through them wasn’t a problem. The shooting in this one feels better than when I started Earned in Blood, but then again that might just be because I am now used to how horrible and janky the shooting mechanics are in these games. Also Red was an absolute badass in these missions, doing way better than my squads in Earned in Blood.
One thing I found interesting was that there was an M1A1 Bazooka in use as part of the mission Objective XYZ, which means that this existed in the engine for Earned in Blood but they just chose not to use it. That’s a really bizarre stylistic choice by the devs, but it’s good to see it in this game.
Session 2: Foucarville Blockade to Dead Man’s Corner
Time: 1hr 02m (1hr 44m)
Maybe it’s the COVID-19 lockdown meaning I have nothing to do, but I decided that I should play another session of Road to Hill 30 as I wanted to make some more inroads and perhaps even complete the first chapter of the game.
The mission Rommel’s Asparagus had a really annoying repetitive task of blowing up these wooden poles used to stop gliders… but there were a tonne of them and enemies kept respawning. The cool part of this though was that once you had removed all the poles a glider came down but holy heck was the animation sped up a lot on these, the gliders just instantly appear and crash land into the field.
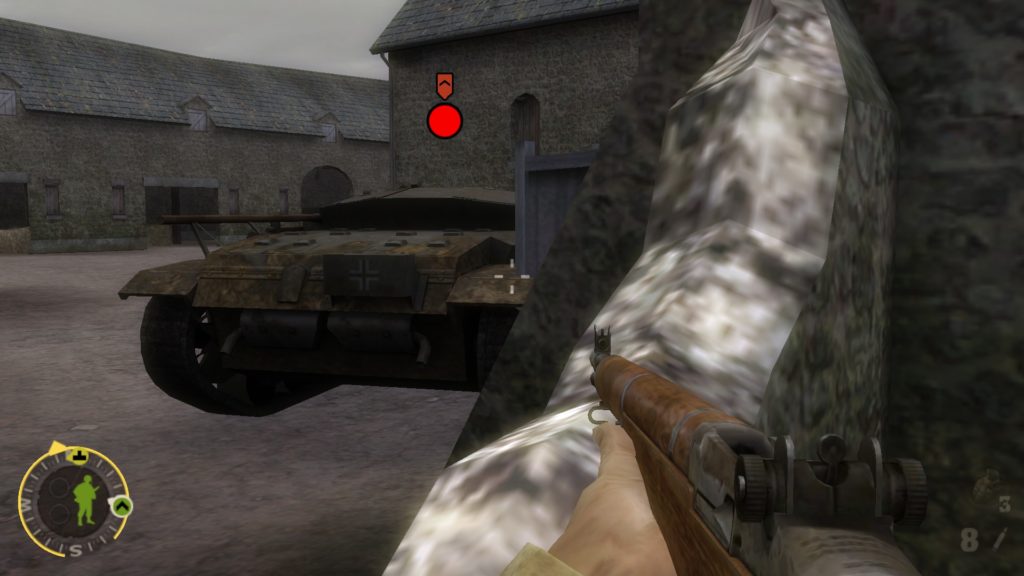
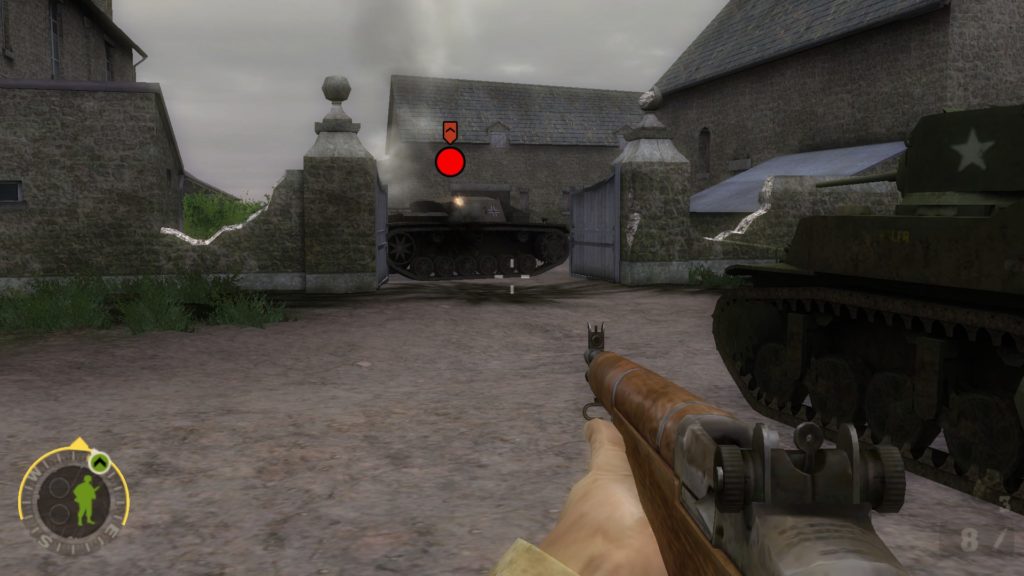
I had my first hilarious glitch in Action at Vierville when the enemy tank got totally stuck in a gate and therefore this supposedly epic sequence where you have to distract the enemy tank whilst yours kills it ended up being me watching a Stug stuck in a gate whilst our Stuart just kept firing into its side. Perhaps not quite the action sequence the developers had in mind at the time.
The unfortunate German tank crew…
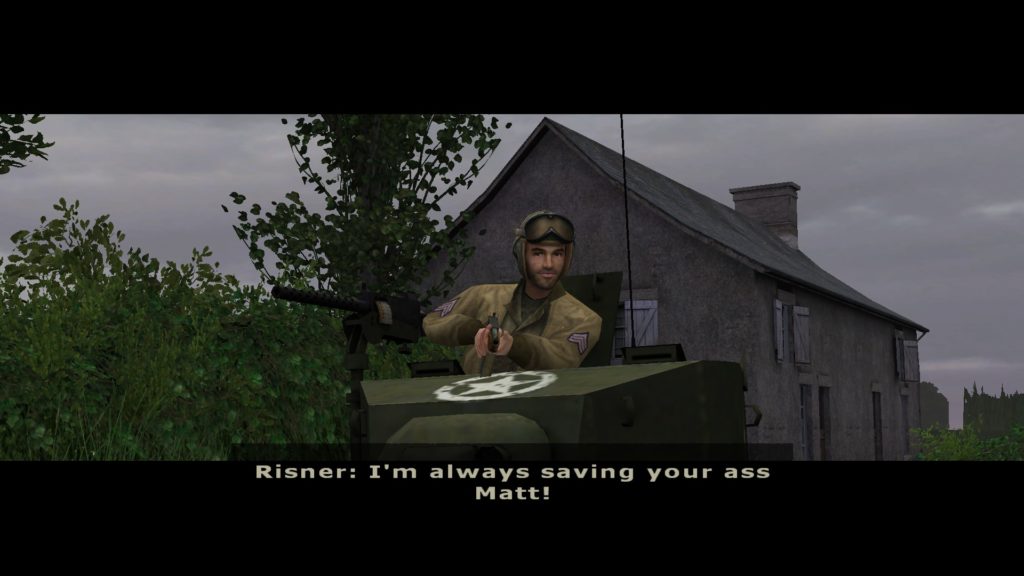
I must admit, I found the tank gameplay in Dead Man’s Corner to be really fun. I felt that in this game they did a lot better job of showing how the tank should be an infantry support vehicle unlike Earned in Blood. I know I keep making comparisons, but that game is just fresh on my mind. I was absolutely gutted when the tank is destroyed on Dead Man’s Corner.
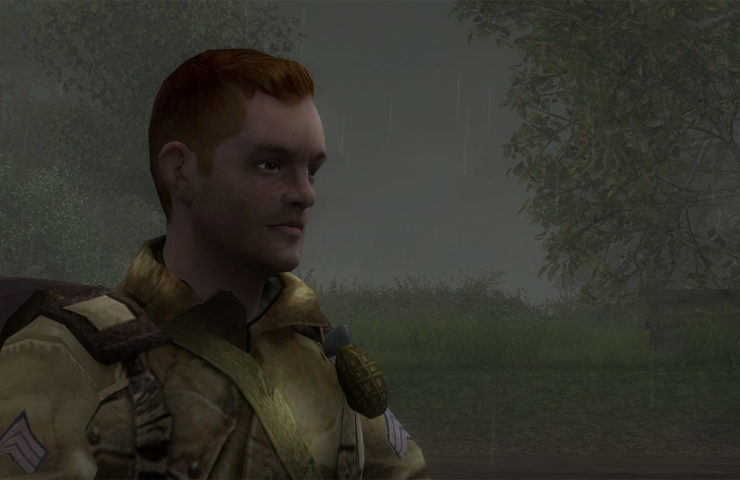
Risner’s time in the game was short, but a really cool character
Session 3: The Crack of Dawn to Alternative Route
Time: 59m (2hr 43m)
So after a little break from the game, I decided that it was actually time to come back and today (4 May 2020) I set myself a target of completing at least 3 but hopefully 4 missions in order to get this campaign moving along. I can now say that I managed to achieve that and honestly I was enjoying the first three missions so much I probably could have gone further. Some great visuals in these missions too as the time of day moved on.
This was supposed to be a plane crash… imagination required
The defence of the house in Crack of Dawn was a favourite for me and it felt good to be playing this game again. Perhaps my playthrough of Men of War: Red Tide had just gotten so stressful that it was just nice to something that had… wait I was about to say decent controls… have I now just come to accept this level of controls as “good”? Jesus.
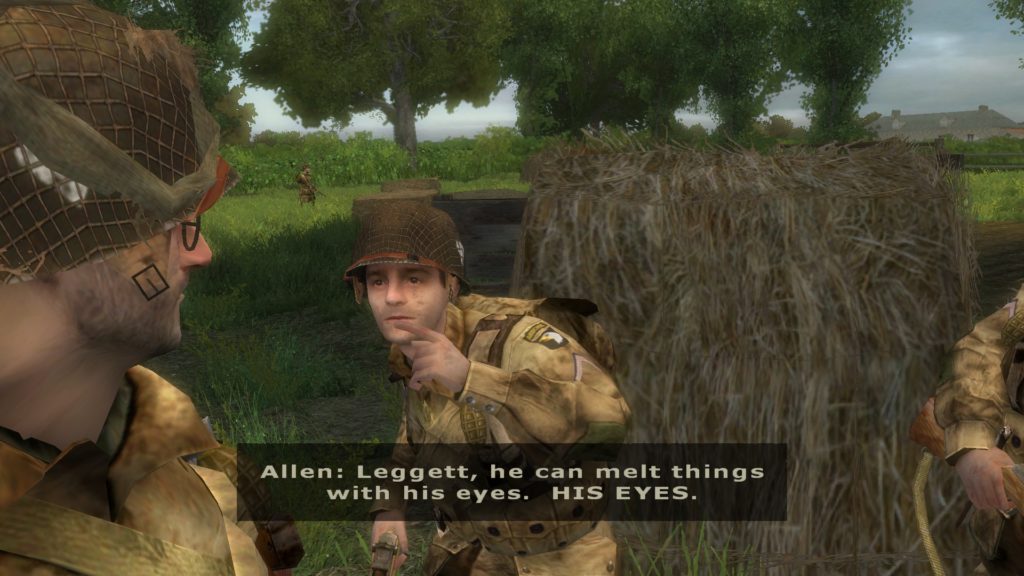
Allen gets serious in the Superman vs Batman debate
It wasn’t all good through. In The Fall of St. Come, my Assault Team was immediately killed (literally 2 seconds into the mission) by enemy mortars striking random locations. Whilst taking the farm was good in Buying the Farm, the attack on the mortar team was kinda dull and the game just keeps throwing tanks in there to add a sense of difficulty.
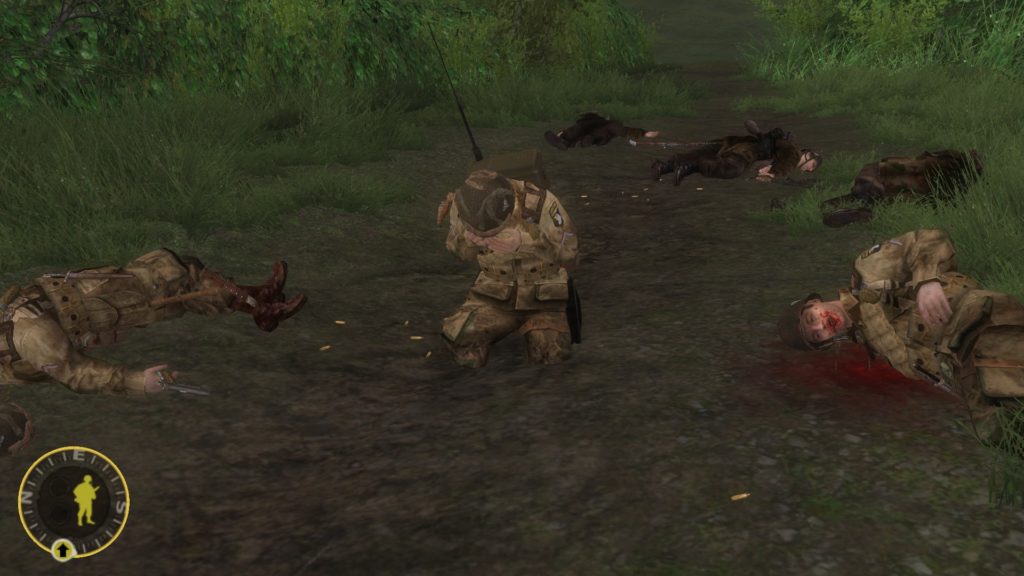
Alternative Route was why I stopped this session where I did. The mission didn’t feel as fun or polished as the others and the challenge at the end of the mission just seemed so artificial. Like, how did Baker and squad get back across the river when there was a tank and two enemy squads that just showed up? Just seemed like we went from the somber low of Leggett losing two of our squad to suddenly and almost immediately getting stuck into an action sequence. I know it’s not a story driven game but like come on folks.
By far the saddest part so far, poor Leggett
Session 4: Purple Heart Lane to Push into Carentan
Time: 1hr 43m (4hr 26m)
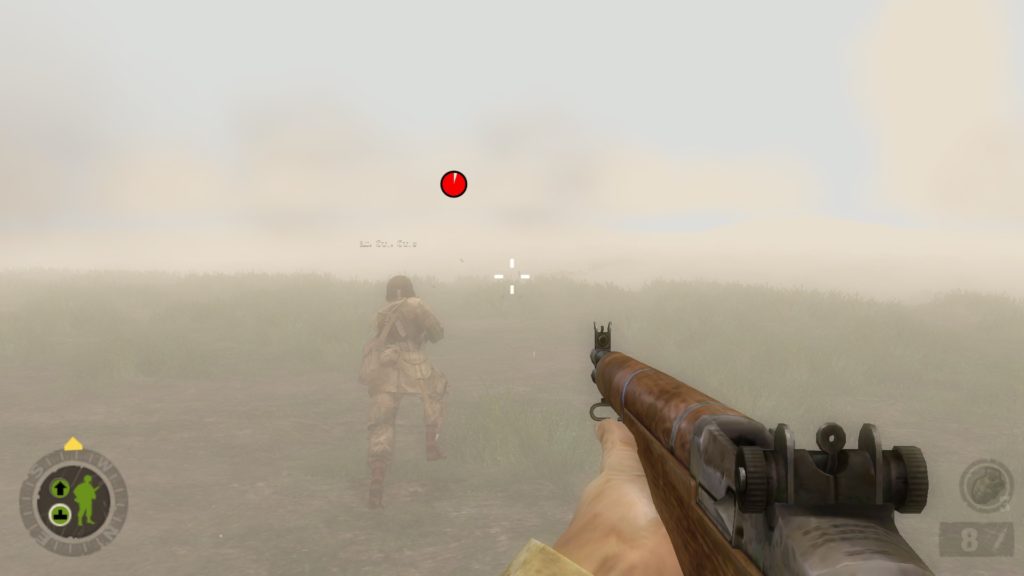
So the goal of this session was to finish the game, especially as it has been so enjoyable so far and I was starting to forget why I got stressed out initially and gave up with this game. Cole’s charge was actually very fun, charging at the Germans through the smoke and trying to command the squad when you can’t see further than the end of your nose is pretty cool.
Cole’s charge used a smoke filter, but doesn’t look too awful for a 2005 game
Ripe Pickings was also a fun mission with attacking the house and retrieving another US Army soldier (Lt. Coles). I must say though I’m padding this with positivity because I know what’s coming… Push into Carentan.
This mission has been my least favourite part of the entire playthrough and it is the reason I didn’t finish the game in this section. The combat is urban and incredibly close quarters. Which is okay but with clunky controls and peabrained AIs, this meant that I had to try a number of times and rely on the RNG to help me win. Also, the checkpoints are way too far apart on this level. For instance, destroying tank one and two is not sufficient to get to a checkpoint and you have to kill three infantrymen, sounds easy, right?
Tank down… for the 5th time…
Well no. The AI are allowed through a glitch to shoot through their cover and so they basically never come out of it and the way that you issue commands means it’s really difficult to tell a squad to get behind the Opel Blitz involves peeking out and certain death. That’s not the worst part of this mission though. That special place in hell is reserved exclusively for the warehouse part of the mission.
Lots of enemies again in close quarters but an MG position that you cannot reach from building 1. The problem is that the game is trying to force you to do a particular action, but doesn’t make this clear. Going behind the boxes and suppressing the MG42 (which is how the game has taught you to act so far) results in an instant death if trying to access the building, regardless of health or if the MG42 is even shooting.
The worst enemy in the game
You have to crouch underneath the above opening and sneak past, even though your character model would be in perfect range and position to get scalped by the machine gunner. I honestly had to look up a guide just to be able to complete this part because it didn’t seem right. Once you complete this you have to fight through the warehouse and Mac yet again tells you that you’re God’s gift. (Love you really Mac). I’d say in all honesty this one part of this one mission added about 40 minutes to my total play time and makes me seriously worry about the remainder of this game.
Session 5: Tom & Jerry to No Better Spot to Die
Time: 46m (5hr 13m)
Firstly, I cannot believe that I have actually finished this game. When I sat down to start this session I had allotted two hours in order to get through the final two missions as I just remember that somewhere in there was the part I absolutely could not beat. Tom & Jerry is one of the best missions in the game, an excellent defence where you’ve actually got access to a Bazooka (no more running around for Panzerfausts like a headless chicken).
Now, I still have many complaints to make about No Better Spot to Die. So let’s dig into that. I’m already bored of seeing the classic getting hit by an explosive and knocked out to build drama thing. I even complained about this at the end of Earned in Blood but it’s hilarious that they managed to do the exact same thing TWICE in two games in part 1 of the final mission both times.
My two tanks try their best to get back home to complete the game.
That’s a rubbish complaint though. My actual moans about this mission come from one particular set piece, where Sgt. Baker has to run through a hedgerow filled with about at least 8 German infantry and 2 Pz.IV tanks with no AT weapons or grenades. It’s frustrating if you don’t know the exact sequence that works well. Literally any other path or mishap on timing and you will be dead. I died many times trying to get through this teeny bit. The ending is kind of epic though, so perhaps it was worth it. I really want to thank the YouTube user Sascha Wo for this guide on how to get through the last part of this mission.
Had to add this in because of Mac’s face!
So there it is, the end of Road to Hill 30. Honestly, I am really happy with the time to beat on this one. I think that having just played Earned in Blood helped a lot with the timing, mainly because I didn’t have to worry so much about the janky controls or AI because I was already used to it. That was even slightly emotional, like this game defeated me once before but I came back stronger than ever and finally beat it!
Game completed in 5 hours and 13 minutes, check out my entry on HowLongToBeat HERE!
Review:
Score: 7/10
I really wanted to give this an 8, I so badly did. But I think it would be unfair as almost all of the things that plagued Earned in Blood are still criticisms here.
If you’re used to modern shooters, the shooting mechanics and general clunky UI and controls will probably feel a little rough around the edges compared to newer games. However, Brothers in Arms: Road to Hill 30 is a classic and I genuinely enjoyed playing through this game (twice!). If you’re a fan of WW2, there are also lots of cool little extras you can unlock by completing the missions that focus on the creation of the game and the actual battles around Carentan.
I’ll admit, there were some moments in this game that were infuriating (hello warehouse and tank parts in the final two missions) but there were also some incredibly good set pieces. Once you get your head around the game’s basic premise of suppress, flank, kill it actually becomes quite satisfying to have your squads take out enemies whilst you command a semi-front line position.
In all honesty as well, I preferred this to Earned in Blood. The campaign relied a lot less on Panzerfausts being randomly strewn all over the place to defeat tanks (you actually get a M1 Bazooka in one mission, woah). The story that underpins it all is also something that keeps you in and something that feeds into later games. Sgt. Matt Baker is a likeable character and I think that most folks will be able to relate to him as you go through the game and he begins to struggle with the experience of war.
I absolutely adore this game and have at the time of posting this spent 113 hours playing this game (and its DLC Rising Storm) on Steam. I actually purchased this game at a GAME Retail store very close to the original release. In fact I even have the illusive in B4 Reset achievement on Steam for playing this game during its chaotic launch and being around for when they reset everyone back to level 1.
I’m going to be playing through the single player missions on ‘Hero’ difficulty in order to give myself a challenge. This only covers the Eastern Front campaign as Rising Storm never had a single player element.
The main menu music for Red Orchestra 2: Heroes of Stalingrad
Playthrough:
Session 1: First three chapters of the German Campaign
Time: 1hr 16m
So I remember completing the basic training mission of Red Orchestra 2 on a laptop that could honestly barely run the game. To the point where the targets in the distance didn’t even render and I just had to guess where they were until the game let me progress. This time it was amazing to actually play the training in full HD and honestly great to be reminded of some of the basic controls that you kind of forget in multiplayer (i.e. pressing ‘6’ to change the barrel on an MG or to use the iron sights on a sniper)
Basic training takes place in an eerily empty field.
Spartanovka is our first mission in the campaign. The lack of cover in this mission makes taking the housing blocks fairly long. Although after my previous playthrough of Brothers in Arms: Earned in Blood, I am relieved to be back to modern shooting controls. One thing that was odd about this mission was that there were so many of the marksman class in the squad. Why would you need so many snipers to seize a small village in close combat? Also, the AI kept getting stuck in the first trench, which kind of drew out the mission a little bit.
I did however forget to record my result, but it wasn’t a great performance with more Germans being lost than Soviets in the end. I only thought of screenshotting the end screen once I got to the second mission.
The mission brief for Spartanovka.
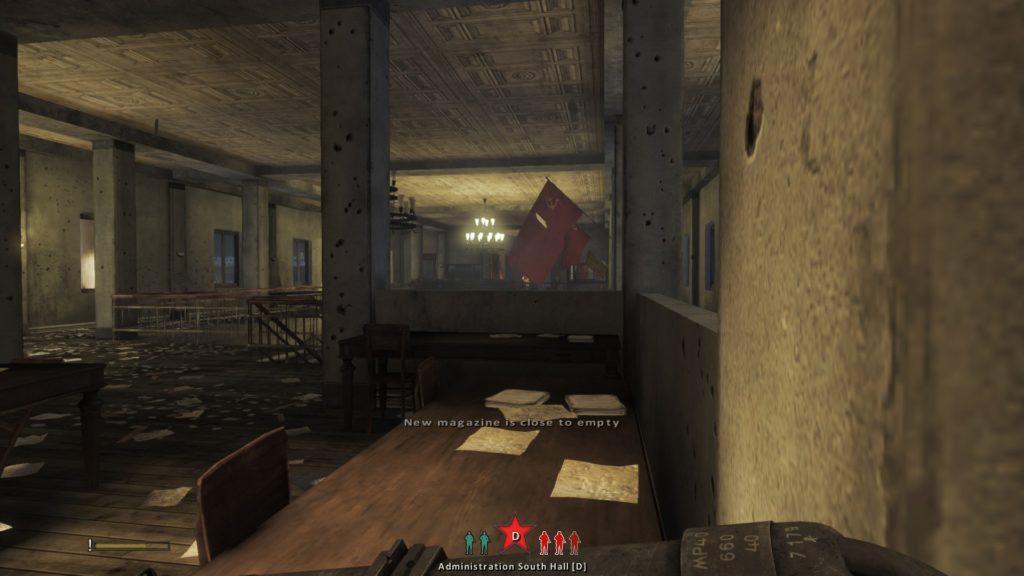
Red Barracks was a totally different feel and this reminded me why I love Red Orchestra 2 so much. It genuinely felt like we were fighting for every inch of this map. The combat (particularly around objectives B and C) felt like room to room combat and flowed so much better than the sparse openness of Spartanovka. I also got through the mission much quicker this time, which I will put down to the game letting me use the MP40.
The combat in Red Barracks is much more close quarters than Spartanovka.
The mission brief and my completion status for Red Barracks.
We then head off to complete some Squad Leader training. Honestly I had forgotten from playing multiplayer that the ‘F’ menu existed, which allows you to give fire teams specific location commands. This training took about three minutes, two of which were waiting for the artillery to hit the small house at the end to the point where the game was satisfied.
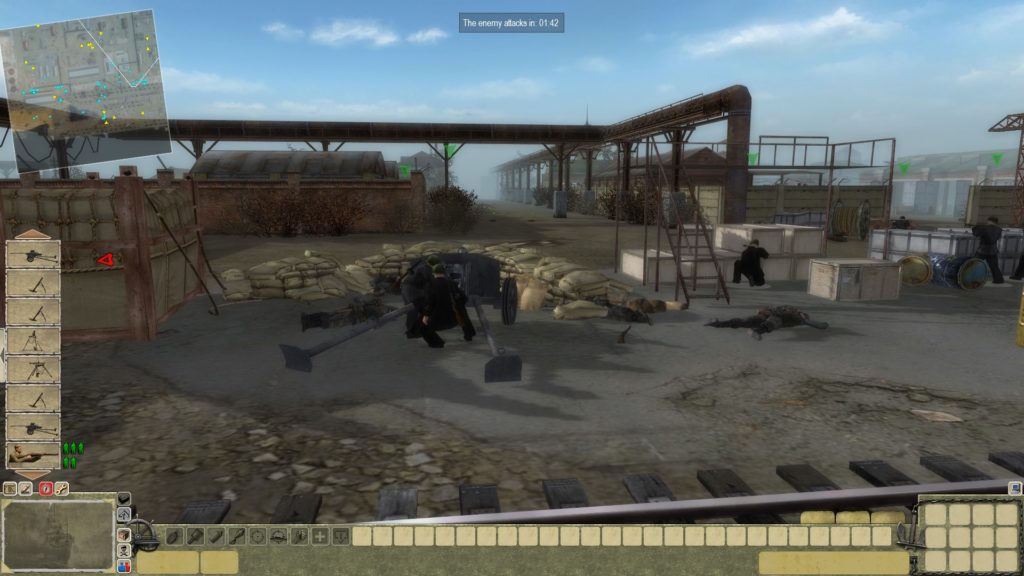
Station One is the next mission that the game introduces and this takes place at a heavily bombarded railyard. This was also the site of my first checkpoint load as my squad was lower on manpower than I had anticipated and I poked my head out at the worst possible time. Not much to say on this mission, but I have noticed the Soviet troops are spawning with MP40s, which doesn’t make any sense.
The mission brief and completion status for Railyard.
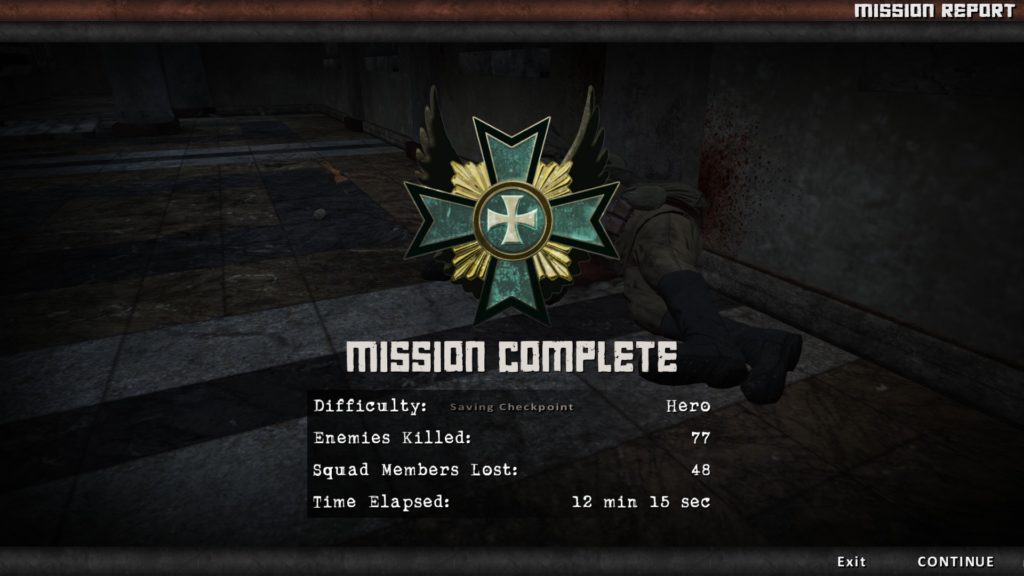
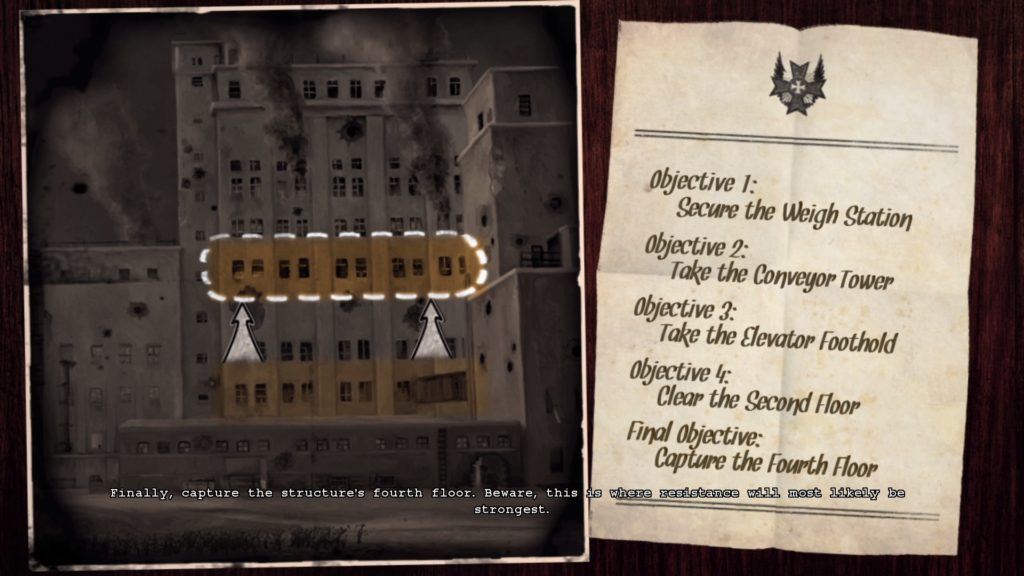
Grain Elevator is our next mission and this is a level in multiplayer which is notoriously scrappy due to the close quarters. I’m not quite sure the AI was done properly for this map as fighting for the first objective felt great and built on that room to room combat, but every objective after that had fewer and fewer enemies until we reached the 4th floor and only one Soviet soldier was there. I think the AI struggled with the building having multiple floors and there being different staircases to get there.
The mission briefing and the completion status for Grain Elevator.
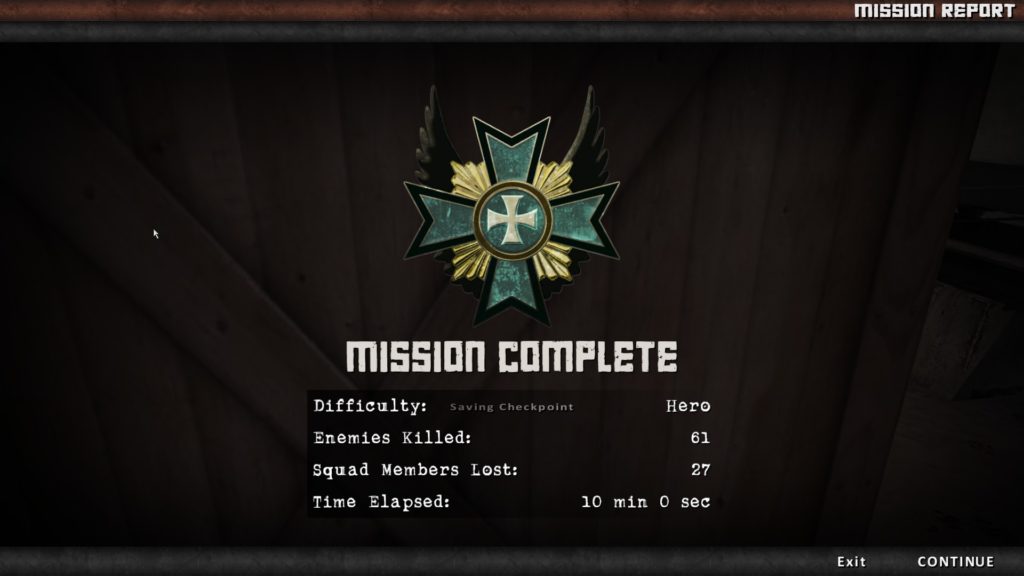
Then suddenly we find ourselves back in familiar territory with Spartanovka (Defence). I was genuinely scared for a defensive mission, considering the multiplayer AI tends to go into any cover it can find (even if that means facing the wrong way and providing basically zero actual defence). I was pleasantly surprised however that using the ‘F’ menu I was able to get people to face the correct way and we managed to defend without even losing the church! That’s one of the two flawless defences needed for the achievement 😀
Mission briefing and completion status for Spartanovka (Defence)
Session 2: Completing the German Campaign
Time: 1hr 56m (3hr 12m)
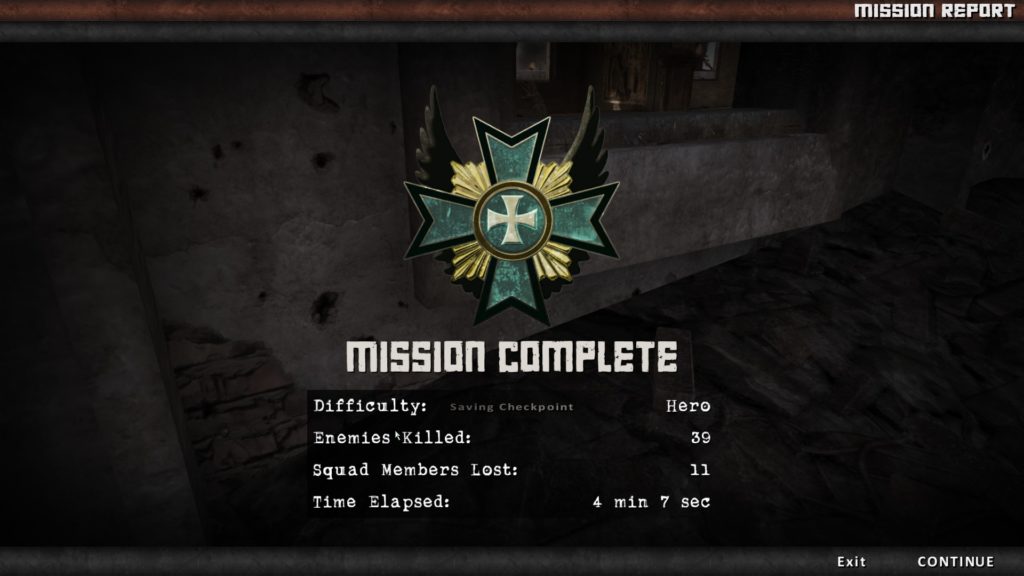
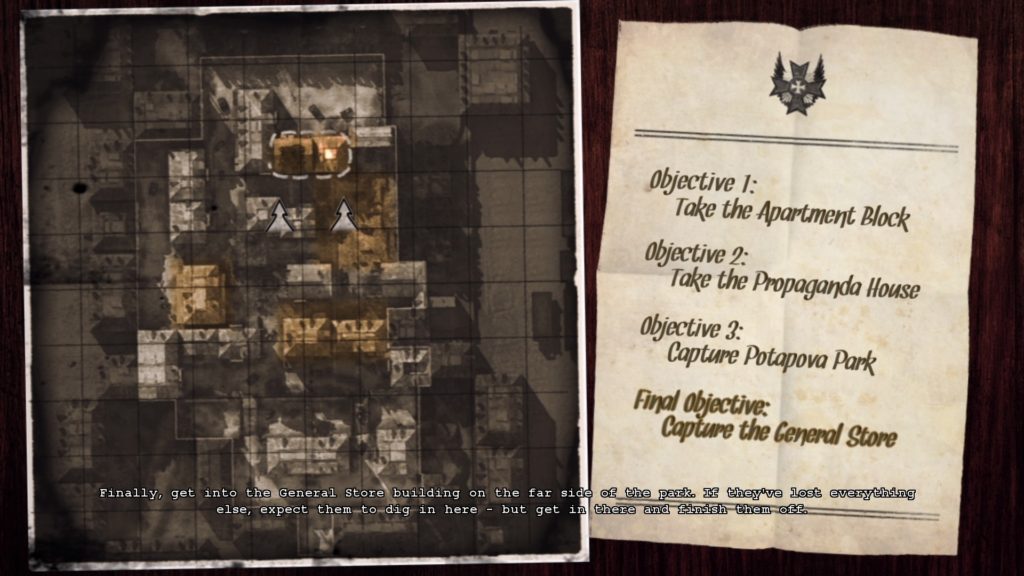
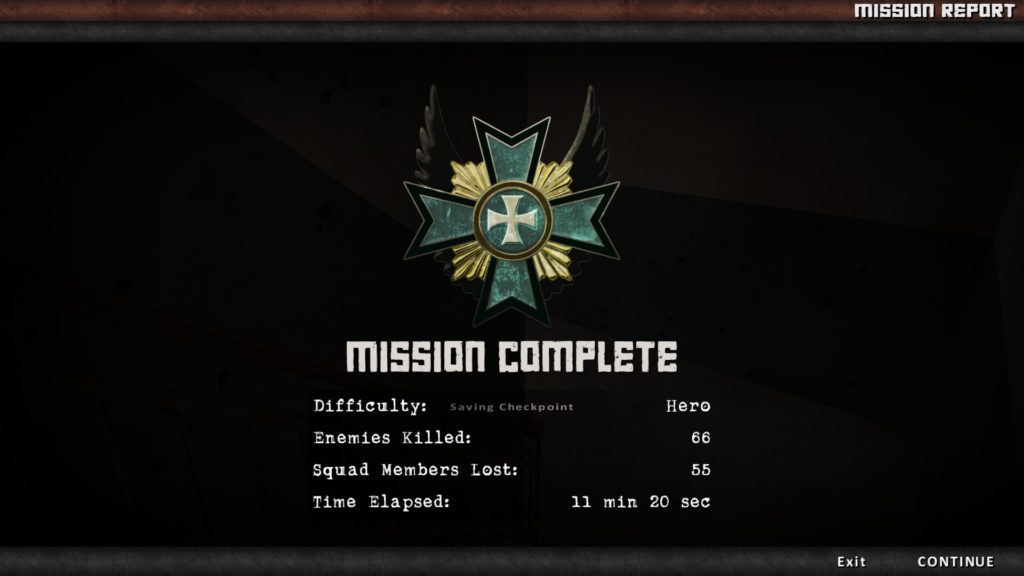
Back to business after a short break, this time on one of the most notorious maps in the game… Apartments. This is a very close quarters map and honestly the initial getting across the bridge stage is the hardest part, after that it almost inevitably just tumbles. I was helped to a super quick finish on this map by the fact that C & D were captured almost back to back with no stoppage as all Soviet soldiers were dead.
The mission briefing and my results from Apartments (attack)
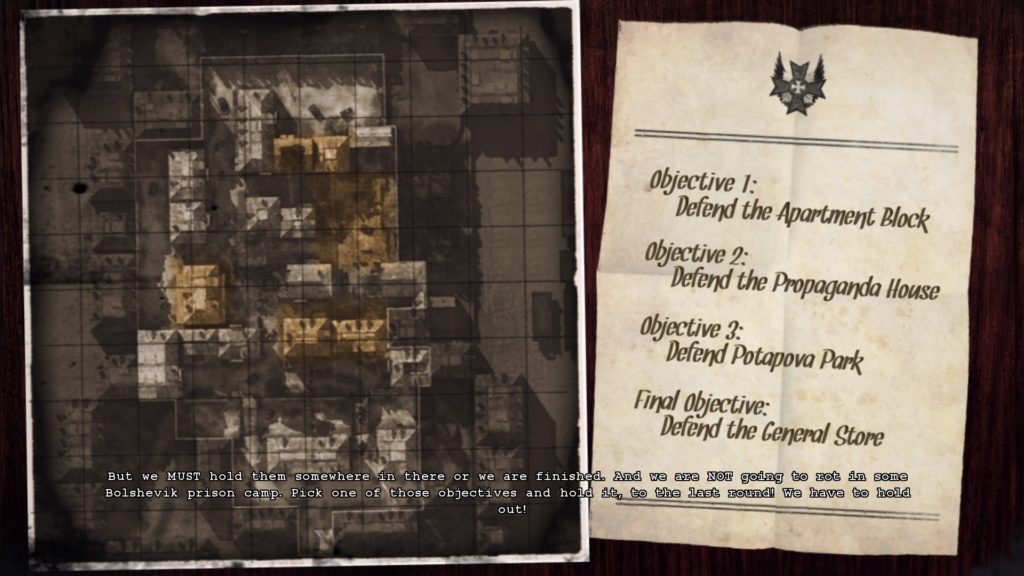
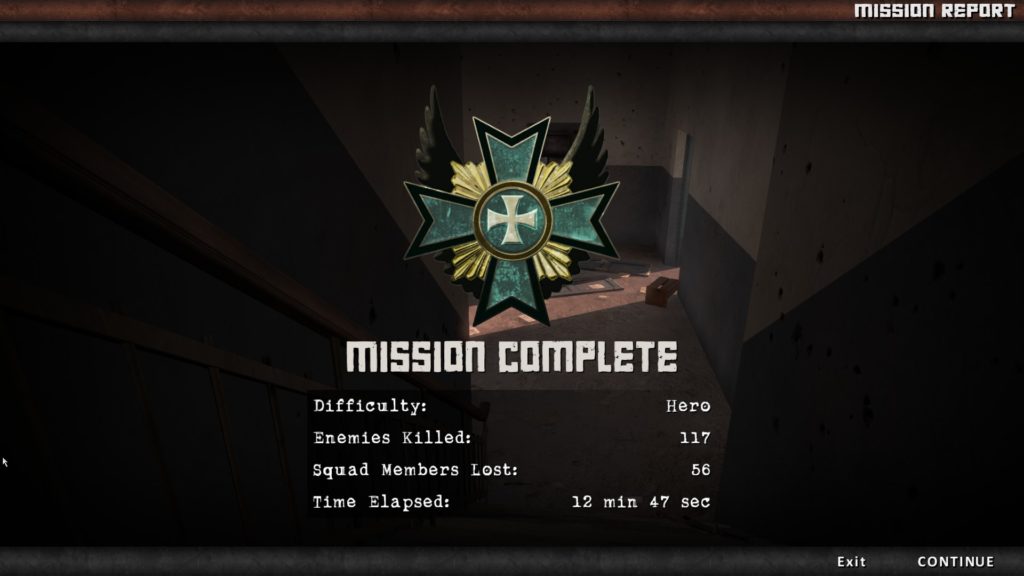
Then once you’ve completed the previous mission, the game decides that you now need some practice at defending, therefore the next mission is Apartments (Defence). Now I had lots of oddities happen here. On one playthrough I lose A & B and the game decided to totally skip Portapova Park and put me on defending D. I don’t actually think it’s possible on Hero to defend A unless you are on an MG and kicking some serious arse. The AI randomly kept spawning at the wrong location too. So for instance I was defending C and the AI on my side was spawning at A making this really challenging.
The mission briefing and my results for Apartments (Defence)
You then have some training on anti-tank operations, but this kind of also acts as Engineer training as the game is teaching you that you can also blow holes in the walls to gain additional entry points to an objective.
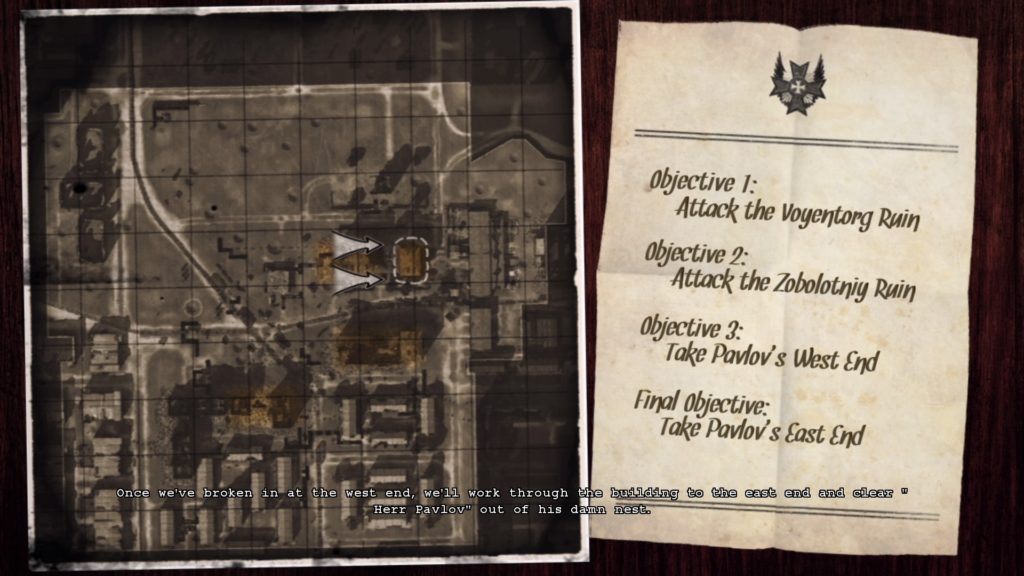
Then you put this to use in the Pavlov’s House (9th January Square) where in the end a tank immediately blew up 10 of the 12 members of my team and the resulting anti-tank gunner had no chance. Okay so let’s try again and walk around the building, completely ignoring the enemy tank… oh wait that actually worked. Yeah, so the tank is very easy to avoid on this one and you can pretty easily make this battle a straightforward infantry fight. Although, spawning as an anti-tank rifleman when you are attacking in close quarters is an interesting experience.
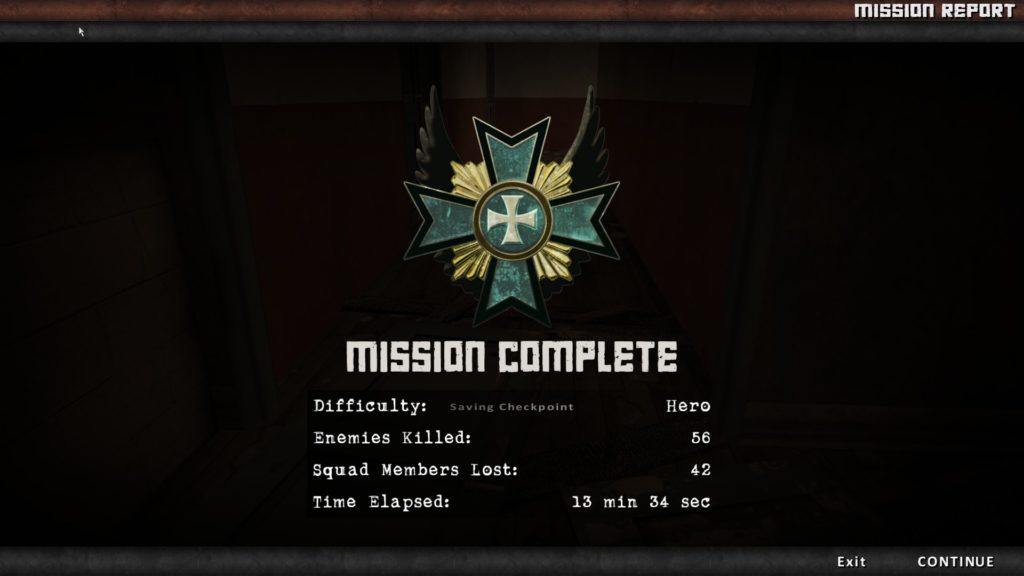
The mission briefing and my results for Pavlov’s House
Then the game sends you back into training again (boy am I racking up achievements through playing this). This time you learn about my absolute hands down least favourite part of this game: tank warfare. The tank play in this game is clunky and really didn’t seem all that necessary in order to make this a good game. People liked this from the original Red Orchestra: Ostfront game however so I can see why it stayed.
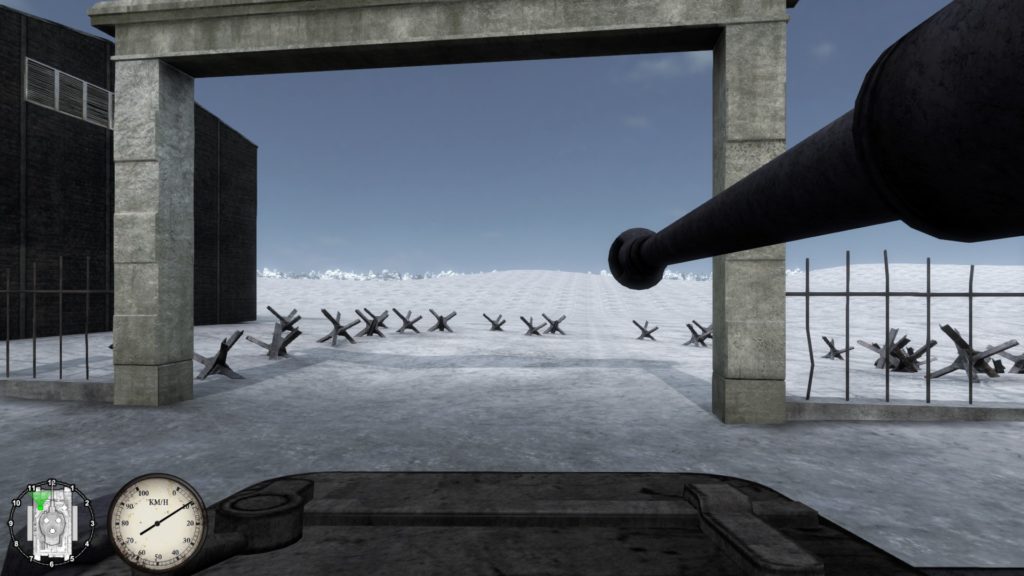
That’s quite a big gun you have there…
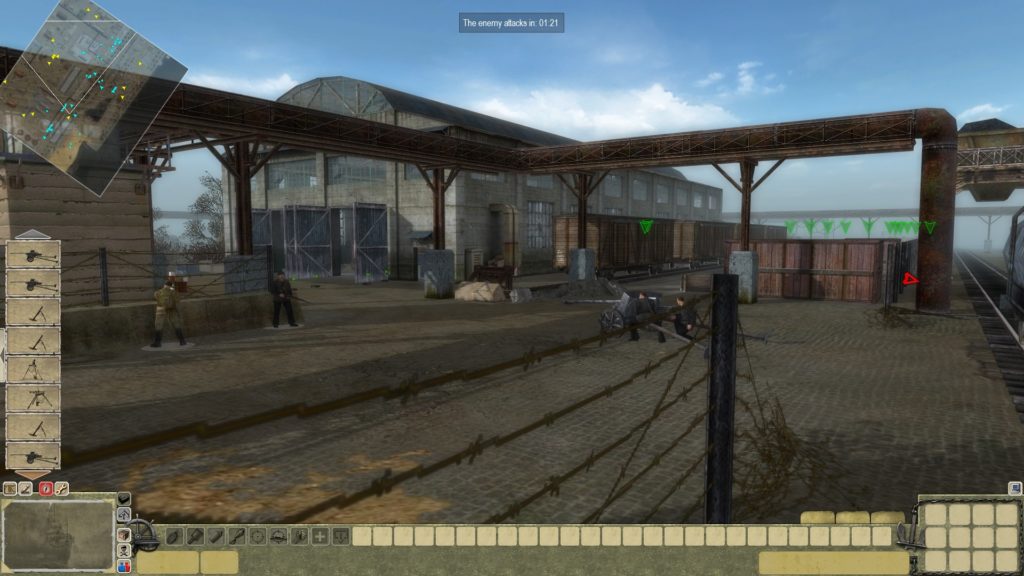
The next mission takes us to the Barrikady Gun Factory where you are tasked with driving a tank in order to support an infantry assault. Now two things about this mission: Firstly the enemy AI is totally broken for the tanks as they just kind of come at you and don’t even shoot most of the time. Secondly, the friendly AI is so incompetent at actually advancing and taking the objective, so be prepared to have to move in sometimes and get the tank itself on the objective.
Something doesn’t quite seem right here.
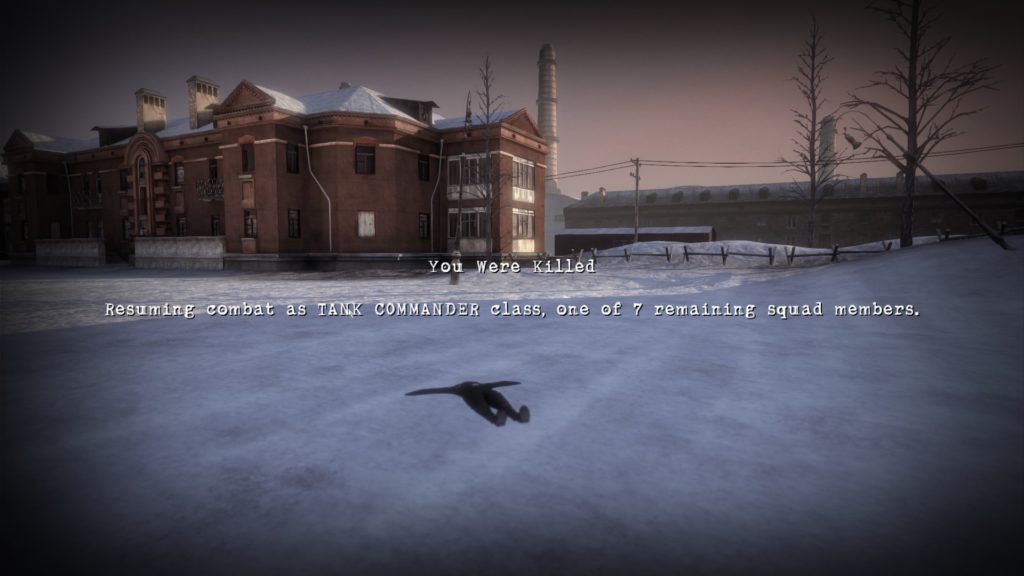
I did however have an amazing glitch happen to me on this map. I spawned as a Tank Commander, but we had no tanks left. So I was someone who was lying down and could not use weapons at all. This did however enable me to advance to the final objective with the infantry and end up capturing it, which for me was a massive bonus as I hate the tank gameplay.
The mission briefing and my results for the Barrikady Gun Factory (Attack)
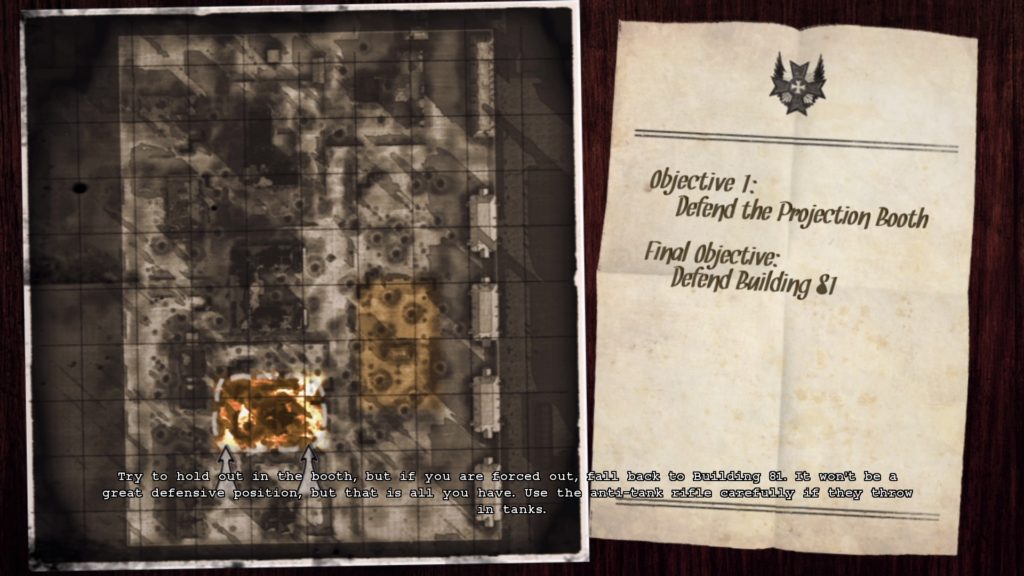
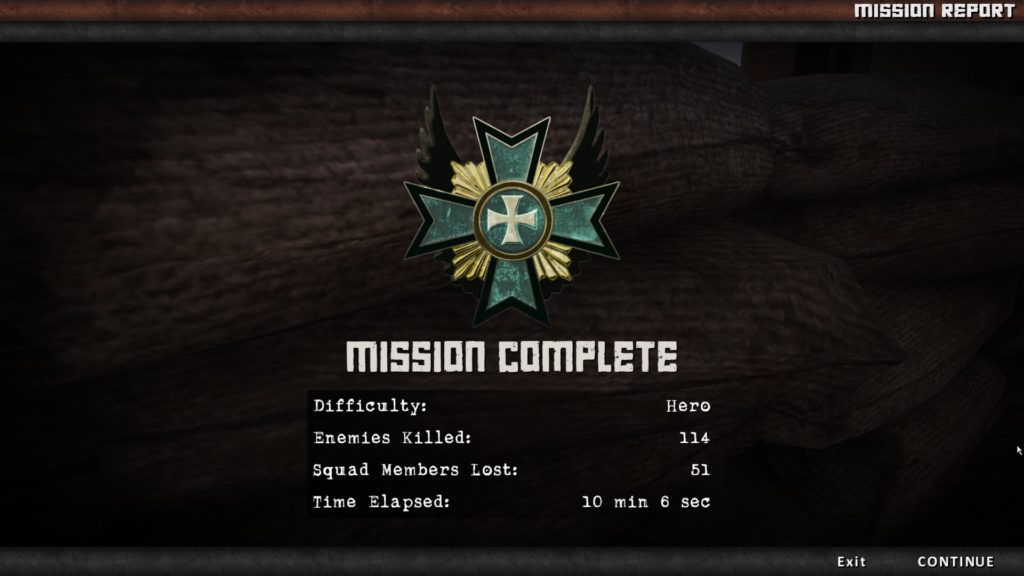
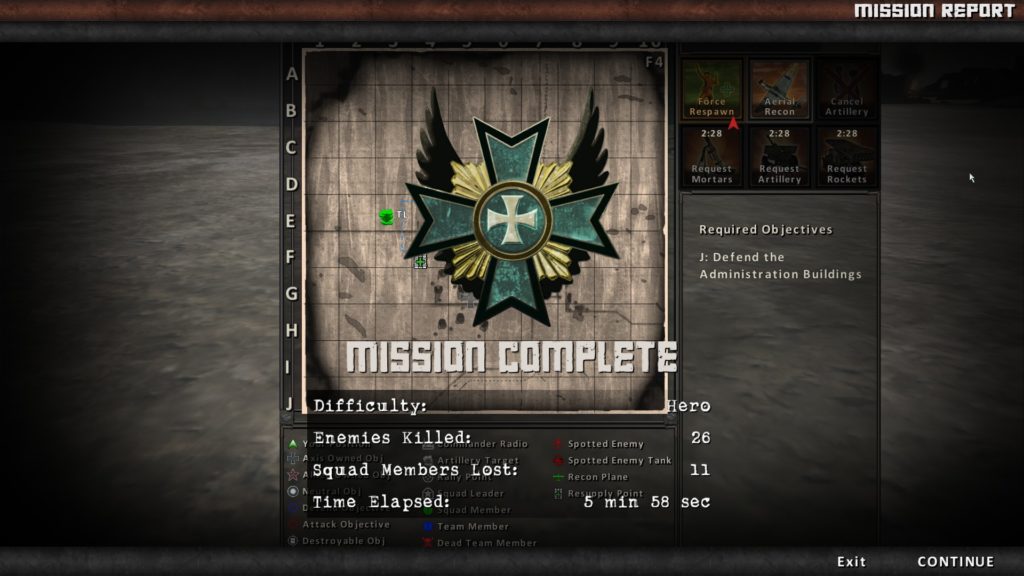
Now the game moves onto something a bit different. It’s a defensive mission, but actually a good one this time! You’re defending the Commissar’s House but in actual fact the line of defence takes place at objective A, which is a small building off of the main part of the map. The way I managed to beat this was by forcing the AI downstairs and then defending from the upstairs of the building with my scoped Gewehr 43. I did actually have an interesting moment where I totally ran out of ammo so had to run to a resupply and then fight my way back up the stairs in order to keep the Soviets from capturing the objective.
The mission briefing and my results for this mission.
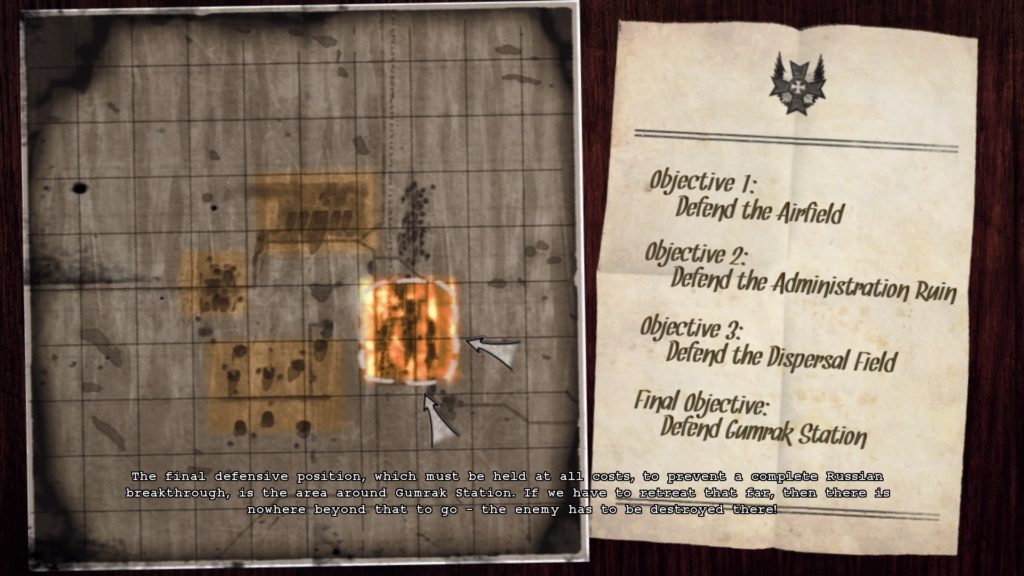
So after the high of a pretty interesting mission, we then come to my personal low point of the entire game… the Battle of Gumrak. This is a tank mission where there are hordes of enemy tanks coming at you in pretty open areas (the first objective is an airfield for instance). It was just not my cup of tea, but I managed to beat it losing only one objective and this was mainly because I worked out I could call in a rocket strike and the enemy AI couldn’t work out how to get past the burning shells of T-34s left on the battlefield.
The mission briefing and my results for Gumrak
Then comes another training course (and the final achievement for completing training which then gives you another achievement for completing all of the training). This time it’s about how to play the commander class and this is something I was already familiar with through the multiplayer section of the game, so this was fairly straight forward.
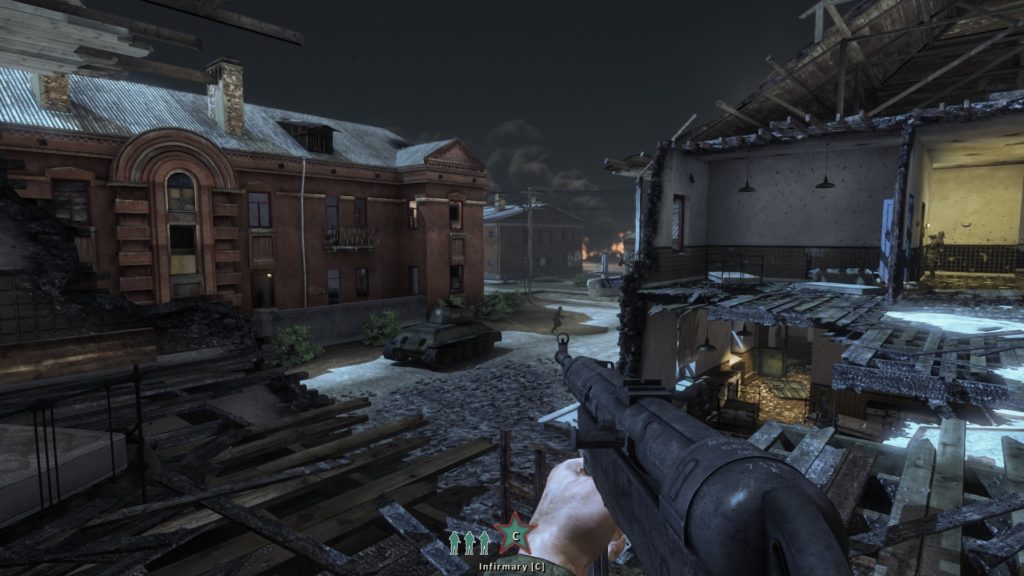
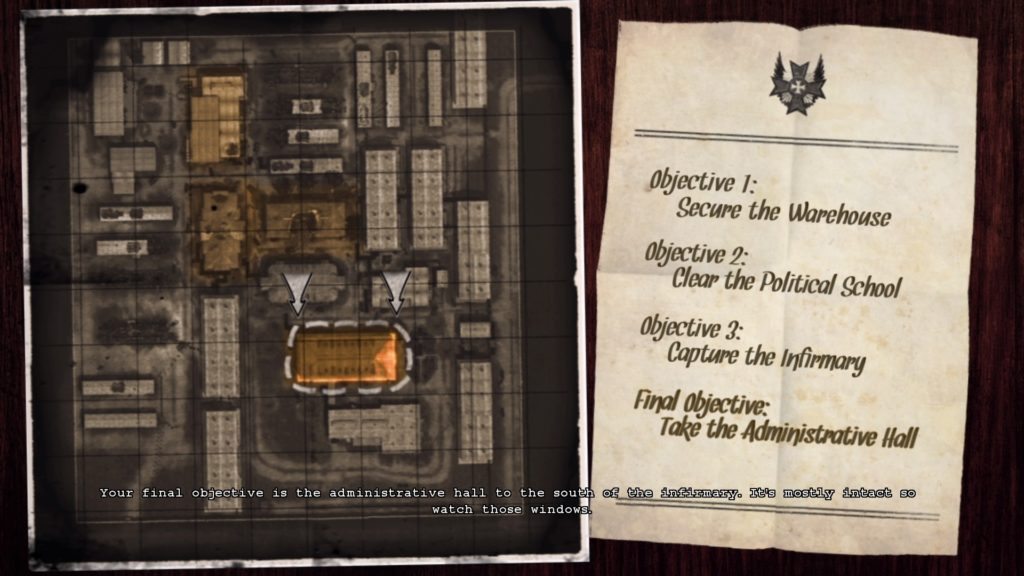
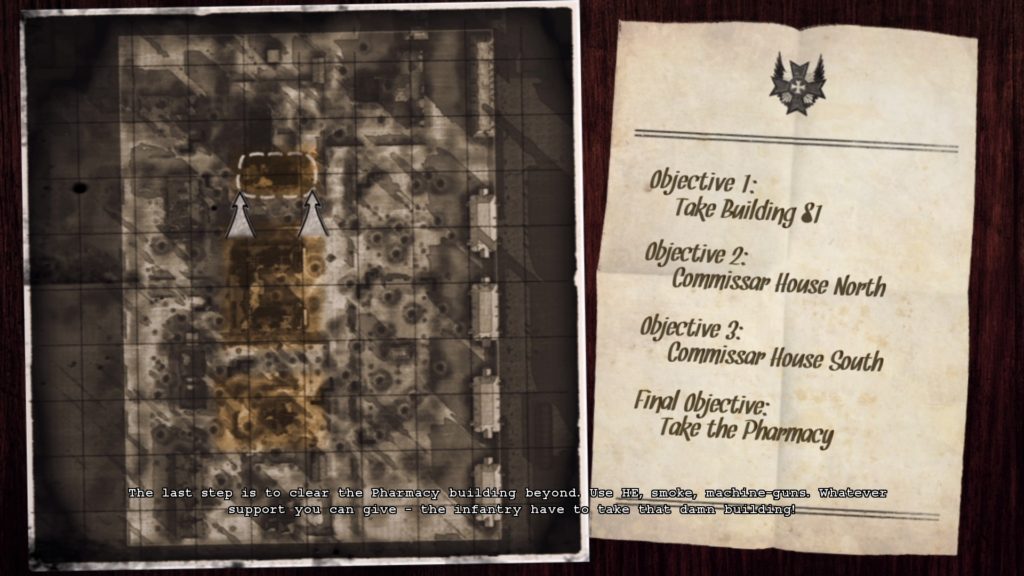
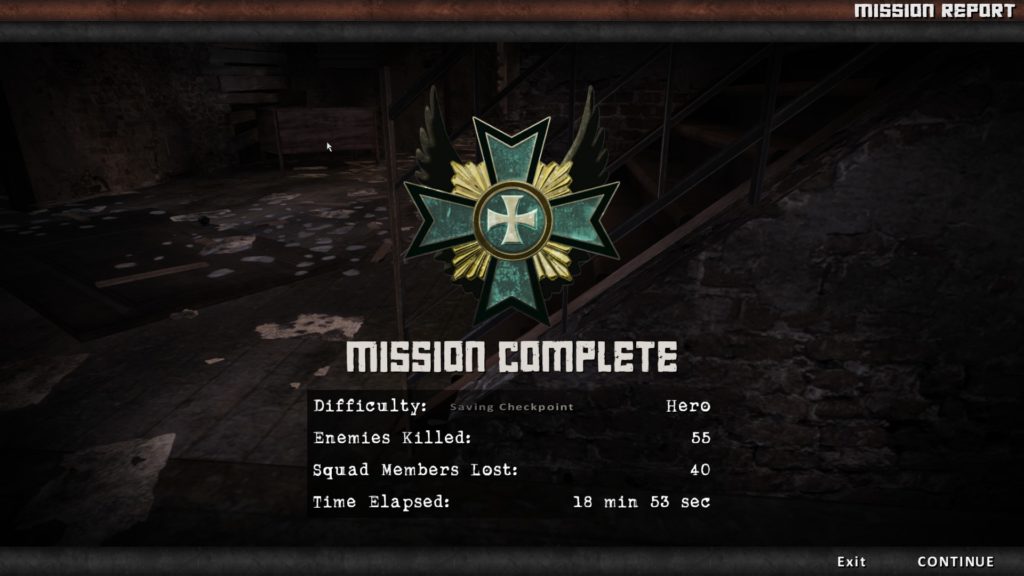
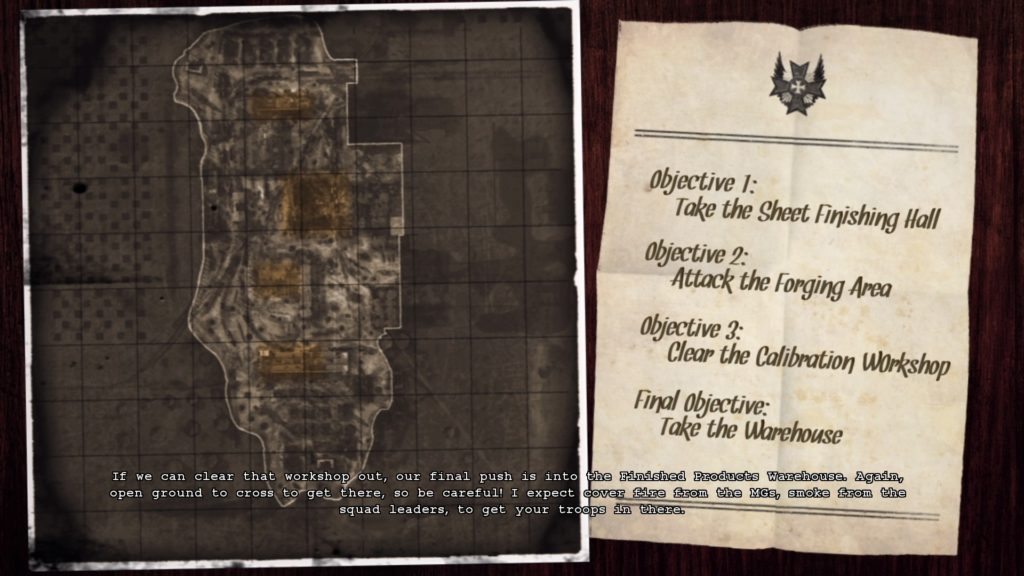
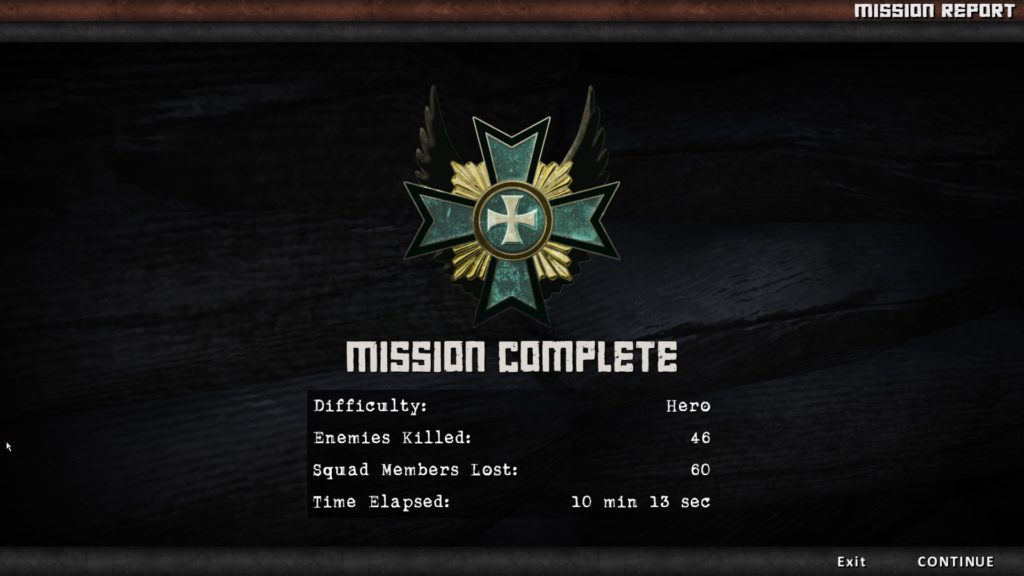
Curiously, whilst you are given the tools to use the radio, the previous training seems misplaced as the final mission Red October Factory does not even let you use most of the stuff you just learned. For instance no recon, no artillery, no rockets. This was actually a good way to end the campaign though as the factory levels are fun to fight on and back to that close range chaos that made the start of the game fun!
The mission briefing and my results for Red October Factory
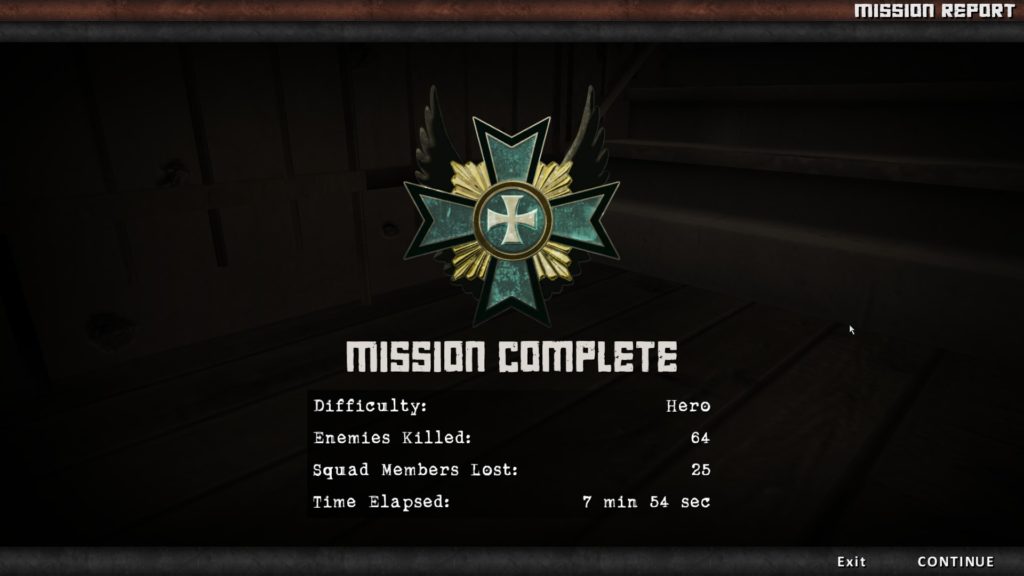
Well, there we have it, the end of the German Campaign on Hero difficulty! I managed to beat the German campaign in 3 hours 12 minutes, which is fairly good in my books with some losses on the Apartments defence meaning that this was over three hours in total. Still, that was enjoyable and I’m very much looking forward to the Soviet campaign.
Victory! Half way through the full campaign now.
Session 3: Soviet Campaign marathon attempt
Time: 3hr 47m (6hr 59m)
So I decided, in hindsight rather stupidly, that I was going to try and complete the entire Soviet campaign in one sitting. Like as if somehow I was going to suddenly enjoy playing games for nearly four hours in one sitting when normally I can just about manage a bit over an hour. I managed to get to the penultimate mission before absolutely giving up and feeling pretty majorly stressed out.
I won’t cover this mission by mission like the German campaign, mainly because the missions are virtually the same, so I feel like I’ve got across the basic areas of the game. However, a key difference is that the Soviet campaign includes none of the training missions as the devs would have expected that you completed this as part of the previous campaign (which is entirely fair).
I have some real issues with the Soviet AI in this game, which seemed to function totally differently from my experience of the German AI in the previous campaign. The key issue is that when you issue a defend command, often times the AI will not actually get onto the point, but rather shoot into the area. This means often that I will be overwhelmed on the point with no-one coming to my side unless you issue a “Follow Me” order, in which case they circle your position like sharks. This made the Railyard mission incredibly challenging (42 minutes on this mission alone).
Pavlov’s House however gave me a different kind of AI cockup. The German AI didn’t spawn a new wave for over two minutes, then suddenly the name of the mission came up and they spawned, but it was way too late to actually attack the point and therefore we held it… mission complete!
Gumrak was my least favourite in the German campaign and again I hated it here. Unlike the German campaign though I couldn’t be quickly done with it as you have to take all of the points. So I spent 32 minutes attacking (again mainly because of questionable AI decisions) but at least I got it done in one go.
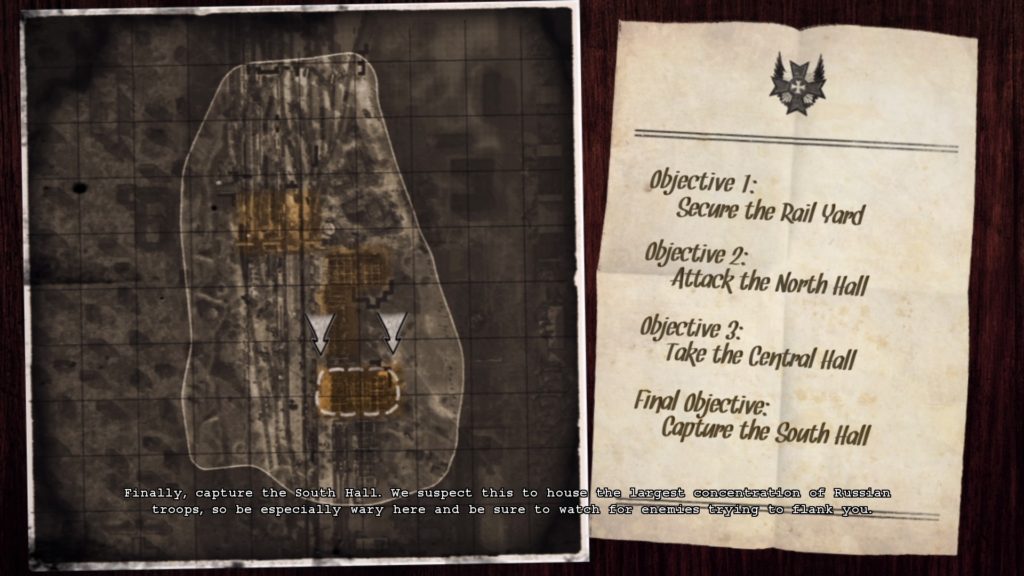
The defence of Red October Factory is where I gave up for this session. I just could not hold the points with the sheer number of Germans attacking. The Soviet AI dies so quickly that you’re basically defending the point by yourself. You start with a Tokarev SVT-40, which works well, but losing that first character can almost guarantee you spawn with a Mosin-Nagant, unable to stop hordes of German attackers. Will give this another real go in the next session as I’m so close and can’t give up now!
Session 3: An epic end to the Soviet Campaign
Time: 43m (7hr 42m)
So in the last session I got the time down to 0 seconds on Red October Factory, but the last remaining AI died, therefore failing the mission at the last possible second. This meant that it restarted me from the next checkpoint but in actual fact upon reloading the game it had actually counted as completing the mission.
So I started with the attack on Red October Factory which was much more fun and the AI genuinely seemed to be way more switched on than the defence (although perhaps that was just me being less tired.
Then the final mission and oh boy was it good! Fallen Fighters (TE-FallenFighters as some may know it) is a map that was really missing from the German campaign and absolutely my favourite. It holds a special place in my heart as my first multiplayer game of Red Orchestra 2 in 2011 was on that map. I still remember it now nine years later defending the Political School building from advancing Soviet troops with my MG34. The Unimag Headquarters is also an incredible objective (and was the last one to capture of the entire game). Super close combat, multiple floors and lots of hiding places for enemy troops! Truly epic!
As I played this on the ‘Hero’ difficulty (which is the hardest on the game) I was able to score 100% of the achievements too and honestly I’m pretty proud of managing to plough through that whole thing without too many issues.
100% of the achievements unlocked!
Some interesting stats are that only 4.2% of players have completed the Soviet campaign at all, which is a little sad. Especially considering that only 9.3% of players have completed the German campaign, which is basically the midpoint. I guess the point of the game is the multiplayer, but I absolutely loved this single player experience and am glad to have beaten it.
Game completed in 7hrs 42mins and you can find my entry on HowLongToBeat HERE!
Review:
Score 8/10
The main show for Red Orchestra 2 is of course its multiplayer and Rising Storm DLC, but the single player is honestly worth a go. This was something that was included originally upon launch as part of the base game but has subsequently been made out into its own thing.
In the campaign you get to play in the German campaign, which includes additional missions that act as training for the different parts of the game, and the Soviet campaign, where you build on what you learnt to face a much tougher enemy. This took me about 7 hrs to complete on the ‘Hero’ difficulty, so there’s about as much gameplay in this campaign as some full games on Steam. Unfortunately there is no single player for Rising Storm (which would have been amazing if it was given the care that the single player for RO2 itself was given).
In terms of the single player itself let’s be clear on something. You will have to carry the team for the vast majority of this as the AI is… lacking. They sometimes (often) get caught on the geometry and therefore are unable to advance. Sometimes their understanding of defend the objective means to stand absolutely nowhere near it and set up their machine gun facing the wrong way. I can however forgive the game for this because the combat (especially where it is so close quarters) is genuinely really fun.
The cutscenes and story are pretty cool if not a little overly stereotypical, but that kind of has some charm. I absolutely love the briefings that the game gives before a mission and think that they really do help you to learn the maps before jumping into them on multiplayer. Overall I really enjoyed this despite the frustrating moments and would highly recommend purchasing Red Orchestra 2 (in order to get this single player part) as well as the Rising Storm DLC.
So around a year ago I started a playthrough of Brothers in Arms: Road to Hill 30. Mainly I did this because I absolutely adored Brothers in Arms: Hell’s Highway on Xbox 360 back when I was in secondary school. I was kind of gutted that I never finished Road to Hill 30, but equally didn’t want to just play through the same game again just yet. In this game you play as Sgt Joe Hartstock (or “Red” as he is called by the others).
It’s a WW2 first person shooter with some tactical elements interlaced in there. According the Steam, I purchased this game on 3 July 2017 and my playthrough started on 19 April 2020, so almost three years after buying it!
The main theme for Brothers in Arms: Earned in Blood
Playthrough:
Session 1: Roses All the Way to Three Patrol Action
Time: 1hr 31m (1hr 31m)
In the first session, I managed to get through the first few missions and my God is this another janky game. Similar to Road to Hill 30, which controlled super poorly. I guess that makes sense considering how close the release date was for both games. I mean in a general sense however, the game supports widescreen and graphically it doesn’t look *too* bad for a game that released in 2005 so I have to give it some credit.
I’m finding that the difficulty setting is basically spot on. I’m finding it challenging but not like impossible. Which probably means that the last mission will feel actually impossible like in Road to Hill 30. Completed up to the end of Three Patrol Action and only ended up losing one solider.
Nothing majorly important to say about the first few missions. Like virtually every WW2 game at the time you start off by getting your weapon and slowly facing more and more enemies. The game also gives you control of the squads at this point, which is kind of the differentiating factor compared to say Medal of Honor.
Session 2: Hell’s Corners
Time: 40m (2hr 11m)
Thought I would sneak in a quick session to end the day as I enjoyed earlier. Man this mission was tough as nails. I lost my whole squad (on multiple loads) through the open field with foxholes. This meant I had to basically fight the entire mission alone, which is difficult when you’ve got a BAR with no ammo and a K98k sniper. The scene on the bridge was horrible, I had to use the unbelievably poor geometry and the AI’s need to poke their heads out of cover every few seconds in order to progress.
The random mortar fire on this map is something that Brothers in Arms: Road to Hill 30 liked to do. It’s a good element as it makes you think, but at the same time it’s frustrating when you lose an entire squad to the roll of a dice. Next mission is a night mission, which should be interesting.
Session 3: Chateau Colombieres
Time: 1hr 04m (3hr 16m)
I took a couple of days break from the game because that last mission really was sucky. I must say however, even though I died an annoyingly high amount of times during Chateau Colombieres, I actually enjoyed this mission. It felt like you had to be a lot more tactical.
Casualty report on this one is not good, lost everyone again (but literally only in the dying seconds) and the tank. Managed to dispatch the enemy tank because it got caught up on some small geometry (not complaining). Honestly though I started to actually understand a lot more about how to play this game about 40m into this session. The need to flank people was always obvious to me, but I now realise how important it is to press ‘V’ and go into the weird look around mode. Honestly I could’ve completed that mission in about 20m if I was doing this properly from the start.
The tactical menu that shows enemy and friendly positions from above
Here’s hoping times improve in the next mission, but good to see the game has somewhat redeemed itself.
Session 4: Bookends to Eviction Notice
Time: 59m (4hr 15m)
So this session started off with a cutscene instead of a mission which honestly helped to catch me up a bit on the story of why Red and Baker don’t get along so well. We also learn in this that Red’s pretty cool scar comes not from the war but from getting glassed by some guy in a bar.
Bloody Gulch started off as a disaster. I accidentally used right click on the wrong squad, forcing my Assault Team to move across the MG42 fire, leading to all three of their deaths. Let me just tell you now that this mission is impossible unless you have two things: speed and two full health squads.
I got pretty good at speedrunning the second part of this before the tanks came and honestly got really lucky on one run where the German AI just kind of ran into my assault squad and the two tanks never actually entered the hedgerows. Baker then (as in Road to Hill 30) swoops in like a white knight. Alas however, the Baker AI didn’t actually shoot any enemies and so me and the squad had to finish them off whilst he sat stuck in the middle of the battlefield… not quite the cinematic ending from Road to Hill 30 lol.
Eviction Notice has notably more built up surroundings than previous missions
Eviction Notice was honestly probably one of the most fun missions so far. Fairly close range, but an actually interesting layout with a small train station and industrial railyard. Made for some interesting combat and honestly the game has become more enjoyable for me with each mission. Maybe it’s because I have worked out how to navigate the incredibly janky shooting mechanics, maybe it’s because I’m now actually using the squads properly… who knows.
Session 5: Close Quarters to Baupte
Time: 1hr 16m (5hr 31m)
So I didn’t count the time for this, but I started the session by looking at the extra little bits of information you unlock for completing missions and honestly this is pretty cool. There’s lots of extras about the making of the game and the actual history of the battles covered. Well worth a read.
An example of the bonus features, this one about the way that the game’s sound environment was created
Close Quarters was actually quite a good mission. There was a really stupid scene where Baker steps in, brings a tank in with him and then suddenly disappears, meaning that Red and his squad have to mop up. At least at the end of the scene he appears with a bottle of wine as a celebration for Red’s promotion.
So then there’s Baupte. Not actually that great of a mission, especially as Friar got stuck in a wall and honestly I struggled to get through the town without totally losing everyone. The game appears to just be throwing tanks into the mix to make it seem like there’s an upstep in the difficulty. It doesn’t really add any atmosphere because the tank gameplay is rubbish. Find panzerfaust, shoot, rinse and repeat 3 or 4 times.
Pvt Friar getting stuck in a wall added to the stress of Baupte
Session 6: Hedgerow Hell to Run of the Mill
Time: 1hr 16m (6hr 47m)
It now appears that I am on the last mission before the final act of the game, I think there are four missions left at this stage. Hyped that I’m potentially going to complete a game here.
Hedgerow Hell wasn’t a terrible mission in all honesty. The gimmick this time was blowing up randomly brown areas of the hedgerow in order to find a way through the battlefield, open up flanks etc. The defence part at the end of this mission was basically impossible for me initially as I only had one solider remaining. However once the game let me revive everyone, this was a really enjoyable defence scene and mission.
When it comes to Run of the Mill, let me simply start by saying that the checkpoints on the section with the FlaK 88’s is diabolical. Massive distance (both actual distance and time wise) and therefore you’ll find yourself making major progress and then being sent back massively, which is really unhelpful and added a lot of time to this session. The second part of the mission for me was made funny by the “sniper” that spawns on the top of the mill. The AI clearly doesn’t trigger soon enough and he is literally just standing on the roof and is the easiest person to kill in the entire mission due to no cover.
The game has stopped using tanks as a way of making everything seem more difficult, now we’ve got Flak 88’s and anti-tank guns (which look a little like Pak 36’s or similar) round literally every corner. God only knows what the two parter final mission is going to be like. So close to completing this game at this stage though, which is exciting as it has been a long slog.
Session 7: The All Americans (Parts 1 & 2)
Time: 51m (7hr 38m)
So here we are, the final set of missions! I’m sad in a way that this is coming to an end, only because the quality of missions has generally been improving throughout (and I’m now actually understanding how to play the game).
The first part of this mission was pretty standard gameplay, although for the scene where there is a tank in a town square, I couldn’t find the Panzerfaust anywhere and the compass kept pointing me towards an area where there was literally… nothing. So instead I ran back across the map to the only other position where I knew that these were stored, which as you can imagine took time. No joke it probably took me 10m just because of this. I probably should have just looked up a guide to be honest!
Walking back to find these Panzerfausts and then seeing the tank finally die was satisfying, but showed the game clearly had some issues with marking objectives.
One thing that struck me as part of this was that there were absolutely no M1A1 Bazookas in the game at all. You’re always reliant on the Germans leaving a box full of Panzerfausts around.
The final mission was genuinely a little disappointing. My entire squad had died pretty early on, so I basically just flanked and killed the remaining soliders myself. The last person died when I only had one magazine and 14 bullets left in my Thompson, with the M1 Garand totally dry. The saddest part of course was Doyle’s death, especially as the way that they did it was that classic watch a cutscene of yourself in an explosion and then get slowly dragged off the screen. That’s basically a Brothers in Arms staple.
RIP pal, you were one of the best characters in this whole game.
But it’s over! I finally finished a Brothers in Arms game and as a result I now have my first completion on HowLongToBeat! I hope you’ve enjoyed reading through my journal of playing this game as much as I have enjoyed writing it 🙂
Game completed in 7 hours and 32 minutes. Find my entry on HowLongToBeat HERE!
Review:
Score: 7/10
I think that it’s important to give this game the benefit of the doubt in that it is old. In 2005 we really didn’t see many shooters with slick controls and so out of fairness I will assess it with that in mind.
The gun play can be absolutely mind numbing at times, mainly due to the way that the aiming swirls around chaotically in a figure of 8 and the actual iron sights themselves are chonky boys which don’t always really show you where you are shooting. The squad based mechanics are also a little stale after a while and I think the game would have benefited greatly at the time if you could issue commands from the ‘V’ menu which provides a better overview of the battlefield.
However, the story makes you genuinely care about the characters and some of the action sequences make it really quite intense. My favourite being the defence sequence in Hedgerow Hell as it really felt like we were finally beginning to tip the scales of the battle ever so slightly. I also have to credit the game for trying to do something different with the combat, even if compared to more modern games it is stiff and cumbersome.
The graphics have held up fairly well too and I really do like that it fully supports modern hardware and widescreen without any required tinkering (at least on my PC). This game is usually super cheap too, so for that reason I would genuinely recommend it but be prepared to get a little frustrated with it from time to time and the janky controls! Also… play Road to Hill 30 first as it gives the story background that you need.